

Tool Review: Git CLI vs. GUI Clients — Which Should Computer Science Students Master First?
Version control is the backbone of modern software engineering. Yet, many students struggle during technical interviews or team hackathons because they rely on GUI buttons without understanding the underlying Git mechanics—or get lost in complex command-line syntax.
Choosing the right interface depends on where you are in your computer science journey. Here is how to evaluate and use both effectively:
1. Git Command Line Interface (Git CLI)
Primary Focus: Core Git fundamentals, scriptability, and terminal mastery.
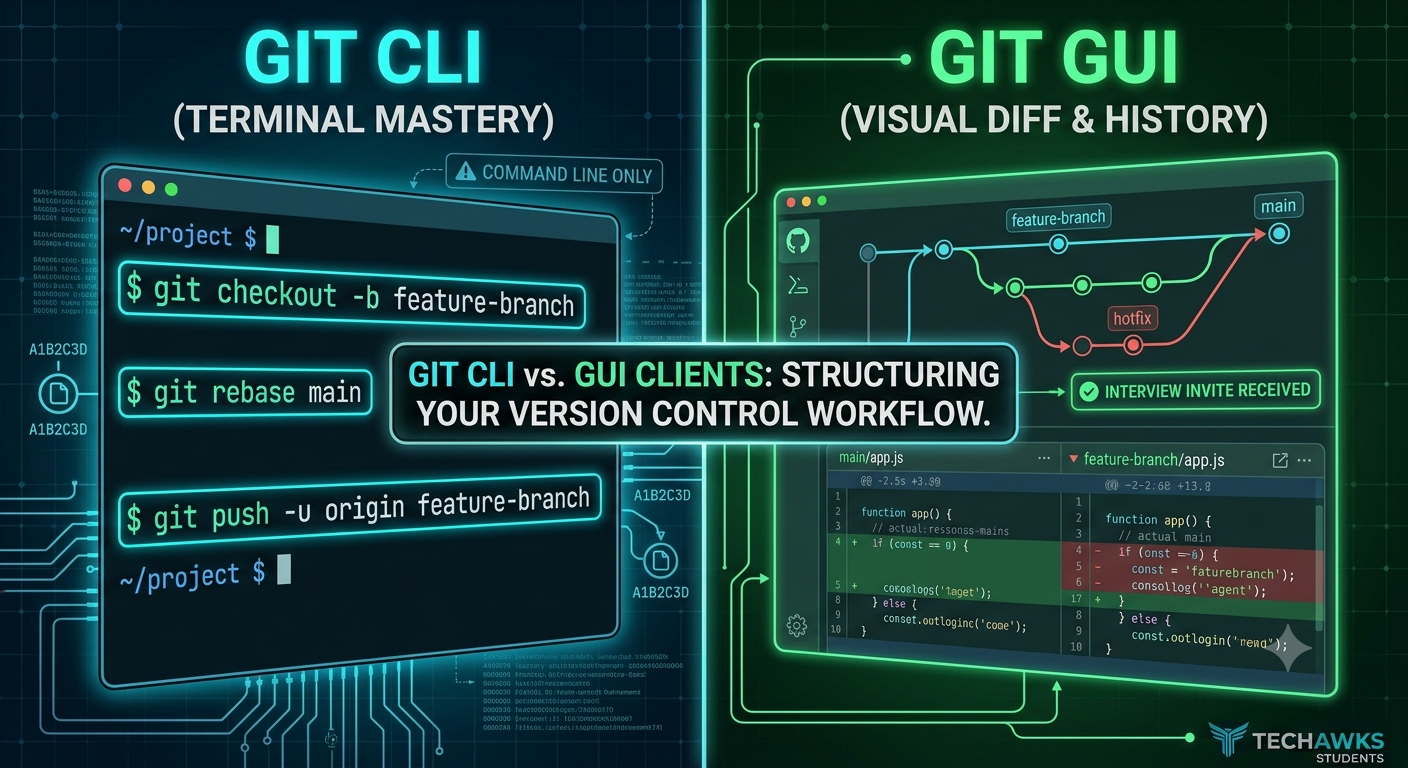
Key Operations: git checkout -b, git rebase, git log --oneline, git push origin main.
When to Use: Always learn this first. Understanding command-line operations builds mental models of trees, commits, and branch pointers that visual tools abstract away.
Strengths: Universal availability across every server, cloud instance, and remote environment.
Essential for passing live coding and system walkthrough portions of technical interviews.
Faster execution once commands become muscle memory.
Limitations: Steeper initial learning curve and harder to visualize complex merge conflicts across multiple branches.
Actionable Advice: Force yourself to use the terminal exclusively for your first 3 group projects. Memorize the 10 core commands and learn how to read git status output carefully before touching a visual client.
2. Visual Git GUI Clients (e.g., GitHub Desktop, GitKraken, VS Code Git Extension)
Primary Focus: Diff visualization, branch history mapping, and quick conflict resolution.
Key Features: Side-by-side code diffs, interactive stage/unstage lines, graphical commit trees.
When to Use: For complex merge conflicts and multi-file code reviews.
Strengths: Highly intuitive visual representation of complex branching strategies and history graphs.
Excellent for staging specific lines or chunks of code rather than entire files.
Limitations: Can create a crutch where students don't understand what operations (like fetch vs. pull) are doing under the hood.
Actionable Advice: Use GUI tools as an enhancement, not a replacement. Open your GUI client specifically to review multi-line diffs or resolve merge conflicts, but keep your terminal open for commits, branching, and pushing.
Key Takeaways
Master the terminal first: Build a strong foundation using the CLI so you understand how Git operates under the hood without visual abstractions.
Leverage GUIs for complex diffs: Visual tools shine when inspecting multi-file changes, staging partial lines, or untangling complex merge conflicts.
Combine both for maximum efficiency: The most productive student engineers execute daily workflow commands in the terminal and use visual tools for complex code inspections.
CTA (Join Students in Tech)
Want to level up your developer workflow, participate in open-source sprints, and master industry-standard software engineering tools? [Join Students in Tech] to share project workflows, get peer code reviews, and build alongside fellow student developers!
Version control is the backbone of modern software engineering. Yet, many students struggle during technical interviews or team hackathons because they rely on GUI buttons without understanding the underlying Git mechanics—or get lost in complex command-line syntax.
Choosing the right interface depends on where you are in your computer science journey. Here is how to evaluate and use both effectively:
1. Git Command Line Interface (Git CLI)
Primary Focus: Core Git fundamentals, scriptability, and terminal mastery.
Key Operations: git checkout -b, git rebase, git log --oneline, git push origin main.
When to Use: Always learn this first. Understanding command-line operations builds mental models of trees, commits, and branch pointers that visual tools abstract away.
Strengths: Universal availability across every server, cloud instance, and remote environment.
Essential for passing live coding and system walkthrough portions of technical interviews.
Faster execution once commands become muscle memory.
Limitations: Steeper initial learning curve and harder to visualize complex merge conflicts across multiple branches.
Actionable Advice: Force yourself to use the terminal exclusively for your first 3 group projects. Memorize the 10 core commands and learn how to read git status output carefully before touching a visual client.
2. Visual Git GUI Clients (e.g., GitHub Desktop, GitKraken, VS Code Git Extension)
Primary Focus: Diff visualization, branch history mapping, and quick conflict resolution.
Key Features: Side-by-side code diffs, interactive stage/unstage lines, graphical commit trees.
When to Use: For complex merge conflicts and multi-file code reviews.
Strengths: Highly intuitive visual representation of complex branching strategies and history graphs.
Excellent for staging specific lines or chunks of code rather than entire files.
Limitations: Can create a crutch where students don't understand what operations (like fetch vs. pull) are doing under the hood.
Actionable Advice: Use GUI tools as an enhancement, not a replacement. Open your GUI client specifically to review multi-line diffs or resolve merge conflicts, but keep your terminal open for commits, branching, and pushing.
Key Takeaways
Master the terminal first: Build a strong foundation using the CLI so you understand how Git operates under the hood without visual abstractions.
Leverage GUIs for complex diffs: Visual tools shine when inspecting multi-file changes, staging partial lines, or untangling complex merge conflicts.
Combine both for maximum efficiency: The most productive student engineers execute daily workflow commands in the terminal and use visual tools for complex code inspections.
CTA (Join Students in Tech)
Want to level up your developer workflow, participate in open-source sprints, and master industry-standard software engineering tools? [Join Students in Tech] to share project workflows, get peer code reviews, and build alongside fellow student developers!
Tool Review: Git CLI vs. GUI Clients — Which Should Computer Science Students Master First?
Version control is the backbone of modern software engineering. Yet, many students struggle during technical interviews or team hackathons because they rely on GUI buttons without understanding the underlying Git mechanics—or get lost in complex command-line syntax.
Choosing the right interface depends on where you are in your computer science journey. Here is how to evaluate and use both effectively:
1. Git Command Line Interface (Git CLI)
Primary Focus: Core Git fundamentals, scriptability, and terminal mastery.
Key Operations: git checkout -b, git rebase, git log --oneline, git push origin main.
When to Use: Always learn this first. Understanding command-line operations builds mental models of trees, commits, and branch pointers that visual tools abstract away.
Strengths: Universal availability across every server, cloud instance, and remote environment.
Essential for passing live coding and system walkthrough portions of technical interviews.
Faster execution once commands become muscle memory.
Limitations: Steeper initial learning curve and harder to visualize complex merge conflicts across multiple branches.
Actionable Advice: Force yourself to use the terminal exclusively for your first 3 group projects. Memorize the 10 core commands and learn how to read git status output carefully before touching a visual client.
2. Visual Git GUI Clients (e.g., GitHub Desktop, GitKraken, VS Code Git Extension)
Primary Focus: Diff visualization, branch history mapping, and quick conflict resolution.
Key Features: Side-by-side code diffs, interactive stage/unstage lines, graphical commit trees.
When to Use: For complex merge conflicts and multi-file code reviews.
Strengths: Highly intuitive visual representation of complex branching strategies and history graphs.
Excellent for staging specific lines or chunks of code rather than entire files.
Limitations: Can create a crutch where students don't understand what operations (like fetch vs. pull) are doing under the hood.
Actionable Advice: Use GUI tools as an enhancement, not a replacement. Open your GUI client specifically to review multi-line diffs or resolve merge conflicts, but keep your terminal open for commits, branching, and pushing.
Key Takeaways
Master the terminal first: Build a strong foundation using the CLI so you understand how Git operates under the hood without visual abstractions.
Leverage GUIs for complex diffs: Visual tools shine when inspecting multi-file changes, staging partial lines, or untangling complex merge conflicts.
Combine both for maximum efficiency: The most productive student engineers execute daily workflow commands in the terminal and use visual tools for complex code inspections.
CTA (Join Students in Tech)
Want to level up your developer workflow, participate in open-source sprints, and master industry-standard software engineering tools? [Join Students in Tech] to share project workflows, get peer code reviews, and build alongside fellow student developers!

 English
 Arabic
 French
 Spanish
 Portuguese
 Turkish
 Dutch
Dutch
 Italiano
 Russian
 Romaian
 Portuguese (Brazil)
 Greek
Greek