

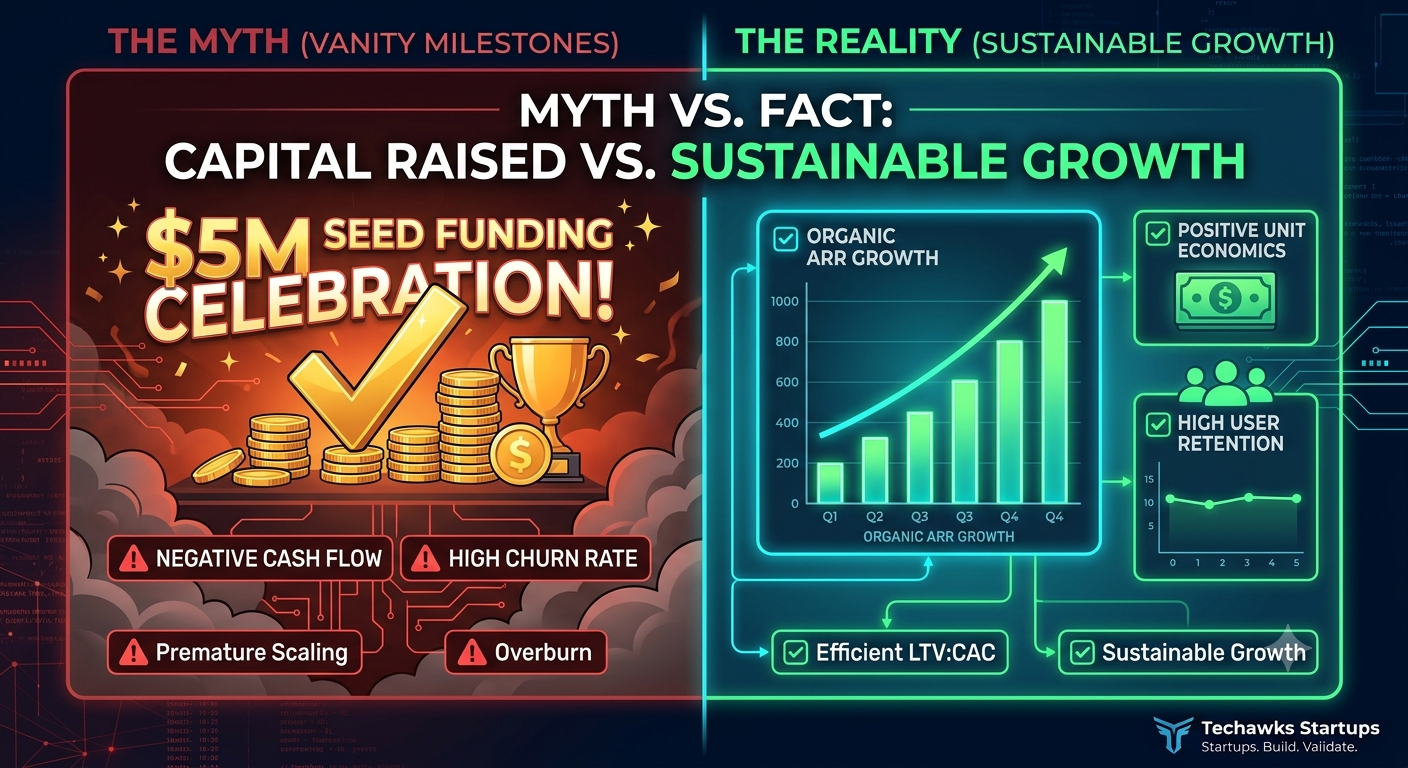
• Myth vs. Fact: Does Raising Venture Capital Mean Your Startup Is Successful
    In the startup ecosystem, funding announcements are often celebrated like final victories. Founders are showered with congratulations when they secure a seed or Series A round, creating a false impression that capital injection equals validation.


    However, venture capital is simply fuel—it accelerates your trajectory in whichever direction you are already heading. Here is the reality behind venture funding vs. building a sustainable business:


    Myth #1:
    Raising VC funding is the ultimate validation of product-market fit.
    Fact: VC funding validates investor appetite for your story, not customer demand for your product.
    Why? Venture capitalists invest in potential scale and market size based on early signals. They are not buying or using your product. True product-market fit is proven by strong customer retention, low churn, and organic referral growth.
    The Action: Before pitching investors, focus on achieving strong unit economics and high customer retention ($NLR / ARR$ growth). Capital should be used to scale an already proven revenue engine, not to search for one.


    Myth #2:
    More capital always gives your startup a better chance of survival.
    Fact: Overfunding early leads to premature scaling, inflated burn rates, and loss of agility.
    Why? Having a large cash cushion often encourages founders to solve structural problems by throwing money at them—hiring too fast or ramping up ad spend before fixing leaky conversion funnels.
    The Action: Maintain a lean burn rate even after a successful raise. Set strict metric milestones (e.g., reaching $X$ in ARR at $Y\%$ gross margin) before scaling team headcount or marketing budgets.


    Myth #3:
    Every high-growth startup should pursue venture capital.
    Fact: VC is a specific asset class designed for hyper-growth; many profitable, highly valuable businesses are better suited for bootstrapping or non-dilutive funding.
    Why? Taking venture money locks you onto a specific trajectory requiring 10x–100x returns and a liquidity event (IPO or acquisition). If your market size doesn't support that scale, VC alignment breaks down.
    The Action: Evaluate your business model objectively. If you can achieve profitability early with high margins, consider bootstrapping, revenue-based financing, or customer-funded growth to retain maximum ownership and control.


    Key Takeaways
    Funding is a tool, not a milestone: Treat a funding round as a responsibility to deliver returns, not proof of product success.
    Prioritize unit economics: Focus on customer retention, lifetime value (LTV), and customer acquisition cost (CAC) over total capital raised.
    Choose the right capital structure: Only take VC funding if your business model demands hyper-scale and operates in a massive addressable market.


    CTA (Join Startup Founders & Entrepreneurs)
    Want to refine your business model, master unit economics, and navigate fundraising with total clarity? [Join Startup Founders & Entrepreneurs] to swap playbooks, join teardown sessions, and build alongside fellow founders!
    Myth vs. Fact: Does Raising Venture Capital Mean Your Startup Is Successful In the startup ecosystem, funding announcements are often celebrated like final victories. Founders are showered with congratulations when they secure a seed or Series A round, creating a false impression that capital injection equals validation. However, venture capital is simply fuel—it accelerates your trajectory in whichever direction you are already heading. Here is the reality behind venture funding vs. building a sustainable business: Myth #1: Raising VC funding is the ultimate validation of product-market fit. Fact: VC funding validates investor appetite for your story, not customer demand for your product. Why? Venture capitalists invest in potential scale and market size based on early signals. They are not buying or using your product. True product-market fit is proven by strong customer retention, low churn, and organic referral growth. The Action: Before pitching investors, focus on achieving strong unit economics and high customer retention ($NLR / ARR$ growth). Capital should be used to scale an already proven revenue engine, not to search for one. Myth #2: More capital always gives your startup a better chance of survival. Fact: Overfunding early leads to premature scaling, inflated burn rates, and loss of agility. Why? Having a large cash cushion often encourages founders to solve structural problems by throwing money at them—hiring too fast or ramping up ad spend before fixing leaky conversion funnels. The Action: Maintain a lean burn rate even after a successful raise. Set strict metric milestones (e.g., reaching $X$ in ARR at $Y\%$ gross margin) before scaling team headcount or marketing budgets. Myth #3: Every high-growth startup should pursue venture capital. Fact: VC is a specific asset class designed for hyper-growth; many profitable, highly valuable businesses are better suited for bootstrapping or non-dilutive funding. Why? Taking venture money locks you onto a specific trajectory requiring 10x–100x returns and a liquidity event (IPO or acquisition). If your market size doesn't support that scale, VC alignment breaks down. The Action: Evaluate your business model objectively. If you can achieve profitability early with high margins, consider bootstrapping, revenue-based financing, or customer-funded growth to retain maximum ownership and control. Key Takeaways Funding is a tool, not a milestone: Treat a funding round as a responsibility to deliver returns, not proof of product success. Prioritize unit economics: Focus on customer retention, lifetime value (LTV), and customer acquisition cost (CAC) over total capital raised. Choose the right capital structure: Only take VC funding if your business model demands hyper-scale and operates in a massive addressable market. CTA (Join Startup Founders & Entrepreneurs) Want to refine your business model, master unit economics, and navigate fundraising with total clarity? [Join Startup Founders & Entrepreneurs] to swap playbooks, join teardown sessions, and build alongside fellow founders!
    0 Comentários 0 Compartilhamentos 1K Visualizações 0 Anterior
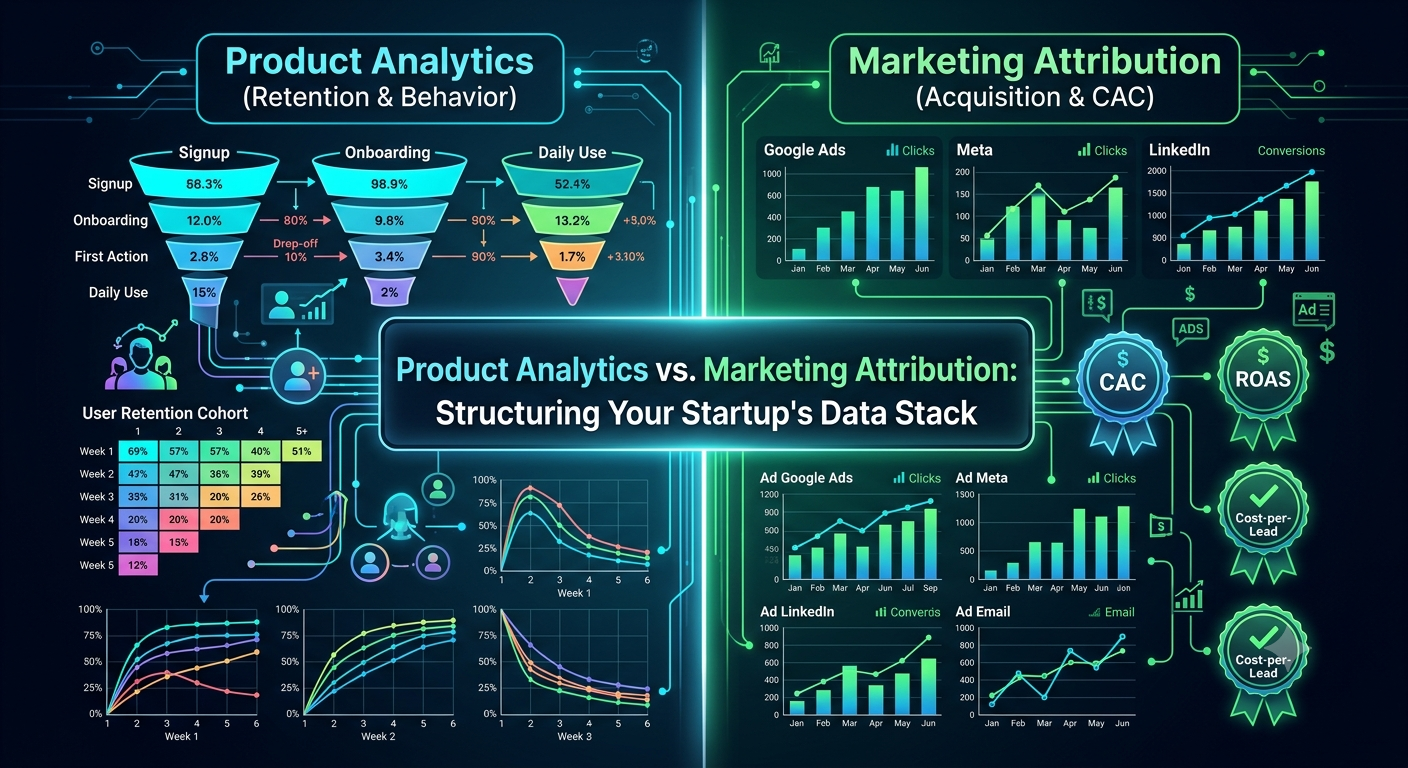
  • Tool Review: Analytics vs. Attribution Tools — Choosing the Right Stack for Early-Stage Startups
    In the early days of a startup, founders often assume a single tool can track everything from top-of-funnel ad clicks down to feature engagement. In reality, modern startup growth relies on two distinct classes of software that answer entirely different business questions.


    Deploying the wrong tool at the wrong stage can lead to bloat, security risks, and decision paralysis. Here is how to evaluate and choose between them:


    1. Product Analytics Tools (e.g., Mixpanel, PostHog, Amplitude)
    Primary Focus: In-product user behavior, funnel drop-offs, and feature retention.
    Key Metrics Tracked: Daily/Monthly Active Users (DAU/MAU), conversion funnels, retention cohorts, feature usage rates.
    When to Deploy: Day 1 of Product Launch. You need visibility into where users drop off during onboarding and which features drive recurring usage.
    Strengths: Event-based tracking built specifically for web and mobile apps.
    Deep cohort retention analysis to prove true Product-Market Fit (PMF).
    Limitations: Weak at tracking off-platform touchpoints, ad network campaigns, and multi-channel marketing attribution.
    Actionable Advice: Start with a privacy-friendly or open-source tool like PostHog or Mixpanel’s free tier. Focus on tracking no more than 5 core event actions (e.g., user_signed_up, first_project_created) before building out complex taxonomy.


    2. Marketing Attribution Platforms (e.g., Google Analytics 4, HockeyStack, Hyros)
    Primary Focus: Acquisition channels, campaign performance, and top-of-funnel conversion rates.
    Key Metrics Tracked: Customer Acquisition Cost (CAC), Return on Ad Spend (ROAS), channel traffic sources, multi-touch attribution.
    When to Deploy: When Scaling Paid Growth. Only invest heavily here once you have validated retention and are actively spending on paid acquisition across multiple channels.
    Strengths: Connects ad spending across networks (Meta, Google, LinkedIn) to landing page conversions.
    Helps optimize marketing budgets and campaign targeting.
    Limitations: Provides zero insight into what users do inside your application after they create an account.
    Actionable Advice: Avoid buying enterprise-grade attribution software too early. Standard UTM parameter discipline combined with clean GA4 tracking is sufficient until your paid marketing budget exceeds $5,000/month.


    Key Takeaways
    Product Analytics comes first: Prove that users keep coming back to your product before spending money on tools to scale marketing acquisition.
    Keep event tracking lean: Map out a clean, minimal schema of core user actions rather than auto-capturing hundreds of unused events.
    Match tools to growth stages: Stick to simple UTM tracking and free tiers until paid acquisition scales enough to justify specialized attribution tools.


    CTA (Join Startup Founders & Entrepreneurs)
    Looking to optimize your startup’s tech stack, refine your growth metrics, and avoid costly early-stage mistakes? [Join Startup Founders & Entrepreneurs] to swap software playbooks, participate in stack reviews, and scale alongside fellow founders!
    Tool Review: Analytics vs. Attribution Tools — Choosing the Right Stack for Early-Stage Startups In the early days of a startup, founders often assume a single tool can track everything from top-of-funnel ad clicks down to feature engagement. In reality, modern startup growth relies on two distinct classes of software that answer entirely different business questions. Deploying the wrong tool at the wrong stage can lead to bloat, security risks, and decision paralysis. Here is how to evaluate and choose between them: 1. Product Analytics Tools (e.g., Mixpanel, PostHog, Amplitude) Primary Focus: In-product user behavior, funnel drop-offs, and feature retention. Key Metrics Tracked: Daily/Monthly Active Users (DAU/MAU), conversion funnels, retention cohorts, feature usage rates. When to Deploy: Day 1 of Product Launch. You need visibility into where users drop off during onboarding and which features drive recurring usage. Strengths: Event-based tracking built specifically for web and mobile apps. Deep cohort retention analysis to prove true Product-Market Fit (PMF). Limitations: Weak at tracking off-platform touchpoints, ad network campaigns, and multi-channel marketing attribution. Actionable Advice: Start with a privacy-friendly or open-source tool like PostHog or Mixpanel’s free tier. Focus on tracking no more than 5 core event actions (e.g., user_signed_up, first_project_created) before building out complex taxonomy. 2. Marketing Attribution Platforms (e.g., Google Analytics 4, HockeyStack, Hyros) Primary Focus: Acquisition channels, campaign performance, and top-of-funnel conversion rates. Key Metrics Tracked: Customer Acquisition Cost (CAC), Return on Ad Spend (ROAS), channel traffic sources, multi-touch attribution. When to Deploy: When Scaling Paid Growth. Only invest heavily here once you have validated retention and are actively spending on paid acquisition across multiple channels. Strengths: Connects ad spending across networks (Meta, Google, LinkedIn) to landing page conversions. Helps optimize marketing budgets and campaign targeting. Limitations: Provides zero insight into what users do inside your application after they create an account. Actionable Advice: Avoid buying enterprise-grade attribution software too early. Standard UTM parameter discipline combined with clean GA4 tracking is sufficient until your paid marketing budget exceeds $5,000/month. Key Takeaways Product Analytics comes first: Prove that users keep coming back to your product before spending money on tools to scale marketing acquisition. Keep event tracking lean: Map out a clean, minimal schema of core user actions rather than auto-capturing hundreds of unused events. Match tools to growth stages: Stick to simple UTM tracking and free tiers until paid acquisition scales enough to justify specialized attribution tools. CTA (Join Startup Founders & Entrepreneurs) Looking to optimize your startup’s tech stack, refine your growth metrics, and avoid costly early-stage mistakes? [Join Startup Founders & Entrepreneurs] to swap software playbooks, participate in stack reviews, and scale alongside fellow founders!
    0 Comentários 0 Compartilhamentos 1K Visualizações 0 Anterior
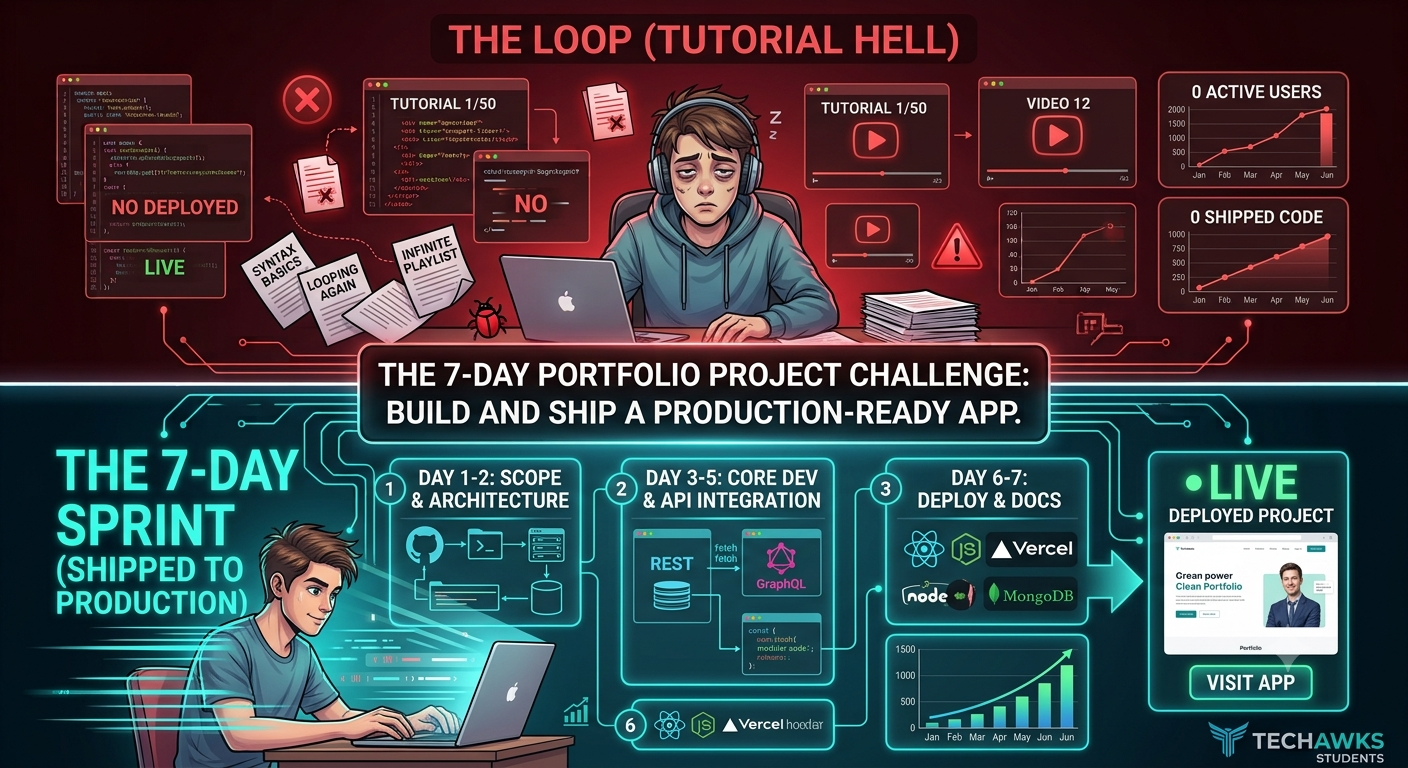
  • The 7-Day Portfolio Project Challenge: Build and Ship a Production-Ready App
    Most student portfolios are filled with identical assignments: basic todo lists, weather apps, or generic clones. Hiring managers skip right past these because they don't demonstrate real-world engineering decisions.


    To stand out in entry-level tech applications, you need to showcase project ownership, API integration, and deployment. Here is your 7-day blueprint to ship a functional, production-ready app:


    Days 1–2: Scope & Architecture
    The Goal: Define a small problem and map your stack.
    The Action: Pick a niche utility app (e.g., a lightweight developer cheat-sheet generator, a localized study-timer with stats, or a simple markdown parser).
    The Rule: Keep the feature set minimal. Define maximum 2 core endpoints/pages. Draw your database schema and UI layout on paper before opening your IDE.


    Days 3–5: Core Development & Integration
    The Goal: Build the functional core using real data or external APIs.
    The Action: Write clean, modular code. Implement essential features first:
    Fetch dynamic data using a public REST or GraphQL API.
    Handle loading, error, and empty states gracefully in your UI.
    The Rule: Don't get stuck styling early. Make it work first, then make it look clean.


    Days 6–7: Deploy, Document & Ship
    The Goal: Put your code live on the internet with a professional repository.
    The Action: Deploy: Host your app live using free hosting platforms (e.g., Vercel, Render, Netlify, or GitHub Pages).
    Write the README: Include a clear project description, system architecture diagram, tech stack badges, local setup instructions, and key technical challenges solved.
    Share: Post a 30-second screen recording of your working app on LinkedIn or X with a live link.


    Key Takeaways
    Ship over perfect: A deployed, 80%-featured project online beats a 100%-featured project sitting on your local localhost.
    Document your engineering decisions: A well-structured README.md explaining why you chose specific tools is as important as the code itself.
    Break out of tutorial loops: Learn just enough syntax to start building, then Google and solve edge cases as you hit them in production.


    CTA (Join Students in Tech)
    Ready to build in public, get code reviews from experienced mentors, and collaborate with ambitious peers? [Join Students in Tech] to share your projects, participate in hackathons, and level up your engineering skills!
    The 7-Day Portfolio Project Challenge: Build and Ship a Production-Ready App Most student portfolios are filled with identical assignments: basic todo lists, weather apps, or generic clones. Hiring managers skip right past these because they don't demonstrate real-world engineering decisions. To stand out in entry-level tech applications, you need to showcase project ownership, API integration, and deployment. Here is your 7-day blueprint to ship a functional, production-ready app: Days 1–2: Scope & Architecture The Goal: Define a small problem and map your stack. The Action: Pick a niche utility app (e.g., a lightweight developer cheat-sheet generator, a localized study-timer with stats, or a simple markdown parser). The Rule: Keep the feature set minimal. Define maximum 2 core endpoints/pages. Draw your database schema and UI layout on paper before opening your IDE. Days 3–5: Core Development & Integration The Goal: Build the functional core using real data or external APIs. The Action: Write clean, modular code. Implement essential features first: Fetch dynamic data using a public REST or GraphQL API. Handle loading, error, and empty states gracefully in your UI. The Rule: Don't get stuck styling early. Make it work first, then make it look clean. Days 6–7: Deploy, Document & Ship The Goal: Put your code live on the internet with a professional repository. The Action: Deploy: Host your app live using free hosting platforms (e.g., Vercel, Render, Netlify, or GitHub Pages). Write the README: Include a clear project description, system architecture diagram, tech stack badges, local setup instructions, and key technical challenges solved. Share: Post a 30-second screen recording of your working app on LinkedIn or X with a live link. Key Takeaways Ship over perfect: A deployed, 80%-featured project online beats a 100%-featured project sitting on your local localhost. Document your engineering decisions: A well-structured README.md explaining why you chose specific tools is as important as the code itself. Break out of tutorial loops: Learn just enough syntax to start building, then Google and solve edge cases as you hit them in production. CTA (Join Students in Tech) Ready to build in public, get code reviews from experienced mentors, and collaborate with ambitious peers? [Join Students in Tech] to share your projects, participate in hackathons, and level up your engineering skills!
    0 Comentários 0 Compartilhamentos 1K Visualizações 0 Anterior
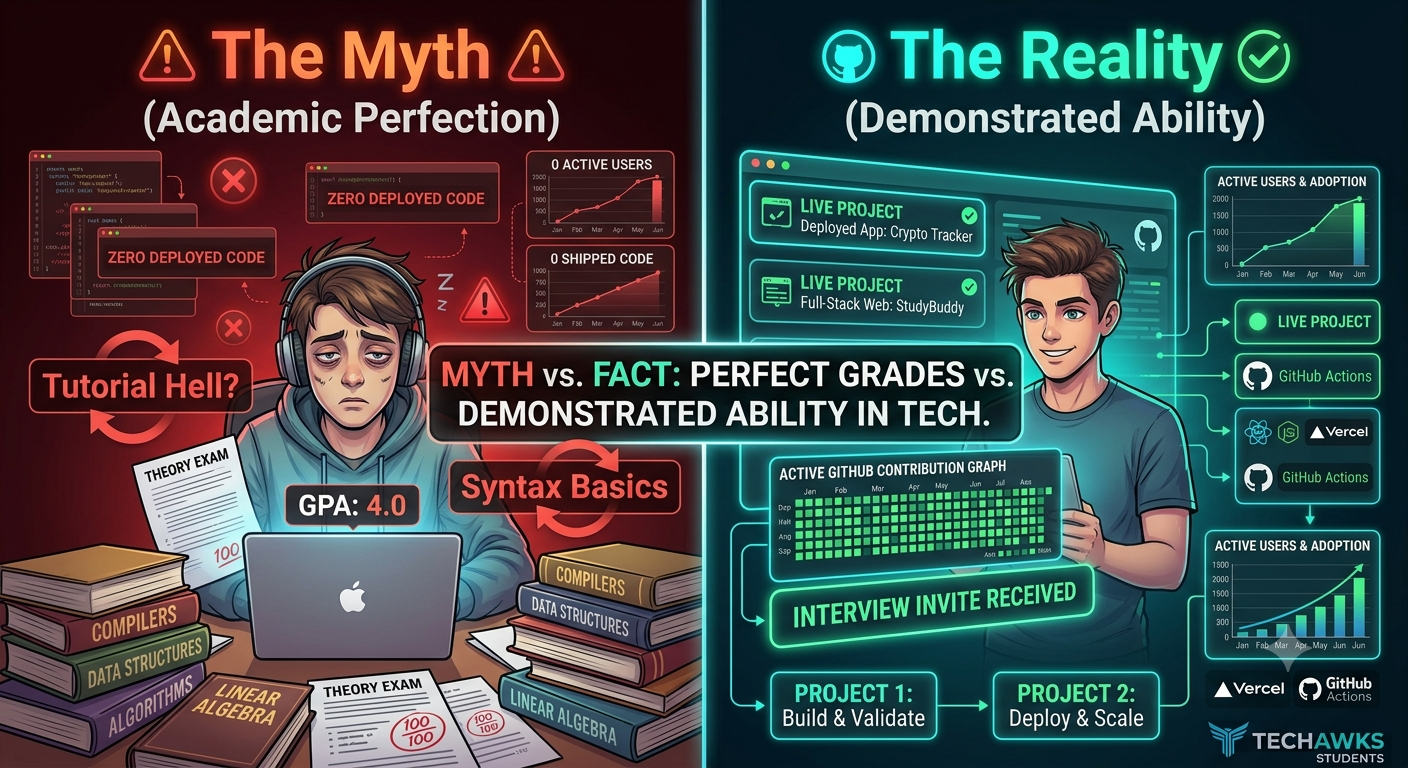
  • Myth vs. Fact: Do You Need Perfect Grades to Land a Great Tech Role?
    Many tech students fall into the trap of believing that academic excellence is the single determining factor for career success. While keeping a respectable grade point average opens certain doors (like research roles or specific graduate programs), the software industry operates primarily on proof of capability.


    Here is the truth about how technical hiring actually works:


    Myth #1: Top tech companies throw away resumes with GPAs below 3.8.
    Fact: Most tech companies prioritize technical assessments, GitHub repositories, and practical experience over GPA.
    Why? Grades measure your ability to take tests in structured environments; engineering roles test your ability to debug messy code, collaborate via Git, and build scalable systems. Many top firms don't even ask for transcripts during candidate screening.
    The Action: Maintain a solid baseline GPA (e.g., above 3.0 to clear basic enterprise thresholds), but dedicate your extra bandwidth to building real projects, contributing to open-source software, and mastering Data Structures & Algorithms (DSA).


    Myth #2: Computer Science theory classes are all you need to be job-ready.
    Fact: Academic curricula often lag behind modern industry toolchains, frameworks, and workflows.
    Why? Universities excel at teaching foundational computer science concepts (Operating Systems, Compilers, Linear Algebra), but rarely cover industry-standard development workflows like CI/CD pipelines, containerization (Docker), or cloud deployments (AWS/Vercel).
    The Action: Treat your degree as the foundation, but actively bridge the gap. Learn modern web/mobile frameworks, version control best practices, and team collaboration workflows on your own time.


    Myth #3: If you don't secure a big-tech internship by sophomore year, your career is behind.
    Fact: Career trajectories in tech are non-linear; open-source contributions and community projects build equal credibility.
    Why? Landing a marquee internship early is great, but hiring managers value consistent output. A well-documented open-source contribution or a launched product with real active users can outshine a passive internship experience.
    The Action: Build in public. Document your learning journey on GitHub, write technical write-ups explaining your architecture choices, and ship small utilities that solve real problems.


    Key Takeaways
    Proof over paper: A live app, active GitHub profile, or open-source contribution carries more weight in technical interviews than a perfect GPA.
    Balance theory and tooling: Use university coursework to master foundational CS concepts, but self-teach modern software engineering toolchains.
    Focus on execution: Consistency in shipping projects and writing clean, tested code is your strongest asset as an entry-level candidate.


    CTA (Join Students in Tech)
    Ready to build a strong developer portfolio, get feedback on your code, and prepare for technical interviews with ambitious peers? [Join Students in Tech] to collaborate on projects, participate in study groups, and fast-track your tech career!
    Myth vs. Fact: Do You Need Perfect Grades to Land a Great Tech Role? Many tech students fall into the trap of believing that academic excellence is the single determining factor for career success. While keeping a respectable grade point average opens certain doors (like research roles or specific graduate programs), the software industry operates primarily on proof of capability. Here is the truth about how technical hiring actually works: Myth #1: Top tech companies throw away resumes with GPAs below 3.8. Fact: Most tech companies prioritize technical assessments, GitHub repositories, and practical experience over GPA. Why? Grades measure your ability to take tests in structured environments; engineering roles test your ability to debug messy code, collaborate via Git, and build scalable systems. Many top firms don't even ask for transcripts during candidate screening. The Action: Maintain a solid baseline GPA (e.g., above 3.0 to clear basic enterprise thresholds), but dedicate your extra bandwidth to building real projects, contributing to open-source software, and mastering Data Structures & Algorithms (DSA). Myth #2: Computer Science theory classes are all you need to be job-ready. Fact: Academic curricula often lag behind modern industry toolchains, frameworks, and workflows. Why? Universities excel at teaching foundational computer science concepts (Operating Systems, Compilers, Linear Algebra), but rarely cover industry-standard development workflows like CI/CD pipelines, containerization (Docker), or cloud deployments (AWS/Vercel). The Action: Treat your degree as the foundation, but actively bridge the gap. Learn modern web/mobile frameworks, version control best practices, and team collaboration workflows on your own time. Myth #3: If you don't secure a big-tech internship by sophomore year, your career is behind. Fact: Career trajectories in tech are non-linear; open-source contributions and community projects build equal credibility. Why? Landing a marquee internship early is great, but hiring managers value consistent output. A well-documented open-source contribution or a launched product with real active users can outshine a passive internship experience. The Action: Build in public. Document your learning journey on GitHub, write technical write-ups explaining your architecture choices, and ship small utilities that solve real problems. Key Takeaways Proof over paper: A live app, active GitHub profile, or open-source contribution carries more weight in technical interviews than a perfect GPA. Balance theory and tooling: Use university coursework to master foundational CS concepts, but self-teach modern software engineering toolchains. Focus on execution: Consistency in shipping projects and writing clean, tested code is your strongest asset as an entry-level candidate. CTA (Join Students in Tech) Ready to build a strong developer portfolio, get feedback on your code, and prepare for technical interviews with ambitious peers? [Join Students in Tech] to collaborate on projects, participate in study groups, and fast-track your tech career!
    0 Comentários 0 Compartilhamentos 1K Visualizações 0 Anterior
  • Tool Review: Git CLI vs. GUI Clients — Which Should Computer Science Students Master First?
    Version control is the backbone of modern software engineering. Yet, many students struggle during technical interviews or team hackathons because they rely on GUI buttons without understanding the underlying Git mechanics—or get lost in complex command-line syntax.


    Choosing the right interface depends on where you are in your computer science journey. Here is how to evaluate and use both effectively:


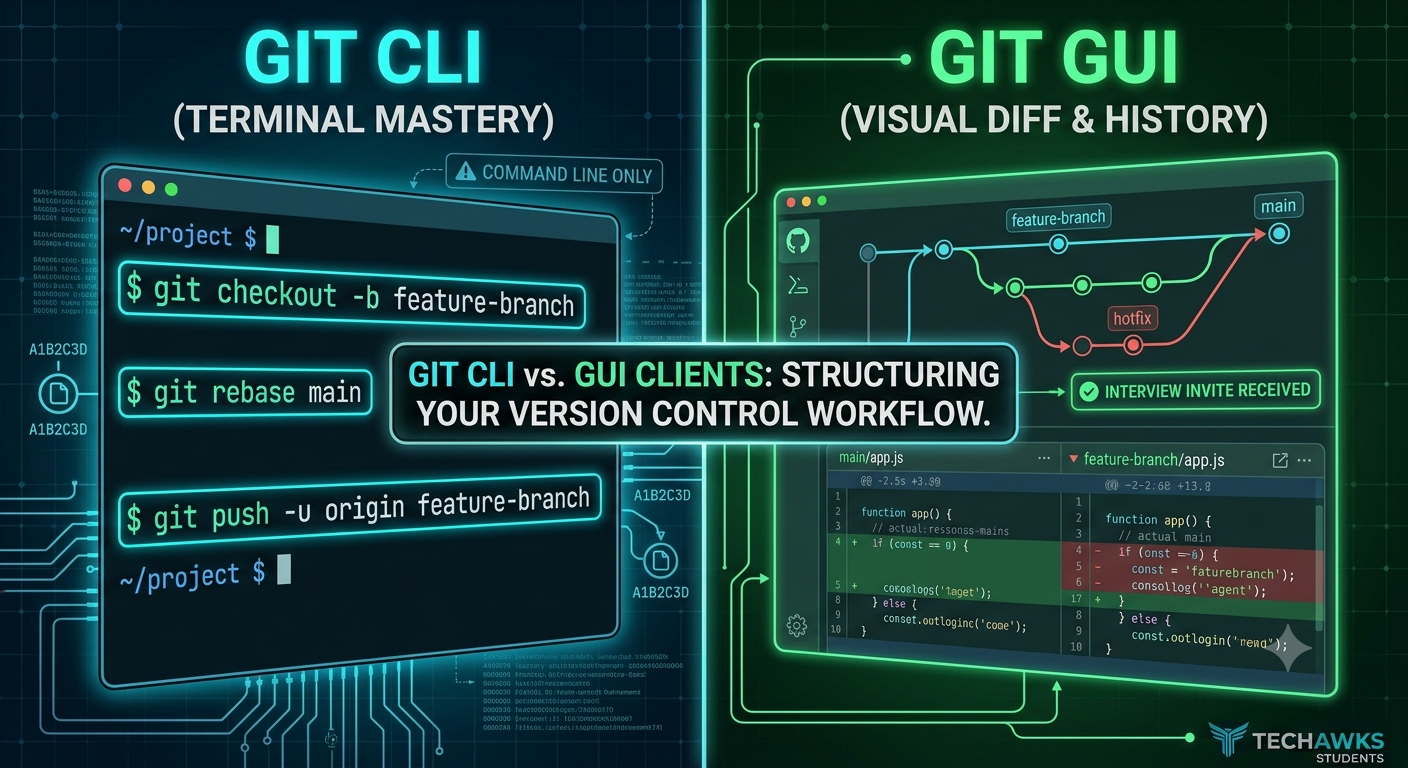
    1. Git Command Line Interface (Git CLI)
    Primary Focus: Core Git fundamentals, scriptability, and terminal mastery.
    Key Operations: git checkout -b, git rebase, git log --oneline, git push origin main.
    When to Use: Always learn this first. Understanding command-line operations builds mental models of trees, commits, and branch pointers that visual tools abstract away.
    Strengths: Universal availability across every server, cloud instance, and remote environment.
    Essential for passing live coding and system walkthrough portions of technical interviews.
    Faster execution once commands become muscle memory.
    Limitations: Steeper initial learning curve and harder to visualize complex merge conflicts across multiple branches.
    Actionable Advice: Force yourself to use the terminal exclusively for your first 3 group projects. Memorize the 10 core commands and learn how to read git status output carefully before touching a visual client.


    2. Visual Git GUI Clients (e.g., GitHub Desktop, GitKraken, VS Code Git Extension)
    Primary Focus: Diff visualization, branch history mapping, and quick conflict resolution.
    Key Features: Side-by-side code diffs, interactive stage/unstage lines, graphical commit trees.
    When to Use: For complex merge conflicts and multi-file code reviews.
    Strengths: Highly intuitive visual representation of complex branching strategies and history graphs.
    Excellent for staging specific lines or chunks of code rather than entire files.
    Limitations: Can create a crutch where students don't understand what operations (like fetch vs. pull) are doing under the hood.
    Actionable Advice: Use GUI tools as an enhancement, not a replacement. Open your GUI client specifically to review multi-line diffs or resolve merge conflicts, but keep your terminal open for commits, branching, and pushing.


    Key Takeaways
    Master the terminal first: Build a strong foundation using the CLI so you understand how Git operates under the hood without visual abstractions.
    Leverage GUIs for complex diffs: Visual tools shine when inspecting multi-file changes, staging partial lines, or untangling complex merge conflicts.
    Combine both for maximum efficiency: The most productive student engineers execute daily workflow commands in the terminal and use visual tools for complex code inspections.


    CTA (Join Students in Tech)
    Want to level up your developer workflow, participate in open-source sprints, and master industry-standard software engineering tools? [Join Students in Tech] to share project workflows, get peer code reviews, and build alongside fellow student developers!
    Tool Review: Git CLI vs. GUI Clients — Which Should Computer Science Students Master First? Version control is the backbone of modern software engineering. Yet, many students struggle during technical interviews or team hackathons because they rely on GUI buttons without understanding the underlying Git mechanics—or get lost in complex command-line syntax. Choosing the right interface depends on where you are in your computer science journey. Here is how to evaluate and use both effectively: 1. Git Command Line Interface (Git CLI) Primary Focus: Core Git fundamentals, scriptability, and terminal mastery. Key Operations: git checkout -b, git rebase, git log --oneline, git push origin main. When to Use: Always learn this first. Understanding command-line operations builds mental models of trees, commits, and branch pointers that visual tools abstract away. Strengths: Universal availability across every server, cloud instance, and remote environment. Essential for passing live coding and system walkthrough portions of technical interviews. Faster execution once commands become muscle memory. Limitations: Steeper initial learning curve and harder to visualize complex merge conflicts across multiple branches. Actionable Advice: Force yourself to use the terminal exclusively for your first 3 group projects. Memorize the 10 core commands and learn how to read git status output carefully before touching a visual client. 2. Visual Git GUI Clients (e.g., GitHub Desktop, GitKraken, VS Code Git Extension) Primary Focus: Diff visualization, branch history mapping, and quick conflict resolution. Key Features: Side-by-side code diffs, interactive stage/unstage lines, graphical commit trees. When to Use: For complex merge conflicts and multi-file code reviews. Strengths: Highly intuitive visual representation of complex branching strategies and history graphs. Excellent for staging specific lines or chunks of code rather than entire files. Limitations: Can create a crutch where students don't understand what operations (like fetch vs. pull) are doing under the hood. Actionable Advice: Use GUI tools as an enhancement, not a replacement. Open your GUI client specifically to review multi-line diffs or resolve merge conflicts, but keep your terminal open for commits, branching, and pushing. Key Takeaways Master the terminal first: Build a strong foundation using the CLI so you understand how Git operates under the hood without visual abstractions. Leverage GUIs for complex diffs: Visual tools shine when inspecting multi-file changes, staging partial lines, or untangling complex merge conflicts. Combine both for maximum efficiency: The most productive student engineers execute daily workflow commands in the terminal and use visual tools for complex code inspections. CTA (Join Students in Tech) Want to level up your developer workflow, participate in open-source sprints, and master industry-standard software engineering tools? [Join Students in Tech] to share project workflows, get peer code reviews, and build alongside fellow student developers!
    0 Comentários 0 Compartilhamentos 1K Visualizações 0 Anterior
  • GTA 5 Mr. Philips Mission Tips from U4GM
    Trevor Philips does not ease into Grand Theft Auto V. He bursts into it. The mission "Mr. Philips" introduces him through anger, suspicion, and a very personal grudge. When he learns that Michael Townley may still be alive in Los Santos, the news hits hard. Trevor does not sit around asking questions. He takes Ron Jakowski and Wade Hebert, climbs into the red Canis Bodhi, and heads after a Lost...
    0 Comentários 0 Compartilhamentos 545 Visualizações 0 Anterior
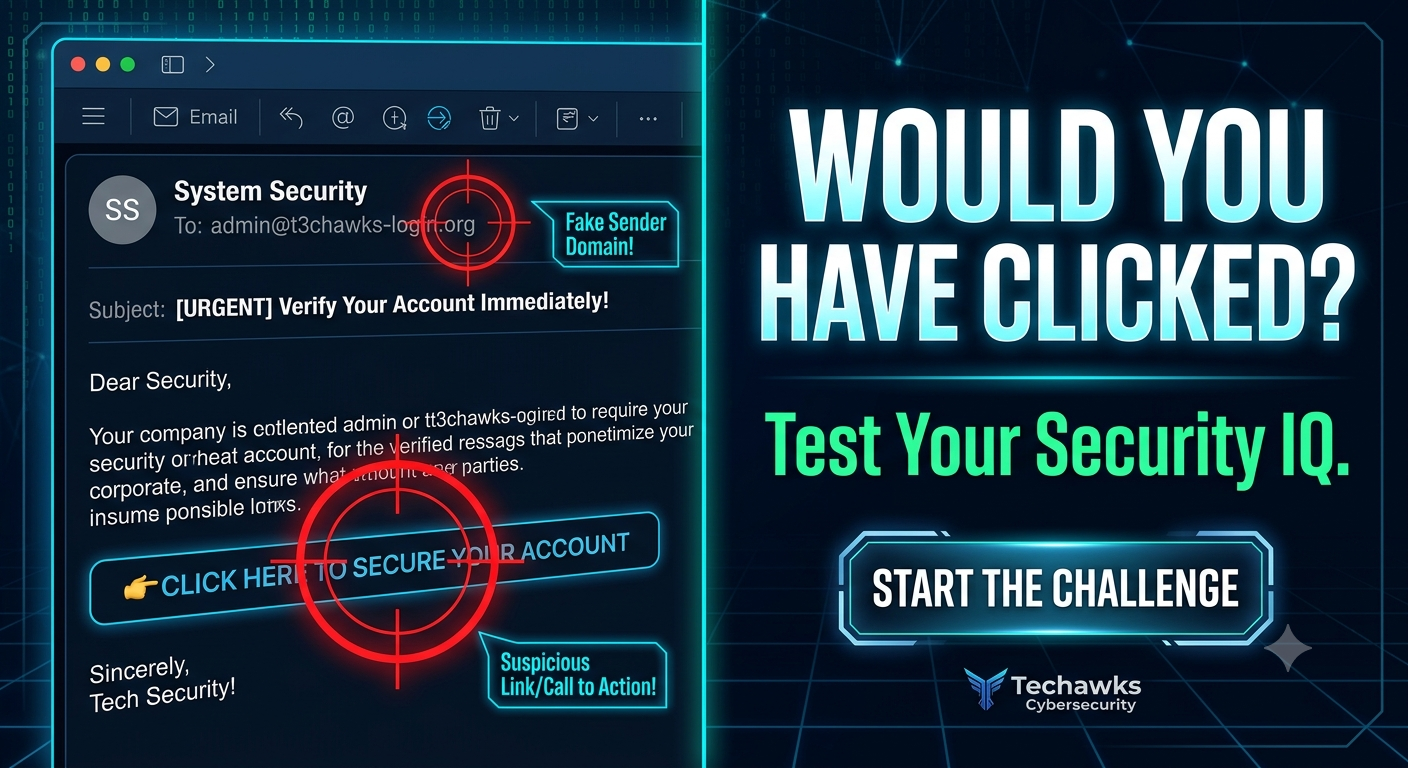
  • Can You Spot the Phish? The 60-Second Email Audit Challenge
    Welcome to the Techawks Email Audit Challenge. Below are 3 real-world red flags hidden in everyday corporate emails. Read through and count how many you would have caught in real-time!


    🚨 Red Flag 1: The "Lookalike" Domain
    The Scenario: You get an email from support@micros0ft-security.com asking you to verify your password.
    The Catch: Cybercriminals register domain names that look almost identical to legitimate brands (using zeroes for 'o's or subtle typos). Always check the full sender address, not just the display name.


    🚨 Red Flag 2: Urgent Action Required (With a Timer)
    The Scenario: "Your account will be suspended in 2 hours unless you update your payment details here."
    The Catch: Urgency bypasses critical thinking. Legitimate security alerts rarely give you a high-stress countdown. When panic strikes, pause—that's your brain warning you.


    🚨 Red Flag 3: The Disguised Link
    The Scenario: A link says [www.yourbank.com/login](https://www.yourbank.com/login), but when you hover over it, the actual URL points to bit.ly/3xX9z2A or an unknown IP address.
    The Catch: What you see on text isn't always where the button goes. Hover before you click to inspect the true destination URL.


    Your Score:
    3/3 Caught: Security Pro status! 🏆
    1-2 Caught: Danger zone—time to sharpen those instincts.
    0 Caught: You're a target waiting to happen. Let's fix that!


    Key Takeaways
    Inspect the Sender: Look closely at the exact domain extension, not just the sender's display name.
    Control the Urgency: Artificial time limits are a psychological trap.
    Hover First, Click Second: Never trust hyperlinked text without previewing the actual destination URL.


    CTA
    Ready to go from spotting scams to stopping hacker attacks?
    Join the Techawks Cybersecurity & Ethical Hacking Program today to build real-world defense skills and start your career in tech security!
    Can You Spot the Phish? The 60-Second Email Audit Challenge Welcome to the Techawks Email Audit Challenge. Below are 3 real-world red flags hidden in everyday corporate emails. Read through and count how many you would have caught in real-time! 🚨 Red Flag 1: The "Lookalike" Domain The Scenario: You get an email from support@micros0ft-security.com asking you to verify your password. The Catch: Cybercriminals register domain names that look almost identical to legitimate brands (using zeroes for 'o's or subtle typos). Always check the full sender address, not just the display name. 🚨 Red Flag 2: Urgent Action Required (With a Timer) The Scenario: "Your account will be suspended in 2 hours unless you update your payment details here." The Catch: Urgency bypasses critical thinking. Legitimate security alerts rarely give you a high-stress countdown. When panic strikes, pause—that's your brain warning you. 🚨 Red Flag 3: The Disguised Link The Scenario: A link says [www.yourbank.com/login](https://www.yourbank.com/login), but when you hover over it, the actual URL points to bit.ly/3xX9z2A or an unknown IP address. The Catch: What you see on text isn't always where the button goes. Hover before you click to inspect the true destination URL. Your Score: 3/3 Caught: Security Pro status! 🏆 1-2 Caught: Danger zone—time to sharpen those instincts. 0 Caught: You're a target waiting to happen. Let's fix that! Key Takeaways Inspect the Sender: Look closely at the exact domain extension, not just the sender's display name. Control the Urgency: Artificial time limits are a psychological trap. Hover First, Click Second: Never trust hyperlinked text without previewing the actual destination URL. CTA Ready to go from spotting scams to stopping hacker attacks? Join the Techawks Cybersecurity & Ethical Hacking Program today to build real-world defense skills and start your career in tech security!
    0 Comentários 0 Compartilhamentos 1K Visualizações 0 Anterior
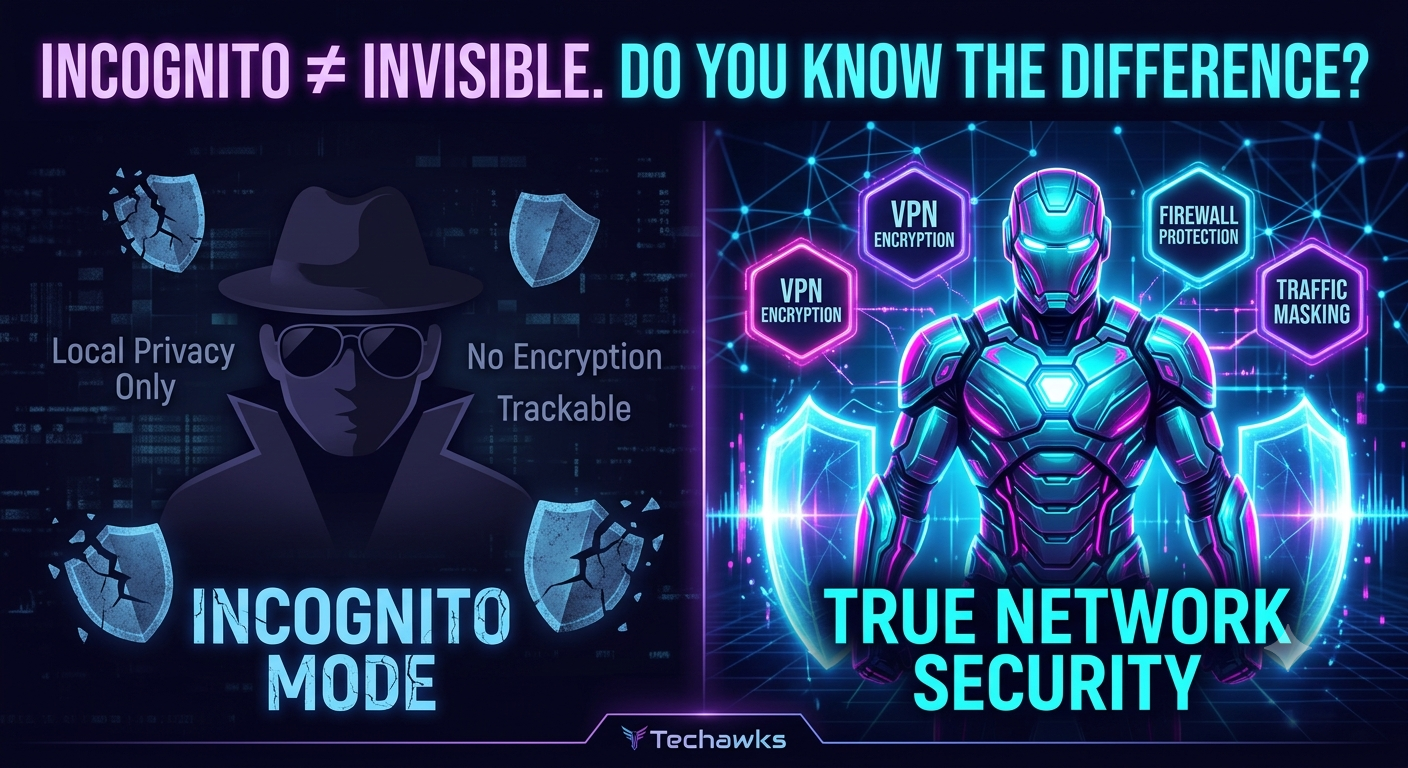
  • Myth Busted: Is Incognito Mode Actually Keeping You Safe? 🕵️‍♂️
    ❌ MYTH: "Incognito Mode makes me completely anonymous and safe from hackers."
    Many people believe that opening a private window creates an impenetrable shield around their device, hiding their location, blocking malware, and stopping websites from tracking them.
    ✅ FACT: It only hides your browsing activity from other people using your device.
    Private browsing simply stops your browser from saving your local search history, cookies, and form data. It does not hide your activity from external networks or protect you against malicious threats.


    What Incognito Mode DOES and DOESN'T Do:
    Feature Incognito Mode 🕶️ What You Actually Need 🛡️
    Local History Clears history on your device Standard browser feature
    IP Address & Location ❌ Still visible VPN (Virtual Private Network)
    ISP & Employer Tracking ❌ Still visible Encrypted Traffic / VPN
    Malware & Phishing Protection ❌ No protection Antivirus & Security Awareness


    Practical Steps to Stay Truly Secure
    Use a Trustworthy VPN: If you want to hide your IP address and encrypt your internet traffic from network snoops, rely on a VPN—not Incognito Mode.
    Layer Your Security: Use modern browser extensions like ad-blockers and HTTPS-enforcers alongside updated antivirus software.
    Practice Cyber Hygiene: Never assume private browsing protects you from download links or fake login pages. Phishing scams work regardless of your browser mode!


    Key Takeaways
    Local vs. Network Privacy: Incognito mode only protects your privacy locally (on your screen), not across the web.
    Visibility Remains: Your Internet Service Provider (ISP), network admin, and the websites you visit can still track you.
    No Security Armor: Private browsing does not block malware, viruses, or phishing attacks.


    CTA
    Want to go beyond basic privacy myths and master real network defense?
    Join the Techawks Cybersecurity & Ethical Hacking Program today to build hands-on skills, learn how real tracking works, and launch your career in cybersecurity! 🚀
    Myth Busted: Is Incognito Mode Actually Keeping You Safe? 🕵️‍♂️ ❌ MYTH: "Incognito Mode makes me completely anonymous and safe from hackers." Many people believe that opening a private window creates an impenetrable shield around their device, hiding their location, blocking malware, and stopping websites from tracking them. ✅ FACT: It only hides your browsing activity from other people using your device. Private browsing simply stops your browser from saving your local search history, cookies, and form data. It does not hide your activity from external networks or protect you against malicious threats. What Incognito Mode DOES and DOESN'T Do: Feature Incognito Mode 🕶️ What You Actually Need 🛡️ Local History Clears history on your device Standard browser feature IP Address & Location ❌ Still visible VPN (Virtual Private Network) ISP & Employer Tracking ❌ Still visible Encrypted Traffic / VPN Malware & Phishing Protection ❌ No protection Antivirus & Security Awareness Practical Steps to Stay Truly Secure Use a Trustworthy VPN: If you want to hide your IP address and encrypt your internet traffic from network snoops, rely on a VPN—not Incognito Mode. Layer Your Security: Use modern browser extensions like ad-blockers and HTTPS-enforcers alongside updated antivirus software. Practice Cyber Hygiene: Never assume private browsing protects you from download links or fake login pages. Phishing scams work regardless of your browser mode! Key Takeaways Local vs. Network Privacy: Incognito mode only protects your privacy locally (on your screen), not across the web. Visibility Remains: Your Internet Service Provider (ISP), network admin, and the websites you visit can still track you. No Security Armor: Private browsing does not block malware, viruses, or phishing attacks. CTA Want to go beyond basic privacy myths and master real network defense? Join the Techawks Cybersecurity & Ethical Hacking Program today to build hands-on skills, learn how real tracking works, and launch your career in cybersecurity! 🚀
    0 Comentários 0 Compartilhamentos 1K Visualizações 0 Anterior
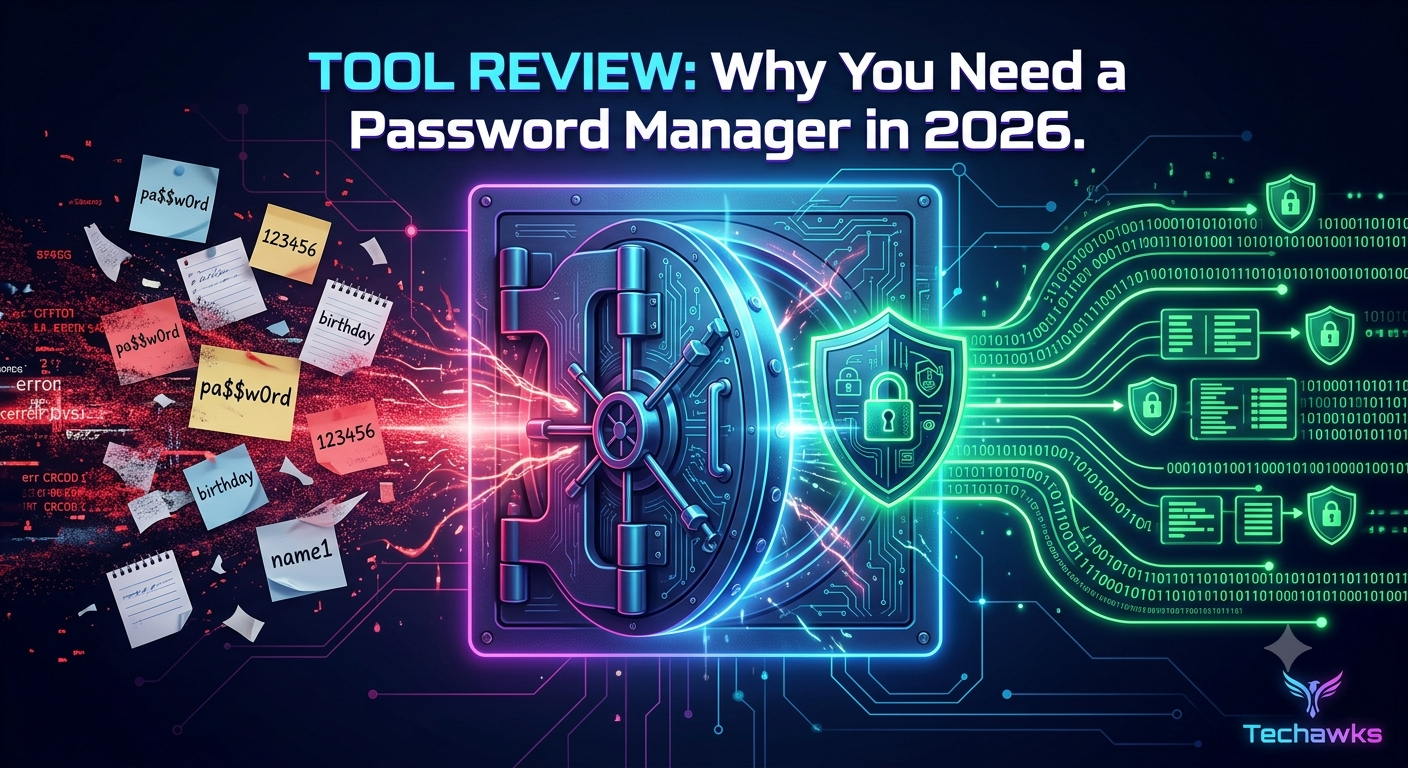
  • Tool Spotlight: Master Password Managers to Lock Down Your Digital Life 🔑


    What is a Password Manager?
    A password manager is a secure, encrypted vault that generates, stores, and auto-fills complex, unique passwords for every site you use. Instead of remembering dozens of credentials, you only need to remember one strong Master Password.


    Key Feature Breakdown
    🔒 Zero-Knowledge Encryption: Top-tier managers use end-to-end AES-256 encryption. This means only you hold the key to decrypt your vault—not even the software developers can see your passwords.
    🎲 Built-in Password Generator: Instantly creates 20+ character random strings with special symbols, numbers, and mixed cases (e.g., k9#mP!9Lz$2vR@7x).
    🛡️ Built-in Phishing Defense: A password manager won't auto-fill your credentials on a fake or lookalike domain (like micros0ft.com), instantly alerting you to malicious websites.
    📱 Cross-Platform Sync: Access your vault seamlessly across mobile, desktop, and web browsers.


    Top Recommended Tools (Free & Paid)
    Tool Best For Standout Feature
    Bitwarden Open-source & budget-friendly Generous free tier with full zero-knowledge encryption
    1Password Families & power users Secret Key feature for secondary authentication layer
    KeePassXC Security purists & offline storage 100% local database control with zero cloud dependency


    How to Get Started in 3 Actionable Steps
    Pick Your Tool: Download a reputable manager like Bitwarden or 1Password.
    Set a Powerful Master Password: Create a 4-word random passphrase (e.g., Correct-Horse-Battery-Staple) that you will never forget.
    Audit & Migration: Import your saved browser passwords, then use the built-in generator to update your high-value accounts (email, banking, social media) one by one.


    Key Takeaways
    Never Reuse Passwords: Unique credentials prevent one breach from ruining all your accounts.
    Zero-Knowledge is Non-Negotiable: Always choose tools that use end-to-end encryption.
    Phishing Shield: Password managers protect you from credential harvesting by refusing to fill data on fraudulent domains.


    CTA
    Ready to go beyond basic password safety and learn how hackers bypass defenses?
    Join the Techawks Cybersecurity & Ethical Hacking Program today to build hands-on skills in cryptography, network defense, and ethical hacking! 🚀
    Tool Spotlight: Master Password Managers to Lock Down Your Digital Life 🔑 What is a Password Manager? A password manager is a secure, encrypted vault that generates, stores, and auto-fills complex, unique passwords for every site you use. Instead of remembering dozens of credentials, you only need to remember one strong Master Password. Key Feature Breakdown 🔒 Zero-Knowledge Encryption: Top-tier managers use end-to-end AES-256 encryption. This means only you hold the key to decrypt your vault—not even the software developers can see your passwords. 🎲 Built-in Password Generator: Instantly creates 20+ character random strings with special symbols, numbers, and mixed cases (e.g., k9#mP!9Lz$2vR@7x). 🛡️ Built-in Phishing Defense: A password manager won't auto-fill your credentials on a fake or lookalike domain (like micros0ft.com), instantly alerting you to malicious websites. 📱 Cross-Platform Sync: Access your vault seamlessly across mobile, desktop, and web browsers. Top Recommended Tools (Free & Paid) Tool Best For Standout Feature Bitwarden Open-source & budget-friendly Generous free tier with full zero-knowledge encryption 1Password Families & power users Secret Key feature for secondary authentication layer KeePassXC Security purists & offline storage 100% local database control with zero cloud dependency How to Get Started in 3 Actionable Steps Pick Your Tool: Download a reputable manager like Bitwarden or 1Password. Set a Powerful Master Password: Create a 4-word random passphrase (e.g., Correct-Horse-Battery-Staple) that you will never forget. Audit & Migration: Import your saved browser passwords, then use the built-in generator to update your high-value accounts (email, banking, social media) one by one. Key Takeaways Never Reuse Passwords: Unique credentials prevent one breach from ruining all your accounts. Zero-Knowledge is Non-Negotiable: Always choose tools that use end-to-end encryption. Phishing Shield: Password managers protect you from credential harvesting by refusing to fill data on fraudulent domains. CTA Ready to go beyond basic password safety and learn how hackers bypass defenses? Join the Techawks Cybersecurity & Ethical Hacking Program today to build hands-on skills in cryptography, network defense, and ethical hacking! 🚀
    0 Comentários 0 Compartilhamentos 726 Visualizações 0 Anterior
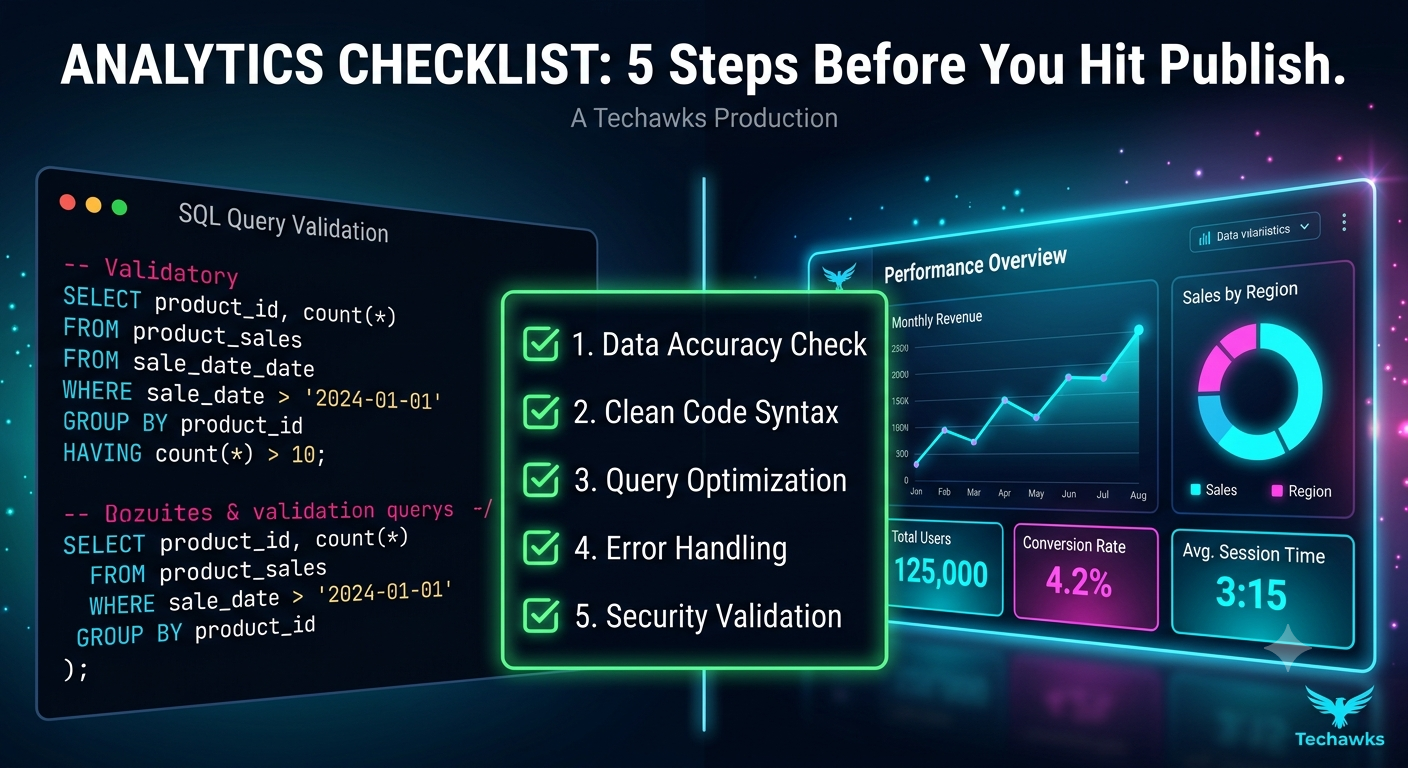
  • The Pre-Dash Checklist: 5 Steps to Bulletproof Data Visualizations 📊
    📋 The Ultimate Pre-Launch Analytics Checklist
    1. Data Integrity & Grain Check
    Grain Consistency: Are your dimensions aggregation-ready (e.g., daily vs. monthly rollups)?
    Null Handling: Did you explicitly handle NULL or missing values so they don't break percentage calculations?
    Reconciliation: Do your dashboard totals match your SQL source queries line-for-line?


    2. Logic & Calculation Audit
    Denominator Integrity: Are division formulas protected against #DIV/0! errors?
    Filter Logic: Are global dashboard filters cascading correctly without accidentally dropping rows?
    Timeframe Alignment: Are Date filters consistent across all charts (e.g., UTC vs. local timezone)?


    3. UX & Visual Clarity
    3-Second Rule: Can a stakeholder identify the main takeaway within 3 seconds?
    Color Intentionality: Is color used only to highlight key insights or categories (max 3–4 main shades)?
    Chart Selection: Did you avoid confusing chart types (like 3D graphs or overcrowded pie charts)?


    4. Performance Optimization
    Query Execution: Does the dashboard load in under 5 seconds?
    Aggregation Level: Are you querying pre-aggregated tables instead of running heavy joins on raw event logs?


    5. Stakeholder Context
    Clear Tooltips & Labels: Are metric definitions clearly labeled or documented via info buttons?
    Actionable Takeaways: Is there a clear next step or "so what?" implied by the data layout?


    Key Takeaways
    Validate First, Design Second: Data accuracy will always trump pretty visuals.
    Optimize for Speed: A slow dashboard is an unused dashboard—aggregate raw data early.
    Design for Decision-Makers: Remove visual clutter so executives can spot insights in seconds.


    CTA
    Ready to level up your SQL, visualization, and data engineering skills?
    Join the Techawks Data Science & Analytics Program today to build production-grade dashboards, master advanced analytics, and fast-track your tech career! 🚀
    The Pre-Dash Checklist: 5 Steps to Bulletproof Data Visualizations 📊 📋 The Ultimate Pre-Launch Analytics Checklist 1. Data Integrity & Grain Check Grain Consistency: Are your dimensions aggregation-ready (e.g., daily vs. monthly rollups)? Null Handling: Did you explicitly handle NULL or missing values so they don't break percentage calculations? Reconciliation: Do your dashboard totals match your SQL source queries line-for-line? 2. Logic & Calculation Audit Denominator Integrity: Are division formulas protected against #DIV/0! errors? Filter Logic: Are global dashboard filters cascading correctly without accidentally dropping rows? Timeframe Alignment: Are Date filters consistent across all charts (e.g., UTC vs. local timezone)? 3. UX & Visual Clarity 3-Second Rule: Can a stakeholder identify the main takeaway within 3 seconds? Color Intentionality: Is color used only to highlight key insights or categories (max 3–4 main shades)? Chart Selection: Did you avoid confusing chart types (like 3D graphs or overcrowded pie charts)? 4. Performance Optimization Query Execution: Does the dashboard load in under 5 seconds? Aggregation Level: Are you querying pre-aggregated tables instead of running heavy joins on raw event logs? 5. Stakeholder Context Clear Tooltips & Labels: Are metric definitions clearly labeled or documented via info buttons? Actionable Takeaways: Is there a clear next step or "so what?" implied by the data layout? Key Takeaways Validate First, Design Second: Data accuracy will always trump pretty visuals. Optimize for Speed: A slow dashboard is an unused dashboard—aggregate raw data early. Design for Decision-Makers: Remove visual clutter so executives can spot insights in seconds. CTA Ready to level up your SQL, visualization, and data engineering skills? Join the Techawks Data Science & Analytics Program today to build production-grade dashboards, master advanced analytics, and fast-track your tech career! 🚀
    0 Comentários 0 Compartilhamentos 845 Visualizações 0 Anterior