


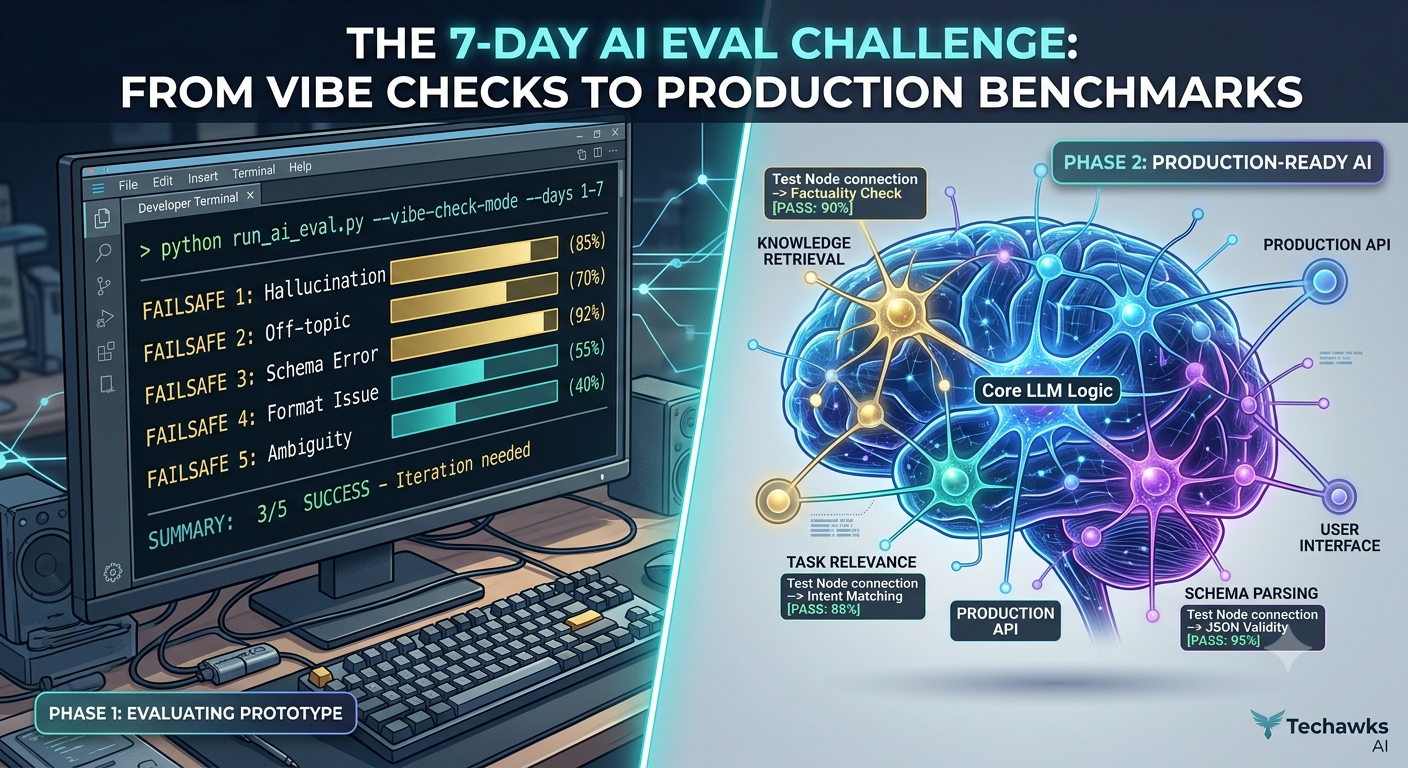
• The 7-Day Prompt Engineering Challenge: Shift from Intuition to Rigorous Evaluation
    Most developers starting out with Large Language Models (LLMs) fall into the "vibe check" trap—tweaking a system prompt, running two manual tests, and assuming it works. But scalable AI engineering requires systematic, reproducible validation.


    This week, we challenge you to take one core feature in your AI pipeline and subject it to a 7-day evaluation upgrade:


    Day 1–2: Define Your Failure Modes
    Identify the top 5 ways your prompt can fail (e.g., hallucination, off-topic drift, formatting errors, unparsed JSON).
    Document specific edge cases from real or synthetic user inputs.


    Day 3–4: Build a Baseline Evaluation Dataset
    Curate a test set of at least 20 diverse input-output pairs.
    Include 70% standard cases, 20% edge cases, and 10% adversarial inputs (e.g., prompt injection or ambiguous queries).


    Day 5–6: Automate LLM-as-a-Judge Evaluation
    Write a programmatic evaluator using a stronger model (or a strict schema validator) to score outputs on a 1–5 scale based on key dimensions: Relevance, Accuracy, and Formatting Compliance.
    Measure your baseline accuracy score across the entire test set.


    Day 7: Iterate & Benchmark
    Refine your system prompt using techniques like Few-Shot Examples or Structured Chain-of-Thought.
    Re-run your automated eval script and calculate your percentage improvement over the baseline.


    Key Takeaways
    Stop "vibe checking": Manual spot-checks do not scale; build automated benchmark datasets instead.
    Quantify output quality: Use schema validation and LLM-as-a-Judge metrics to measure accuracy quantitatively.


    Iterate with evidence: Only keep prompt changes that yield measurable improvements on your evaluation dataset.


    CTA (Join AI Builders & Enthusiasts)
    Ready to build, test, and ship production-ready AI alongside top engineers and researchers? [Join AI Builders & Enthusiasts] to access advanced tutorials, benchmark templates, and weekly community challenges!
    The 7-Day Prompt Engineering Challenge: Shift from Intuition to Rigorous Evaluation Most developers starting out with Large Language Models (LLMs) fall into the "vibe check" trap—tweaking a system prompt, running two manual tests, and assuming it works. But scalable AI engineering requires systematic, reproducible validation. This week, we challenge you to take one core feature in your AI pipeline and subject it to a 7-day evaluation upgrade: Day 1–2: Define Your Failure Modes Identify the top 5 ways your prompt can fail (e.g., hallucination, off-topic drift, formatting errors, unparsed JSON). Document specific edge cases from real or synthetic user inputs. Day 3–4: Build a Baseline Evaluation Dataset Curate a test set of at least 20 diverse input-output pairs. Include 70% standard cases, 20% edge cases, and 10% adversarial inputs (e.g., prompt injection or ambiguous queries). Day 5–6: Automate LLM-as-a-Judge Evaluation Write a programmatic evaluator using a stronger model (or a strict schema validator) to score outputs on a 1–5 scale based on key dimensions: Relevance, Accuracy, and Formatting Compliance. Measure your baseline accuracy score across the entire test set. Day 7: Iterate & Benchmark Refine your system prompt using techniques like Few-Shot Examples or Structured Chain-of-Thought. Re-run your automated eval script and calculate your percentage improvement over the baseline. Key Takeaways Stop "vibe checking": Manual spot-checks do not scale; build automated benchmark datasets instead. Quantify output quality: Use schema validation and LLM-as-a-Judge metrics to measure accuracy quantitatively. Iterate with evidence: Only keep prompt changes that yield measurable improvements on your evaluation dataset. CTA (Join AI Builders & Enthusiasts) Ready to build, test, and ship production-ready AI alongside top engineers and researchers? [Join AI Builders & Enthusiasts] to access advanced tutorials, benchmark templates, and weekly community challenges!
    0 Comments 0 Shares 969 Views 0 Reviews
  • Myth vs. Fact: Fine-Tuning is Always Better Than RAG for Custom AI Knowledge.
    When developers need an LLM to answer questions about proprietary data or niche domains, the immediate impulse is often: "We need to fine-tune a model."
    However, confusing knowledge injection with style/behavior adaptation is one of the most common and expensive mistakes in AI development. Let’s break down the reality behind this tradeoff:


    Myth #1: Fine-tuning is the best way to teach an LLM new facts and knowledge.
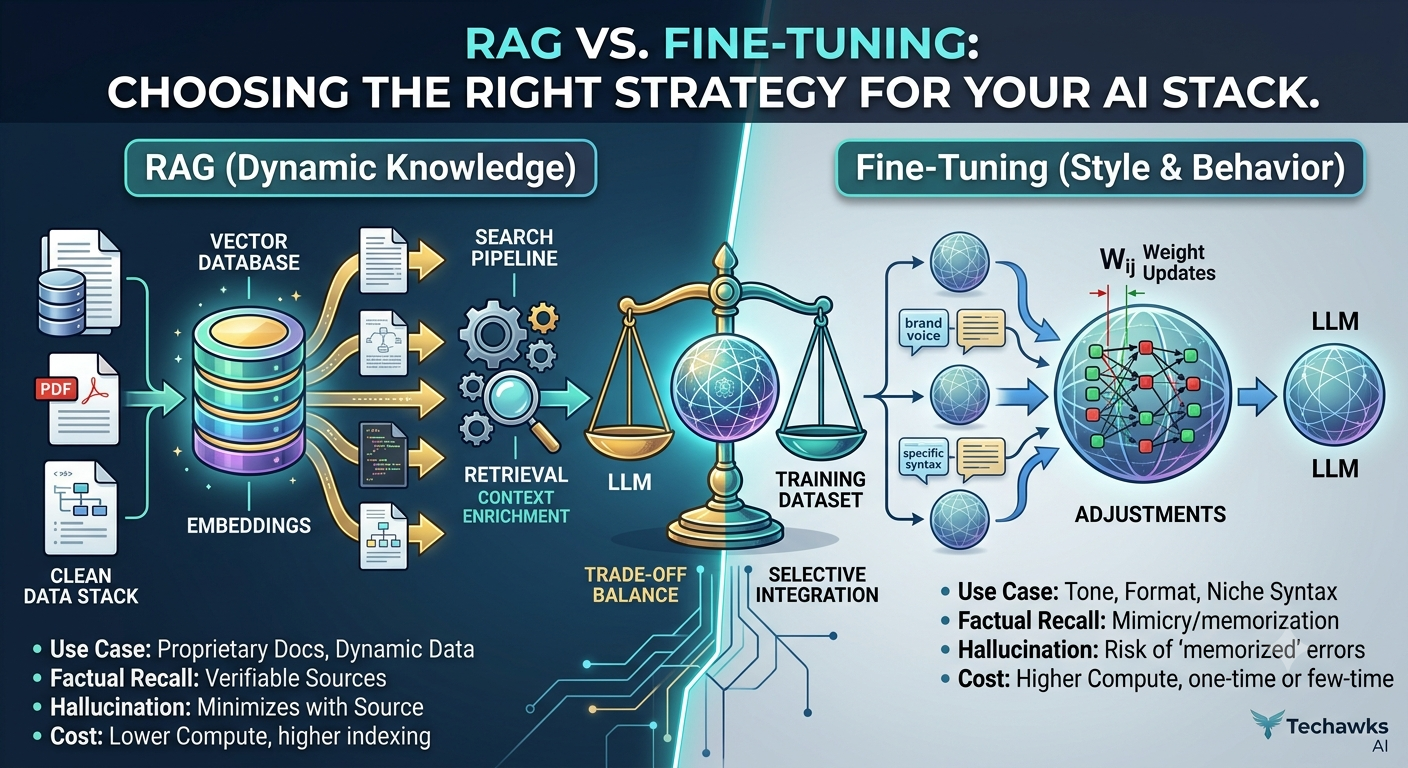
    Fact: Retrieval-Augmented Generation (RAG) is far superior for knowledge retrieval, while fine-tuning excels at teaching form, tone, and specific task formatting.
    Why? Fine-tuning updates model weights non-deterministically. It teaches the model how to output, but it struggles with precise, verifiable factual recall.
    The Action: Use RAG when your goal is to search across dynamic, frequently updated documents (like internal wikis or customer support databases). Use fine-tuning when you need the model to follow strict syntax (e.g., generating valid SQL dialects, learning specialized medical nomenclature formats, or adopting a specific brand voice).


    Myth #2: Fine-tuning eliminates hallucinations.
    Fact: Fine-tuning can actually increase hallucinations if the model attempts to retrieve memorized facts without source grounding.
    Why? When an LLM is fine-tuned on factual data, it learns to mimic those facts during inference. But if it encounters an edge case, it cannot verify its memory against a source document—it simply predicts the next token based on statistical probabilities.
    The Action: Combine RAG with strict prompt boundaries (e.g., "Answer the question using ONLY the provided context below. If unknown, state 'Not available'") to minimize hallucination rates in production pipelines.


    Myth #3: RAG and Fine-Tuning are mutually exclusive choices.
    Fact: The most robust production AI architectures combine both strategies.
    Why? Fine-tuning optimizes the model’s reasoning trajectory and output format, while RAG feeds it real-time, contextually accurate data.
    The Action: If you have complex requirements, adopt a hybrid strategy:
    Fine-tune a smaller base model to reliably follow your specific JSON schema or reasoning format.
    Layer RAG on top of that fine-tuned model to feed in real-time, domain-specific context at query time.


    Key Takeaways
    Knowledge vs. Style: Use RAG for knowledge lookup and factual accuracy; use fine-tuning for behavior, tone, and formatting constraints.
    Hallucination Control: Fine-tuning alone does not guarantee truthfulness—ground your outputs with dynamic retrieval context.
    Hybrid Approach: Combine fine-tuned base models with RAG architectures for optimal efficiency, speed, and accuracy.


    CTA (Join AI Builders & Enthusiasts)
    Want to master production-grade AI system design, evaluation strategies, and architecture patterns? [Join AI Builders & Enthusiasts] to connect with AI developers, share real-world benchmarks, and build smarter models together.
    Myth vs. Fact: Fine-Tuning is Always Better Than RAG for Custom AI Knowledge. When developers need an LLM to answer questions about proprietary data or niche domains, the immediate impulse is often: "We need to fine-tune a model." However, confusing knowledge injection with style/behavior adaptation is one of the most common and expensive mistakes in AI development. Let’s break down the reality behind this tradeoff: Myth #1: Fine-tuning is the best way to teach an LLM new facts and knowledge. Fact: Retrieval-Augmented Generation (RAG) is far superior for knowledge retrieval, while fine-tuning excels at teaching form, tone, and specific task formatting. Why? Fine-tuning updates model weights non-deterministically. It teaches the model how to output, but it struggles with precise, verifiable factual recall. The Action: Use RAG when your goal is to search across dynamic, frequently updated documents (like internal wikis or customer support databases). Use fine-tuning when you need the model to follow strict syntax (e.g., generating valid SQL dialects, learning specialized medical nomenclature formats, or adopting a specific brand voice). Myth #2: Fine-tuning eliminates hallucinations. Fact: Fine-tuning can actually increase hallucinations if the model attempts to retrieve memorized facts without source grounding. Why? When an LLM is fine-tuned on factual data, it learns to mimic those facts during inference. But if it encounters an edge case, it cannot verify its memory against a source document—it simply predicts the next token based on statistical probabilities. The Action: Combine RAG with strict prompt boundaries (e.g., "Answer the question using ONLY the provided context below. If unknown, state 'Not available'") to minimize hallucination rates in production pipelines. Myth #3: RAG and Fine-Tuning are mutually exclusive choices. Fact: The most robust production AI architectures combine both strategies. Why? Fine-tuning optimizes the model’s reasoning trajectory and output format, while RAG feeds it real-time, contextually accurate data. The Action: If you have complex requirements, adopt a hybrid strategy: Fine-tune a smaller base model to reliably follow your specific JSON schema or reasoning format. Layer RAG on top of that fine-tuned model to feed in real-time, domain-specific context at query time. Key Takeaways Knowledge vs. Style: Use RAG for knowledge lookup and factual accuracy; use fine-tuning for behavior, tone, and formatting constraints. Hallucination Control: Fine-tuning alone does not guarantee truthfulness—ground your outputs with dynamic retrieval context. Hybrid Approach: Combine fine-tuned base models with RAG architectures for optimal efficiency, speed, and accuracy. CTA (Join AI Builders & Enthusiasts) Want to master production-grade AI system design, evaluation strategies, and architecture patterns? [Join AI Builders & Enthusiasts] to connect with AI developers, share real-world benchmarks, and build smarter models together.
    0 Comments 0 Shares 823 Views 0 Reviews
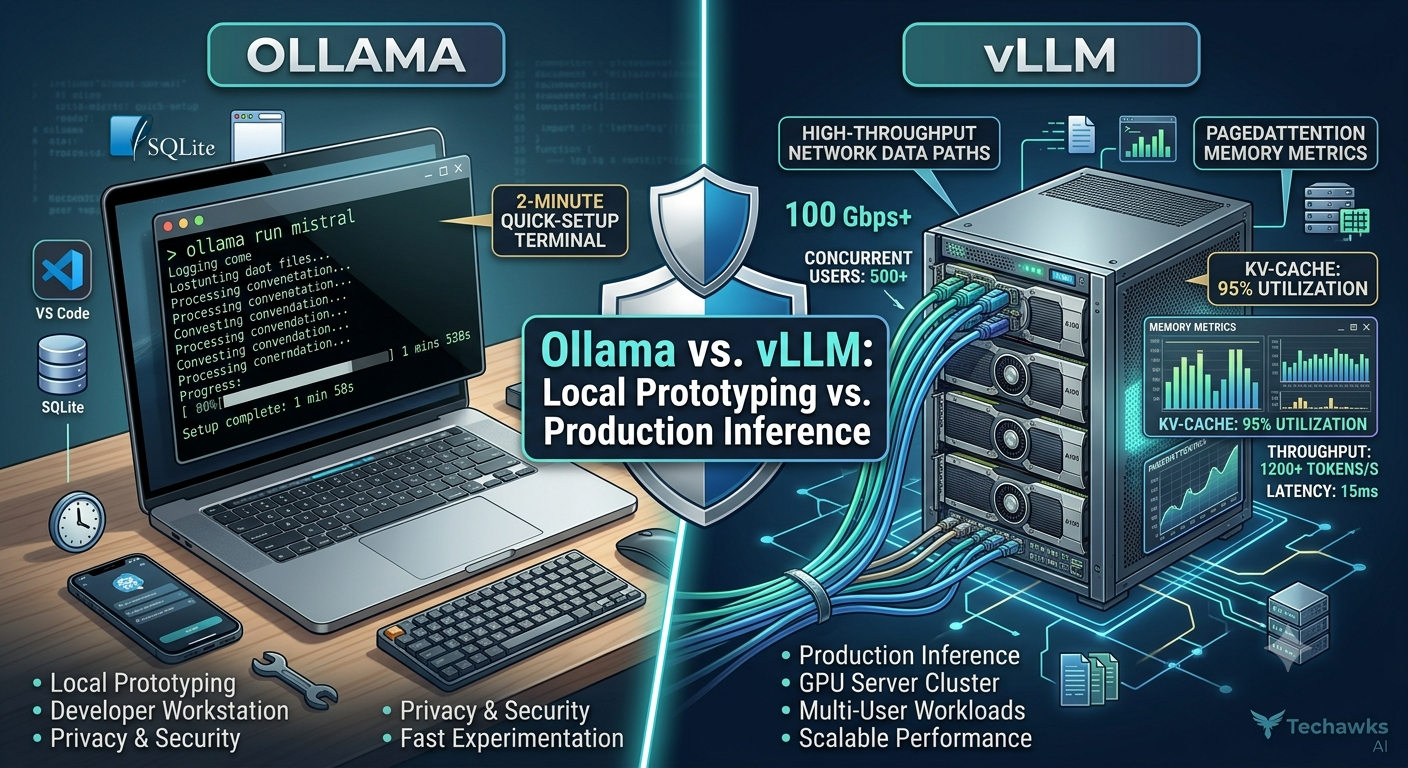
  • Tool Review: Ollama vs. vLLM — Choosing the Right LLM Serving Engine for Your Stack
    When deploying local or open-weights models (such as Llama 3, Mistral, or Qwen), two open-source inference tools stand out as industry standards. While both provide OpenAI-compatible API endpoints, they serve fundamentally different stages of the development lifecycle.Here is how they stack up across key developer criteria:


    1. Ollama: Fast Experimentation & Local Development
    Best For: Rapid prototyping, developer workstations, and Mac/Apple Silicon setups.
    Setup Time: ~2 minutes. Requires zero Docker setup or complex hardware configurations.
    Memory & Quantization: Native support for GGUF model formats (4-bit, 8-bit, FP16). It manages static key-value (KV) cache automatically, allowing you to run powerful models on consumer laptops.
    The Verdict: If you are building proof-of-concepts, testing prompt variations locally, or integrating AI capabilities into internal desktop workflows, Ollama offers an unmatched developer experience.


    2. vLLM: High-Throughput Production Workloads
    Best For: Production APIs, multi-user deployments, and GPU server clusters.
    Setup Time: Requires CUDA environment configuration or Docker deployment.
    Performance & Architecture: Powered by PagedAttention (which eliminates memory fragmentation) and continuous batching. Handles hundreds of concurrent requests with up to 3x–4x higher token throughput compared to single-queue local engines under high concurrency.
    Model Formats: Works directly with Hugging Face safetensors formats in FP16, FP8, AWQ, or GPTQ precision.
    The Verdict: If you are shipping an customer-facing application where multiple users query the model simultaneously, vLLM is the clear enterprise winner.


    Key Takeaways
    Match tools to stage: Use Ollama for local feature development and prompt testing; migrate to vLLM when deploying to cloud GPUs for multi-user workloads.
    Watch KV cache efficiency: Production throughput depends heavily on KV memory management—vLLM’s PagedAttention prevents hardware memory waste under concurrency.
    Seamless transition: Both tools expose standard /v1/chat/completions endpoints, meaning you can swap backends without rewriting application code.


    CTA (Join AI Builders & Enthusiasts)
    Evaluating new AI frameworks, vector databases, or inference servers? [Join AI Builders & Enthusiasts] to access practical benchmarks, architecture reviews, and technical guides from fellow AI engineers!
    Tool Review: Ollama vs. vLLM — Choosing the Right LLM Serving Engine for Your Stack When deploying local or open-weights models (such as Llama 3, Mistral, or Qwen), two open-source inference tools stand out as industry standards. While both provide OpenAI-compatible API endpoints, they serve fundamentally different stages of the development lifecycle.Here is how they stack up across key developer criteria: 1. Ollama: Fast Experimentation & Local Development Best For: Rapid prototyping, developer workstations, and Mac/Apple Silicon setups. Setup Time: ~2 minutes. Requires zero Docker setup or complex hardware configurations. Memory & Quantization: Native support for GGUF model formats (4-bit, 8-bit, FP16). It manages static key-value (KV) cache automatically, allowing you to run powerful models on consumer laptops. The Verdict: If you are building proof-of-concepts, testing prompt variations locally, or integrating AI capabilities into internal desktop workflows, Ollama offers an unmatched developer experience. 2. vLLM: High-Throughput Production Workloads Best For: Production APIs, multi-user deployments, and GPU server clusters. Setup Time: Requires CUDA environment configuration or Docker deployment. Performance & Architecture: Powered by PagedAttention (which eliminates memory fragmentation) and continuous batching. Handles hundreds of concurrent requests with up to 3x–4x higher token throughput compared to single-queue local engines under high concurrency. Model Formats: Works directly with Hugging Face safetensors formats in FP16, FP8, AWQ, or GPTQ precision. The Verdict: If you are shipping an customer-facing application where multiple users query the model simultaneously, vLLM is the clear enterprise winner. Key Takeaways Match tools to stage: Use Ollama for local feature development and prompt testing; migrate to vLLM when deploying to cloud GPUs for multi-user workloads. Watch KV cache efficiency: Production throughput depends heavily on KV memory management—vLLM’s PagedAttention prevents hardware memory waste under concurrency. Seamless transition: Both tools expose standard /v1/chat/completions endpoints, meaning you can swap backends without rewriting application code. CTA (Join AI Builders & Enthusiasts) Evaluating new AI frameworks, vector databases, or inference servers? [Join AI Builders & Enthusiasts] to access practical benchmarks, architecture reviews, and technical guides from fellow AI engineers!
    0 Comments 0 Shares 1K Views 0 Reviews
  • Writing Clean, Maintainable Code: 3 Refactoring Patterns Every Developer Should Master
    As features scale and deadlines loom, source code can quickly turn into a maze of deeply nested conditional checks and massive functions. Refactoring isn't about rewriting your application from scratch; it’s about making incremental improvements to code structure without changing its external behavior.


    Incorporate these three fundamental refactoring patterns into your everyday coding workflow:


    1. Replace Deep Nesting with Early Guards (Guard Clauses)
    Deeply nested if-else blocks increase cognitive load, making functions hard to follow and prone to logical errors.
    The Problem: Nesting core business logic inside multiple levels of validation checks.
    The Refactor: Invert conditional checks and return early if a pre-condition fails.


    2. Extract Function: Enforce the Single Responsibility Principle
    When a single function tries to validate input, calculate totals, format response data, and log errors, it becomes rigid and difficult to unit test.
    The Action: Break down long functions into smaller, modular helper functions that each handle exactly one responsibility.
    The Benefit: Shorter functions are self-documenting, easier to isolate in unit tests, and highly reusable across your application stack.


    3. Replace Magic Numbers and Hardcoded Strings with Constants
    Hardcoded values scattered throughout your codebase create subtle bugs during maintenance and updates.
    The Action: Group domain values, API route paths, status codes, and threshold limits into named constants or enum data types.
    Example: Replace if (user.role === 3) with if (user.role === ROLES.ADMIN). This clarifies code intent and provides a single source of truth when business rules change.


    Key Takeaways
    Flat over nested: Use early returns (guard clauses) to keep your logic paths flat and readable.
    One job per function: Keep functions small, focused, and testable by adhering to the Single Responsibility Principle.
    Explicit intent: Replace hardcoded magic values with clear, centralized constant declarations.


    CTA (Join Developers & Coding)
    Looking to sharpen your core software engineering skills, share code reviews, and learn design patterns with a community of fellow devs? [Join Developers & Coding] to connect, collaborate, and build better software together!
    Writing Clean, Maintainable Code: 3 Refactoring Patterns Every Developer Should Master As features scale and deadlines loom, source code can quickly turn into a maze of deeply nested conditional checks and massive functions. Refactoring isn't about rewriting your application from scratch; it’s about making incremental improvements to code structure without changing its external behavior. Incorporate these three fundamental refactoring patterns into your everyday coding workflow: 1. Replace Deep Nesting with Early Guards (Guard Clauses) Deeply nested if-else blocks increase cognitive load, making functions hard to follow and prone to logical errors. The Problem: Nesting core business logic inside multiple levels of validation checks. The Refactor: Invert conditional checks and return early if a pre-condition fails. 2. Extract Function: Enforce the Single Responsibility Principle When a single function tries to validate input, calculate totals, format response data, and log errors, it becomes rigid and difficult to unit test. The Action: Break down long functions into smaller, modular helper functions that each handle exactly one responsibility. The Benefit: Shorter functions are self-documenting, easier to isolate in unit tests, and highly reusable across your application stack. 3. Replace Magic Numbers and Hardcoded Strings with Constants Hardcoded values scattered throughout your codebase create subtle bugs during maintenance and updates. The Action: Group domain values, API route paths, status codes, and threshold limits into named constants or enum data types. Example: Replace if (user.role === 3) with if (user.role === ROLES.ADMIN). This clarifies code intent and provides a single source of truth when business rules change. Key Takeaways Flat over nested: Use early returns (guard clauses) to keep your logic paths flat and readable. One job per function: Keep functions small, focused, and testable by adhering to the Single Responsibility Principle. Explicit intent: Replace hardcoded magic values with clear, centralized constant declarations. CTA (Join Developers & Coding) Looking to sharpen your core software engineering skills, share code reviews, and learn design patterns with a community of fellow devs? [Join Developers & Coding] to connect, collaborate, and build better software together!
    0 Comments 0 Shares 1K Views 0 Reviews
  • The 30-Minute Algorithmic Efficiency Challenge: Optimize Your Time & Space Complexity
    Writing code that works is only the first milestone—writing code that stays fast as data scales is where software engineering truly happens.
    Many developers default to nested loops for search and matching problems, inadvertently creating performance bottlenecks when handling large datasets.


    Your challenge today is to refactor a slow lookup pattern using optimal data structures.


    The Challenge Scenario:
    Given an array of integers nums and a target integer target, write a function that returns the indices of the two numbers such that they add up to target.
    The Naive Approach ($O(n^2)$ Time Complexity)JavaScript// ❌ Brute Force Approach: Double loop nested iteration
    function twoSumNaive(nums, target) {
    for (let i = 0; i < nums.length; i++) {
    for (let j = i + 1; j < nums.length; j++) {
    if (nums[i] + nums[j] === target) {
    return [i, j];
    }
    }
    }
    return [];
    }


    The Problem: As nums grows to 100,000 items, an $O(n^2)$ algorithm runs up to 10 billion operations, causing noticeable execution lag or browser freezes.


    Your 3-Step Refactoring Protocol:
    1 Trade Memory for Speed (O(n) Time, O(n) Space):
    Replace the inner loop with a Hash Map (or Map object in JavaScript / dict in Python)
    As you iterate through the array once, calculate the complement needed (target - current_number).
    Check if the complement already exists in your map in O(1) time. If not, store the current number's value and index.


    2 Benchmark the Difference:
    Run both implementations against an array of 50,000 elements. Measure execution time using console.time() / console.timeEnd() or your language's native benchmarking suite.


    3 Handle Edge Cases:
    How does your solution behave with negative integers, duplicate values, or empty input arrays?


    Key Takeaways
    Data structure selection matters: Swapping nested loops for a Hash Map turns expensive search operations into instantaneous O(1) lookups.
    Understand trade-offs: Sacrificing a small amount of memory (space complexity) often yields exponential gains in execution speed (time complexity).
    Measure before and after: Always back up code optimizations with real timing benchmarks, not just theoretical assumptions.


    CTA (Join Developers & Coding)
    Ready to tackle weekly algorithm challenges, benchmark code, and discuss software architecture with fellow developers? [Join Developers & Coding] today to level up your engineering skills!
    The 30-Minute Algorithmic Efficiency Challenge: Optimize Your Time & Space Complexity Writing code that works is only the first milestone—writing code that stays fast as data scales is where software engineering truly happens. Many developers default to nested loops for search and matching problems, inadvertently creating performance bottlenecks when handling large datasets. Your challenge today is to refactor a slow lookup pattern using optimal data structures. The Challenge Scenario: Given an array of integers nums and a target integer target, write a function that returns the indices of the two numbers such that they add up to target. The Naive Approach ($O(n^2)$ Time Complexity)JavaScript// ❌ Brute Force Approach: Double loop nested iteration function twoSumNaive(nums, target) { for (let i = 0; i < nums.length; i++) { for (let j = i + 1; j < nums.length; j++) { if (nums[i] + nums[j] === target) { return [i, j]; } } } return []; } The Problem: As nums grows to 100,000 items, an $O(n^2)$ algorithm runs up to 10 billion operations, causing noticeable execution lag or browser freezes. Your 3-Step Refactoring Protocol: 1 Trade Memory for Speed (O(n) Time, O(n) Space): Replace the inner loop with a Hash Map (or Map object in JavaScript / dict in Python) As you iterate through the array once, calculate the complement needed (target - current_number). Check if the complement already exists in your map in O(1) time. If not, store the current number's value and index. 2 Benchmark the Difference: Run both implementations against an array of 50,000 elements. Measure execution time using console.time() / console.timeEnd() or your language's native benchmarking suite. 3 Handle Edge Cases: How does your solution behave with negative integers, duplicate values, or empty input arrays? Key Takeaways Data structure selection matters: Swapping nested loops for a Hash Map turns expensive search operations into instantaneous O(1) lookups. Understand trade-offs: Sacrificing a small amount of memory (space complexity) often yields exponential gains in execution speed (time complexity). Measure before and after: Always back up code optimizations with real timing benchmarks, not just theoretical assumptions. CTA (Join Developers & Coding) Ready to tackle weekly algorithm challenges, benchmark code, and discuss software architecture with fellow developers? [Join Developers & Coding] today to level up your engineering skills!
    0 Comments 0 Shares 980 Views 0 Reviews
  • Myth vs. Fact: Does DRY (Don't Repeat Yourself) Mean Never Copying Code?
    The DRY (Don't Repeat Yourself) principle is one of the most misunderstood guidelines in software development. Many developers assume it simply means "if two lines of code look identical, create a shared function."
    However, premature abstraction often creates tighter coupling, making future refactoring twice as hard. Here is the reality behind code duplication:


    Myth #1: DRY is about duplicating code syntax.
    Fact: DRY is about single sources of truth for business logic and knowledge, not identical lines of syntax.
    Why? Two completely separate features might share a few lines of boilerplate today, but if their business requirements diverge tomorrow, forcing them into a shared abstraction creates unnecessary dependencies.
    The Action: Apply the Rule of Three. Allow code duplication up to two times. Only extract a shared helper or service when you see the same logic repeated a third time and both use cases represent the exact same domain knowledge.


    Myth #2: Duplicate code is always a code smell.
    Fact: Coupling is worse than repetition. A little duplication is far better than the wrong abstraction.
    Why? Creating a shared, highly customizable function filled with configurable flags (if (isUserTypeA && !isLegacyMode)) to serve disparate parts of an application makes code brittle and hard to test.
    The Action: If extracting code requires adding complex conditional logic to cater to different callers, keep the code duplicated and uncoupled instead.


    Myth #3: DRY applies equally across all layers of an application.
    Fact: Decoupling domain layers (e.g., database models vs. API response DTOs) requires intentional structural duplication.
    Why? Mapping a database entity directly to your API output to avoid defining a separate Data Transfer Object (DTO) seems DRY, but it leaks internal schema details to API consumers and prevents independent API versioning.
    The Action: Explicitly define separate interfaces for data storage, internal logic, and public API contracts—even if their properties look identical initially.


    Key Takeaways
    Knowledge, not syntax: Duplicate knowledge or business rules is a bug; structural code duplication is often harmless.
    Beware premature abstraction: Follow the Rule of Three before refactoring shared logic into generic utility functions.
    Decouple over deduplicate: Prefer clear, slightly repetitive code over complex abstractions with numerous conditional flags.


    CTA (Join Developers & Coding)
    Want to discuss software architecture, design principles, and refactoring patterns with fellow engineers? [Join Developers & Coding] to share code snippets, engage in peer reviews, and level up your dev skills!
    Myth vs. Fact: Does DRY (Don't Repeat Yourself) Mean Never Copying Code? The DRY (Don't Repeat Yourself) principle is one of the most misunderstood guidelines in software development. Many developers assume it simply means "if two lines of code look identical, create a shared function." However, premature abstraction often creates tighter coupling, making future refactoring twice as hard. Here is the reality behind code duplication: Myth #1: DRY is about duplicating code syntax. Fact: DRY is about single sources of truth for business logic and knowledge, not identical lines of syntax. Why? Two completely separate features might share a few lines of boilerplate today, but if their business requirements diverge tomorrow, forcing them into a shared abstraction creates unnecessary dependencies. The Action: Apply the Rule of Three. Allow code duplication up to two times. Only extract a shared helper or service when you see the same logic repeated a third time and both use cases represent the exact same domain knowledge. Myth #2: Duplicate code is always a code smell. Fact: Coupling is worse than repetition. A little duplication is far better than the wrong abstraction. Why? Creating a shared, highly customizable function filled with configurable flags (if (isUserTypeA && !isLegacyMode)) to serve disparate parts of an application makes code brittle and hard to test. The Action: If extracting code requires adding complex conditional logic to cater to different callers, keep the code duplicated and uncoupled instead. Myth #3: DRY applies equally across all layers of an application. Fact: Decoupling domain layers (e.g., database models vs. API response DTOs) requires intentional structural duplication. Why? Mapping a database entity directly to your API output to avoid defining a separate Data Transfer Object (DTO) seems DRY, but it leaks internal schema details to API consumers and prevents independent API versioning. The Action: Explicitly define separate interfaces for data storage, internal logic, and public API contracts—even if their properties look identical initially. Key Takeaways Knowledge, not syntax: Duplicate knowledge or business rules is a bug; structural code duplication is often harmless. Beware premature abstraction: Follow the Rule of Three before refactoring shared logic into generic utility functions. Decouple over deduplicate: Prefer clear, slightly repetitive code over complex abstractions with numerous conditional flags. CTA (Join Developers & Coding) Want to discuss software architecture, design principles, and refactoring patterns with fellow engineers? [Join Developers & Coding] to share code snippets, engage in peer reviews, and level up your dev skills!
    0 Comments 0 Shares 800 Views 0 Reviews
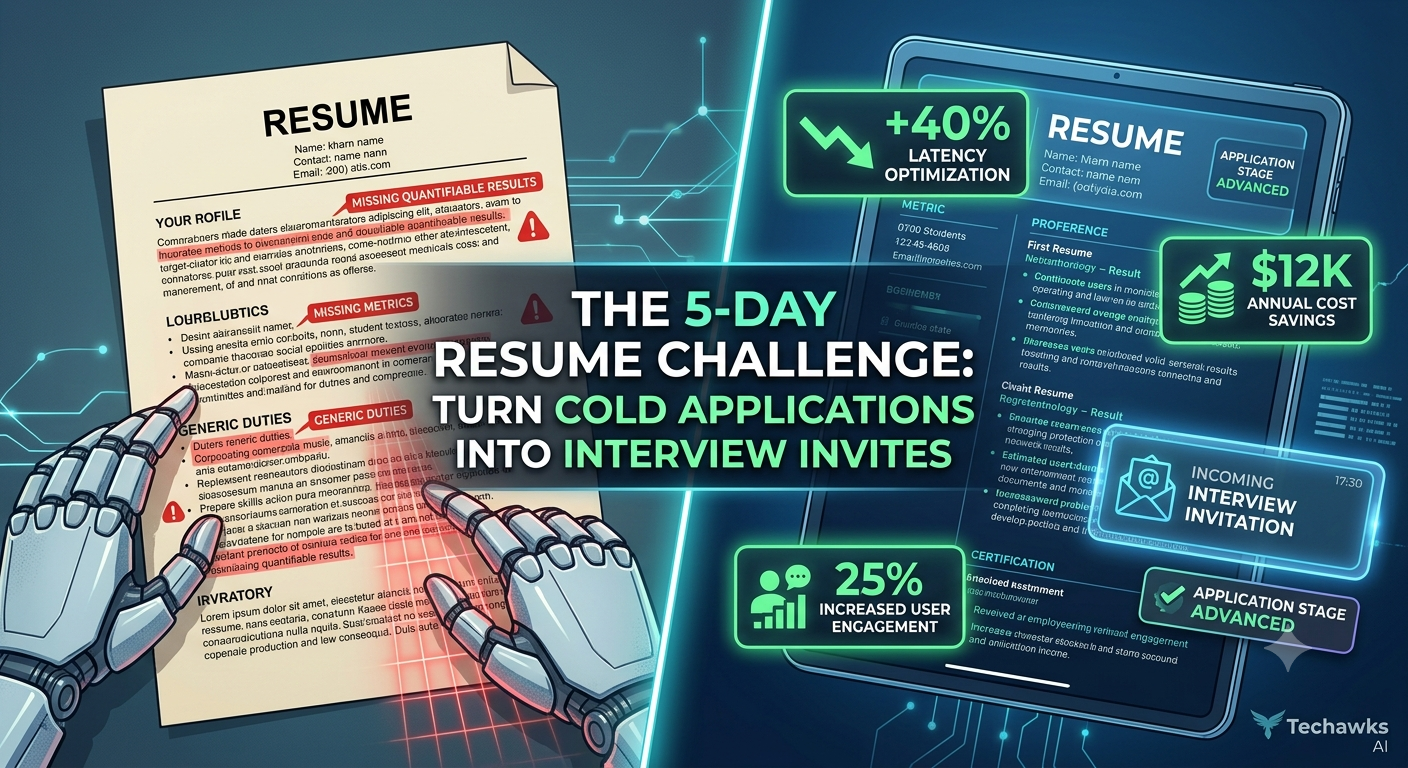
  • The 5-Day Resume & Portfolio Audit: Turn Cold Applications into Interview Calls
    In a competitive job market, hiring managers spend less than 10 seconds scanning a resume before deciding whether to advance a candidate. If your resume simply lists job duties rather than proven business outcomes, you are slipping through the cracks.
    This week, challenge yourself to execute a systematic 5-day career asset upgrade:


    Day 1: Audit Your Resume Bullet Points for Impact Metrics
    The Challenge: Rewrite every experience bullet using the X-Y-Z Formula (Accomplished [X], as measured by [Y], by doing [Z]).
    Before: "Developed API endpoints for the web application."
    After: "Optimized 12 core REST API endpoints, reducing average response latency by 40% and cutting cloud infrastructure costs by $1,200/month."


    Day 2: Optimize Your Portfolio for the 30-Second Rule
    The Challenge: Ensure every project featured on your personal site or GitHub includes a live working demo link, a clean architecture diagram, and a 3-bullet executive summary.
    The Action: Remove completed tutorial projects (e.g., basic To-Do apps) and replace them with 2–3 full-stack or domain-specific applications that solve real user pain points.


    Day 3: Align Keywords with Target Job Descriptions
    The Challenge: Run your resume against 5 job descriptions for your dream role using word-cloud or keyword-extraction tools.
    The Action: Identify missing technical frameworks, tools, and methodologies (e.g., CI/CD pipelines, Docker, microservices, unit testing) and naturally integrate them into your skills matrix and project bullet points.


    Day 4: Refresh Your LinkedIn Headline & Executive Summary
    The Challenge: Replace generic titles like "Aspiring Developer" or "Computer Science Graduate" with role-focused value propositions.
    The Action: Use a structured formula: [Current Role/Specialty] | [Core Stack/Tools] | [Value Delivered/Industry Focus]. Example: "Full-Stack Software Engineer | React, Node.js, PostgreSQL | Building Scalable FinTech Applications".


    Day 5: Execute 3 Value-First Outreach Messages
    The Challenge: Don't just click "Easy Apply." Identify 3 hiring managers or senior team leads at companies you admire.
    The Action: Send a concise, personalized message highlighting a specific insight about their product or technical stack, attaching your updated resume and live portfolio link.


    Key Takeaways
    Quantify everything: Measure your past work in terms of efficiency, latency, cost savings, or revenue impact.
    Show, don't just tell: Make portfolio projects instantly clickable and easily scannable with architecture diagrams and live demos.
    Targeted visibility: Tailor your keywords to match job descriptions and proactively reach out to decision-makers directly.


    CTA (Join Tech Jobs & Opportunities)
    Looking to accelerate your tech career, receive resume feedback, and access unlisted job opportunities across the industry? [Join Tech Jobs & Opportunities] today to connect with hiring managers, recruiters, and fellow tech professionals!
    The 5-Day Resume & Portfolio Audit: Turn Cold Applications into Interview Calls In a competitive job market, hiring managers spend less than 10 seconds scanning a resume before deciding whether to advance a candidate. If your resume simply lists job duties rather than proven business outcomes, you are slipping through the cracks. This week, challenge yourself to execute a systematic 5-day career asset upgrade: Day 1: Audit Your Resume Bullet Points for Impact Metrics The Challenge: Rewrite every experience bullet using the X-Y-Z Formula (Accomplished [X], as measured by [Y], by doing [Z]). Before: "Developed API endpoints for the web application." After: "Optimized 12 core REST API endpoints, reducing average response latency by 40% and cutting cloud infrastructure costs by $1,200/month." Day 2: Optimize Your Portfolio for the 30-Second Rule The Challenge: Ensure every project featured on your personal site or GitHub includes a live working demo link, a clean architecture diagram, and a 3-bullet executive summary. The Action: Remove completed tutorial projects (e.g., basic To-Do apps) and replace them with 2–3 full-stack or domain-specific applications that solve real user pain points. Day 3: Align Keywords with Target Job Descriptions The Challenge: Run your resume against 5 job descriptions for your dream role using word-cloud or keyword-extraction tools. The Action: Identify missing technical frameworks, tools, and methodologies (e.g., CI/CD pipelines, Docker, microservices, unit testing) and naturally integrate them into your skills matrix and project bullet points. Day 4: Refresh Your LinkedIn Headline & Executive Summary The Challenge: Replace generic titles like "Aspiring Developer" or "Computer Science Graduate" with role-focused value propositions. The Action: Use a structured formula: [Current Role/Specialty] | [Core Stack/Tools] | [Value Delivered/Industry Focus]. Example: "Full-Stack Software Engineer | React, Node.js, PostgreSQL | Building Scalable FinTech Applications". Day 5: Execute 3 Value-First Outreach Messages The Challenge: Don't just click "Easy Apply." Identify 3 hiring managers or senior team leads at companies you admire. The Action: Send a concise, personalized message highlighting a specific insight about their product or technical stack, attaching your updated resume and live portfolio link. Key Takeaways Quantify everything: Measure your past work in terms of efficiency, latency, cost savings, or revenue impact. Show, don't just tell: Make portfolio projects instantly clickable and easily scannable with architecture diagrams and live demos. Targeted visibility: Tailor your keywords to match job descriptions and proactively reach out to decision-makers directly. CTA (Join Tech Jobs & Opportunities) Looking to accelerate your tech career, receive resume feedback, and access unlisted job opportunities across the industry? [Join Tech Jobs & Opportunities] today to connect with hiring managers, recruiters, and fellow tech professionals!
    0 Comments 0 Shares 1K Views 0 Reviews
  • Myth vs. Fact: Do You Need to Match 100% of Job Requirements to Apply?
    Job descriptions are rarely strict boundary lines set in stone. In reality, most postings represent a hiring manager’s idealized "wish list" rather than an absolute minimum threshold.
    Failing to apply due to self-selection is one of the biggest bottlenecks candidates face during a job search. Let’s separate tech hiring myths from real-world recruitment realities:


    Myth #1: If you don’t meet 100% of the listed requirements, your resume will be automatically rejected.
    Fact: Meeting 60%–70% of core requirements is often enough to secure an initial screening call.
    Why? Employers routinely list every tool or technology used across their entire team. What they actually need is a developer with solid foundational skills who can learn domain-specific tooling on the job.
    The Action: Focus on core competencies (e.g., strong backend logic, system design, or frontend state management) rather than secondary tooling (e.g., a specific logging framework or niche testing library). If you hold the core skills, send the application.


    Myth #2: "Years of experience" requirements are rigid, non-negotiable cutoffs.
    Fact: Demonstrated impact and project complexity routinely outweigh arbitrary year counts.
    Why? Three years of high-velocity, production-level development at a scaling startup often yields more relevant experience than five years of routine maintenance on legacy systems.
    The Action: Reframe your experience around outcomes and metrics rather than time served. Show how you reduced API latency, scaled database throughput, or spearheaded feature launches.


    Myth #3: Applying directly through job boards is the only way to get noticed.
    Fact: Cold applying without networking drastically lowers your response rate.
    Why? Applicant Tracking Systems (ATS) handle hundreds of cold submissions per posting. An internal referral or a direct conversation with a engineering manager instantly bypasses the initial resume stack.
    The Action: Don't just click "Submit." Find a developer or engineering lead at the target company on LinkedIn, share a brief note highlighting alignment with their team's stack, and request a quick 10-minute informational chat.


    Key Takeaways
    The 60% Rule: Treat job postings as wishlist guidelines—if you match ~60% of the core skills, apply confidence.
    Impact over time: Highlight complex technical problems solved and measurable results rather than focusing strictly on years of experience.
    Bypass cold stacks: Pair every online application with targeted outreach to recruiters or engineering peers.


    CTA (Join Tech Jobs & Opportunities)
    Looking to navigate your tech career with confidence, optimize your interview pipeline, and unlock unlisted job opportunities? [Join Tech Jobs & Opportunities] to connect with hiring managers, recruiters, and fellow tech professionals!
    Myth vs. Fact: Do You Need to Match 100% of Job Requirements to Apply? Job descriptions are rarely strict boundary lines set in stone. In reality, most postings represent a hiring manager’s idealized "wish list" rather than an absolute minimum threshold. Failing to apply due to self-selection is one of the biggest bottlenecks candidates face during a job search. Let’s separate tech hiring myths from real-world recruitment realities: Myth #1: If you don’t meet 100% of the listed requirements, your resume will be automatically rejected. Fact: Meeting 60%–70% of core requirements is often enough to secure an initial screening call. Why? Employers routinely list every tool or technology used across their entire team. What they actually need is a developer with solid foundational skills who can learn domain-specific tooling on the job. The Action: Focus on core competencies (e.g., strong backend logic, system design, or frontend state management) rather than secondary tooling (e.g., a specific logging framework or niche testing library). If you hold the core skills, send the application. Myth #2: "Years of experience" requirements are rigid, non-negotiable cutoffs. Fact: Demonstrated impact and project complexity routinely outweigh arbitrary year counts. Why? Three years of high-velocity, production-level development at a scaling startup often yields more relevant experience than five years of routine maintenance on legacy systems. The Action: Reframe your experience around outcomes and metrics rather than time served. Show how you reduced API latency, scaled database throughput, or spearheaded feature launches. Myth #3: Applying directly through job boards is the only way to get noticed. Fact: Cold applying without networking drastically lowers your response rate. Why? Applicant Tracking Systems (ATS) handle hundreds of cold submissions per posting. An internal referral or a direct conversation with a engineering manager instantly bypasses the initial resume stack. The Action: Don't just click "Submit." Find a developer or engineering lead at the target company on LinkedIn, share a brief note highlighting alignment with their team's stack, and request a quick 10-minute informational chat. Key Takeaways The 60% Rule: Treat job postings as wishlist guidelines—if you match ~60% of the core skills, apply confidence. Impact over time: Highlight complex technical problems solved and measurable results rather than focusing strictly on years of experience. Bypass cold stacks: Pair every online application with targeted outreach to recruiters or engineering peers. CTA (Join Tech Jobs & Opportunities) Looking to navigate your tech career with confidence, optimize your interview pipeline, and unlock unlisted job opportunities? [Join Tech Jobs & Opportunities] to connect with hiring managers, recruiters, and fellow tech professionals!
    0 Comments 0 Shares 1K Views 0 Reviews
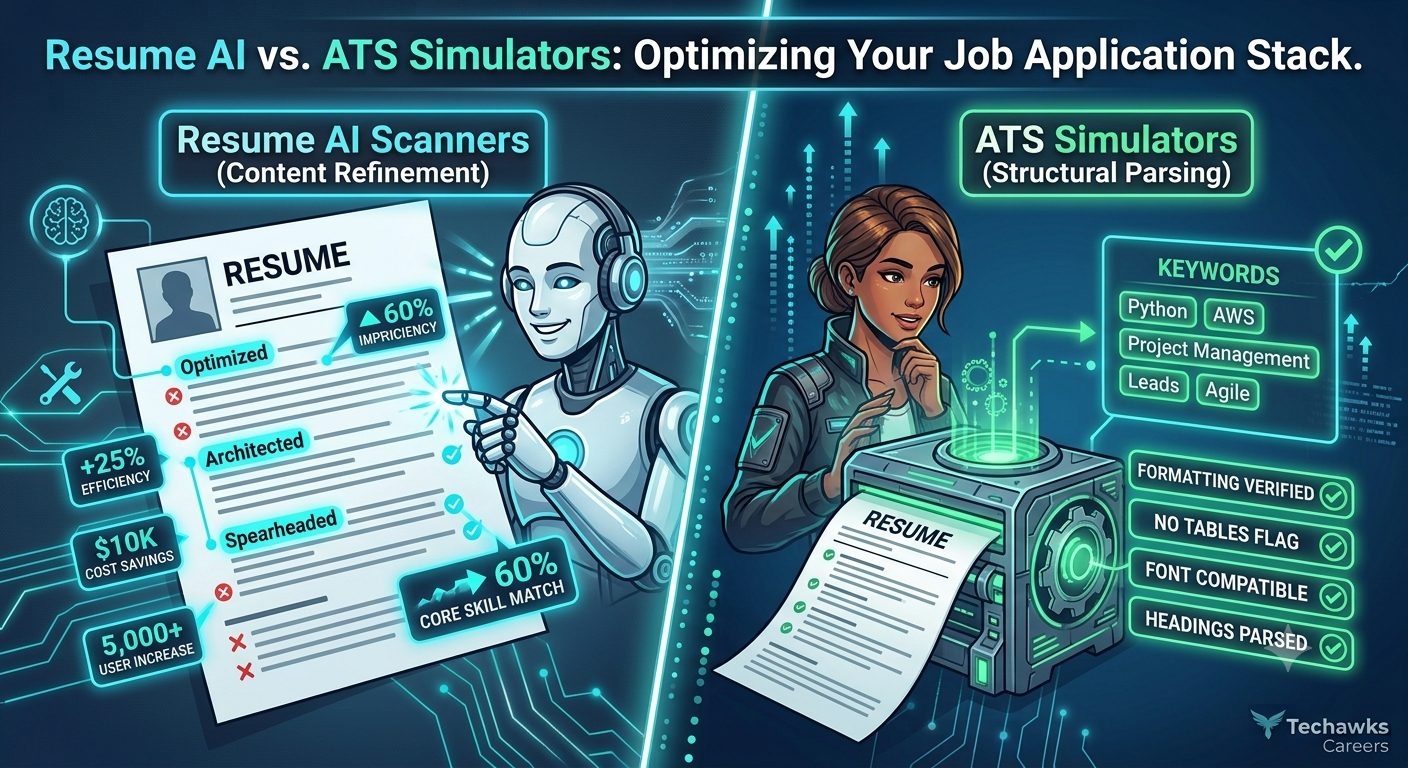
  • Tool Review: Resume AI Scanners vs. ATS Simulators — How to Optimize Your Job Search Tech Stack
    Modern recruitment relies heavily on Applicant Tracking Systems (ATS) like Lever, Greenhouse, and Workday to parse, filter, and score candidate resumes. To increase your interview callbacks, candidate tools have emerged to help you test and format your resume before hit "Submit."
    Understanding how to leverage these two primary categories of career tools will transform your application response rate:


    1. Resume AI Scanners (e.g., ChatGPT, Claude, Rezi)
    Best For: Content optimization, bullet point impact quantification, and tone alignment.
    How They Work: You prompt large language models with your resume bullet points and a target job description to analyze semantic alignment and rewrite descriptions.
    Strengths:
    Excellent at suggesting action verbs and identifying missing domain keywords.
    Helps rephrase duties into high-impact metric statements (e.g., using the Action + Metric + Outcome structure).
    Where They Fall Short: Generative AI can introduce subtle hallucinated technical claims or overly flowery phrasing that feels disingenuous to experienced hiring managers.
    Actionable Advice: Never copy-paste generated text directly. Use AI tools to generate draft bullet options, then manually verify that every stat and claim accurately reflects your real experience.


    2. ATS Simulators & Keyword Matchers (e.g., Jobscan, Resume Worded)
    Best For: Structural parsing verification, formatting bug detection, and hard-keyword coverage.
    How They Work: These tools convert your PDF/Word document into plain text using standard optical parsing engines, comparing exact keyword frequency against the target job post.
    Strengths:
    Flags unparsable elements like complex graphic columns, non-standard fonts, or icons in headers.
    Gives hard match percentages for key technical frameworks, tools, and certifications.
    Where They Fall Short: Over-optimizing purely for exact keyword matches can result in dry, robotic resumes that fail to impress human hiring managers once you pass the initial screen.
    Actionable Advice: Aim for a 70–80% keyword match score in these tools rather than chasing 100%. Over-stuffed keyword blocks look artificial to human recruiters.


    Key Takeaways
    Combine both tool types: Use AI models to refine your accomplishments into measurable results, then run your file through an ATS simulator to ensure clean technical parsing.
    Format for parsability: Stick to single-column or clean two-column layouts; avoid tables, charts, and embedded graphics inside PDF headers/footers.
    Balance bots and humans: Optimize for automated keywords to pass the screen, but write for human recruiters who want clear proof of problem-solving ability.


    CTA (Join Tech Jobs & Opportunities)
    Looking to sharpen your resume, receive portfolio reviews, and access unlisted opportunities across the tech industry? [Join Tech Jobs & Opportunities] to connect with hiring managers, recruiters, and fellow tech professionals!
    Tool Review: Resume AI Scanners vs. ATS Simulators — How to Optimize Your Job Search Tech Stack Modern recruitment relies heavily on Applicant Tracking Systems (ATS) like Lever, Greenhouse, and Workday to parse, filter, and score candidate resumes. To increase your interview callbacks, candidate tools have emerged to help you test and format your resume before hit "Submit." Understanding how to leverage these two primary categories of career tools will transform your application response rate: 1. Resume AI Scanners (e.g., ChatGPT, Claude, Rezi) Best For: Content optimization, bullet point impact quantification, and tone alignment. How They Work: You prompt large language models with your resume bullet points and a target job description to analyze semantic alignment and rewrite descriptions. Strengths: Excellent at suggesting action verbs and identifying missing domain keywords. Helps rephrase duties into high-impact metric statements (e.g., using the Action + Metric + Outcome structure). Where They Fall Short: Generative AI can introduce subtle hallucinated technical claims or overly flowery phrasing that feels disingenuous to experienced hiring managers. Actionable Advice: Never copy-paste generated text directly. Use AI tools to generate draft bullet options, then manually verify that every stat and claim accurately reflects your real experience. 2. ATS Simulators & Keyword Matchers (e.g., Jobscan, Resume Worded) Best For: Structural parsing verification, formatting bug detection, and hard-keyword coverage. How They Work: These tools convert your PDF/Word document into plain text using standard optical parsing engines, comparing exact keyword frequency against the target job post. Strengths: Flags unparsable elements like complex graphic columns, non-standard fonts, or icons in headers. Gives hard match percentages for key technical frameworks, tools, and certifications. Where They Fall Short: Over-optimizing purely for exact keyword matches can result in dry, robotic resumes that fail to impress human hiring managers once you pass the initial screen. Actionable Advice: Aim for a 70–80% keyword match score in these tools rather than chasing 100%. Over-stuffed keyword blocks look artificial to human recruiters. Key Takeaways Combine both tool types: Use AI models to refine your accomplishments into measurable results, then run your file through an ATS simulator to ensure clean technical parsing. Format for parsability: Stick to single-column or clean two-column layouts; avoid tables, charts, and embedded graphics inside PDF headers/footers. Balance bots and humans: Optimize for automated keywords to pass the screen, but write for human recruiters who want clear proof of problem-solving ability. CTA (Join Tech Jobs & Opportunities) Looking to sharpen your resume, receive portfolio reviews, and access unlisted opportunities across the tech industry? [Join Tech Jobs & Opportunities] to connect with hiring managers, recruiters, and fellow tech professionals!
    0 Comments 0 Shares 1K Views 0 Reviews
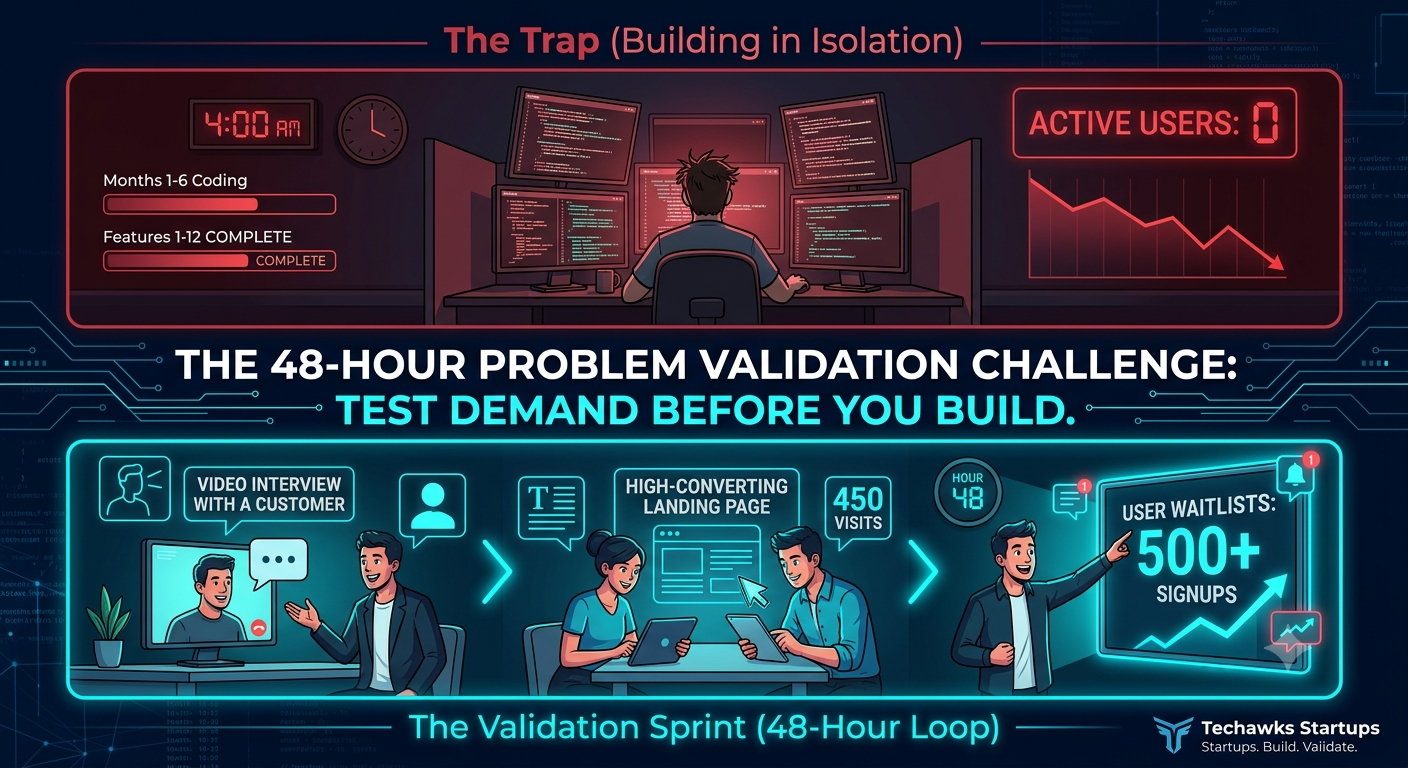
  • The 48-Hour Problem Validation Challenge: Test Demand Before You Build
    Founders often waste months—and tens of thousands of dollars—building polished Minimum Viable Products (MVPs) only to launch to total silence. True validation doesn't come from positive feedback from friends; it comes from proving that prospective customers feel enough pain to give you their time, data, or money right now.
    Here is your 2-day actionable protocol to validate problem-solution fit:


    Day 1: Conduct 5 "Mom Test" Customer Interviews
    The Challenge: Speak to 5 ideal target users without pitching your product concept once.
    The Rules: Talk about their past behaviors and existing workflows, not hypothetical future promises ("Would you use a tool that...?").
    Ask: "How do you currently solve [Problem]?" and "How much time or money did that cost you last month?"
    The Benchmark: If none of your interviewees have actively spent money or effort trying to fix the problem in the last 90 days, it is a nice-to-have, not a hair-on-fire priority.


    Day 2: Launch a Low-Fidelity Smoke Test
    The Challenge: Build a simple, single-page landing page explaining your value proposition with a clear call-to-action (CTA).
    The Mechanics: Use a no-code builder to launch the page in under 3 hours.
    Define a high-intent conversion goal: a paid pre-order, a deposit, or a detailed onboarding questionnaire (not just an email newsletter signup).
    Drive 100–200 targeted visitors via direct outreach, niche community posts, or small test ad budgets.
    The Benchmark: Aim for a minimum 5% to 10% high-intent conversion rate. If users won't trade contact information or join a waitlist for your core promise, refactoring your messaging or target customer profile is necessary before building.


    Key Takeaways
    Validate pain, not opinions: Focus on how customers currently solve their problems today rather than asking for opinions on your future product.
    Require high-intent skin in the game: Look for validation signals like deposit payments, detailed onboarding forms, or letter-of-intent (LOI) signups.
    Speed to insight over perfection: You can validate core demand in 48 hours with low-code tools faster than building a multi-month prototype.


    CTA (Join Startup Founders & Entrepreneurs)
    Navigating early-stage validation, go-to-market strategies, or fundraising setup? [Join Startup Founders & Entrepreneurs] to swap teardowns, refine pitch decks, and build alongside fellow founders!
    The 48-Hour Problem Validation Challenge: Test Demand Before You Build Founders often waste months—and tens of thousands of dollars—building polished Minimum Viable Products (MVPs) only to launch to total silence. True validation doesn't come from positive feedback from friends; it comes from proving that prospective customers feel enough pain to give you their time, data, or money right now. Here is your 2-day actionable protocol to validate problem-solution fit: Day 1: Conduct 5 "Mom Test" Customer Interviews The Challenge: Speak to 5 ideal target users without pitching your product concept once. The Rules: Talk about their past behaviors and existing workflows, not hypothetical future promises ("Would you use a tool that...?"). Ask: "How do you currently solve [Problem]?" and "How much time or money did that cost you last month?" The Benchmark: If none of your interviewees have actively spent money or effort trying to fix the problem in the last 90 days, it is a nice-to-have, not a hair-on-fire priority. Day 2: Launch a Low-Fidelity Smoke Test The Challenge: Build a simple, single-page landing page explaining your value proposition with a clear call-to-action (CTA). The Mechanics: Use a no-code builder to launch the page in under 3 hours. Define a high-intent conversion goal: a paid pre-order, a deposit, or a detailed onboarding questionnaire (not just an email newsletter signup). Drive 100–200 targeted visitors via direct outreach, niche community posts, or small test ad budgets. The Benchmark: Aim for a minimum 5% to 10% high-intent conversion rate. If users won't trade contact information or join a waitlist for your core promise, refactoring your messaging or target customer profile is necessary before building. Key Takeaways Validate pain, not opinions: Focus on how customers currently solve their problems today rather than asking for opinions on your future product. Require high-intent skin in the game: Look for validation signals like deposit payments, detailed onboarding forms, or letter-of-intent (LOI) signups. Speed to insight over perfection: You can validate core demand in 48 hours with low-code tools faster than building a multi-month prototype. CTA (Join Startup Founders & Entrepreneurs) Navigating early-stage validation, go-to-market strategies, or fundraising setup? [Join Startup Founders & Entrepreneurs] to swap teardowns, refine pitch decks, and build alongside fellow founders!
    0 Comments 0 Shares 2K Views 0 Reviews