


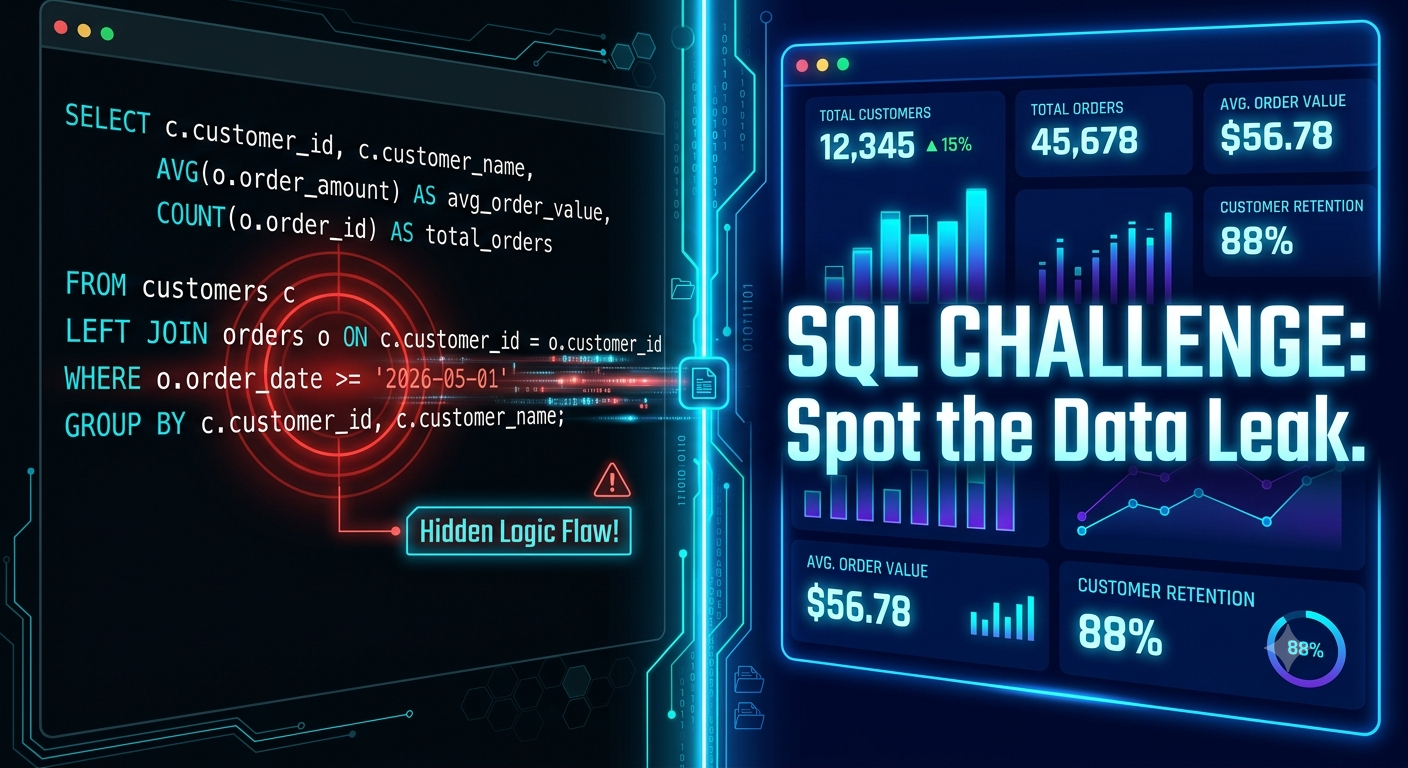
• SQL Challenge: Can You Spot the Hidden Data Leak? 🔍
    Below is a common SQL query designed to calculate Average Order Value (AOV) per customer over the last quarter. At first glance, it runs smoothly and returns a result. But there is a subtle, critical logic flaw hiding in plain sight that distorts the business metrics.
    SELECT
    c.customer_id,
    c.customer_name,
    AVG(o.order_amount) AS avg_order_value,
    COUNT(o.order_id) AS total_orders
    FROM customers c
    LEFT JOIN orders o
    ON c.customer_id = o.customer_id
    WHERE o.order_date >= '2026-05-01'
    GROUP BY c.customer_id, c.customer_name;


    🛠️ The Challenge
    Can you identify why this query produces inaccurate business reporting?
    💡 Hint & Solution Breakdown
    The Hidden Flaw: Using WHERE o.order_date >= ... on a LEFT JOIN table implicitly converts your query into an INNER JOIN!
    Why it breaks: Any customer who made 0 orders in that timeframe will have a NULL order_date. The WHERE clause filters out those NULL rows entirely instead of keeping the customer in the result set with 0 orders.
    The Impact: Your report will completely exclude inactive customers, artificially inflating your overall engagement metrics!


    ✅ The Fixed Query
    To preserve your LEFT JOIN and retain all customers (even those with zero orders), move the date filter directly into the ON clause:
    SELECT
    c.customer_id,
    c.customer_name,
    COALESCE(AVG(o.order_amount), 0) AS avg_order_value,
    COUNT(o.order_id) AS total_orders
    FROM customers c
    LEFT JOIN orders o
    ON c.customer_id = o.customer_id
    AND o.order_date >= '2026-05-01'
    GROUP BY c.customer_id, c.customer_name;


    Key Takeaways
    Watch Where You Filter: Filtering a LEFT JOIN table in the WHERE clause converts it to an INNER JOIN.
    Preserve Inactive Records: Move conditional logic for joined tables into the ON clause to keep zero-count or inactive entities.
    Wrap Nulls Safely: Always use COALESCE() on aggregated fields to avoid returning empty NULL values to business dashboards.


    CTA
    Ready to sharpen your SQL logic, master data modeling, and solve complex real-world analytics problems?
    Join the Techawks Data Science & Analytics Program today to build production-grade projects and elevate your data career! 🚀
    SQL Challenge: Can You Spot the Hidden Data Leak? 🔍 Below is a common SQL query designed to calculate Average Order Value (AOV) per customer over the last quarter. At first glance, it runs smoothly and returns a result. But there is a subtle, critical logic flaw hiding in plain sight that distorts the business metrics. SELECT c.customer_id, c.customer_name, AVG(o.order_amount) AS avg_order_value, COUNT(o.order_id) AS total_orders FROM customers c LEFT JOIN orders o ON c.customer_id = o.customer_id WHERE o.order_date >= '2026-05-01' GROUP BY c.customer_id, c.customer_name; 🛠️ The Challenge Can you identify why this query produces inaccurate business reporting? 💡 Hint & Solution Breakdown The Hidden Flaw: Using WHERE o.order_date >= ... on a LEFT JOIN table implicitly converts your query into an INNER JOIN! Why it breaks: Any customer who made 0 orders in that timeframe will have a NULL order_date. The WHERE clause filters out those NULL rows entirely instead of keeping the customer in the result set with 0 orders. The Impact: Your report will completely exclude inactive customers, artificially inflating your overall engagement metrics! ✅ The Fixed Query To preserve your LEFT JOIN and retain all customers (even those with zero orders), move the date filter directly into the ON clause: SELECT c.customer_id, c.customer_name, COALESCE(AVG(o.order_amount), 0) AS avg_order_value, COUNT(o.order_id) AS total_orders FROM customers c LEFT JOIN orders o ON c.customer_id = o.customer_id AND o.order_date >= '2026-05-01' GROUP BY c.customer_id, c.customer_name; Key Takeaways Watch Where You Filter: Filtering a LEFT JOIN table in the WHERE clause converts it to an INNER JOIN. Preserve Inactive Records: Move conditional logic for joined tables into the ON clause to keep zero-count or inactive entities. Wrap Nulls Safely: Always use COALESCE() on aggregated fields to avoid returning empty NULL values to business dashboards. CTA Ready to sharpen your SQL logic, master data modeling, and solve complex real-world analytics problems? Join the Techawks Data Science & Analytics Program today to build production-grade projects and elevate your data career! 🚀

    0 Kommentare 0 Geteilt 896 Ansichten 0 Bewertungen
  • Myth Busted: More Data Does NOT Mean Better Insights 📉
    ❌ MYTH: "The more data we collect and store, the better our analytics will be."
    Many organizations believe that capturing every single micro-event and storing massive, unorganized datasets automatically leads to deeper intelligence and better forecasting.
    ✅ FACT: Signal beats volume every time—data quality and modeling drive real value.
    Excess, uncurated data introduces noise, increases query latency, inflates warehouse storage costs, and leads to conflicting "single sources of truth." High-performing data teams focus on data hygiene, precise metric definitions, and efficient modeling over sheer volume.


    Quality vs. Quantity in Data Engineering
    Focus Area The "More Data" Trap 🛑 The "Quality First" Approach 🎯
    Pipeline Health Slow, brittle ETL pipelines querying raw event logs Pre-aggregated, clean data models (dbt/star schema)
    Dashboard Usability Overcrowded reports with conflicting numbers Focused metrics tied directly to key business KPIs
    Cloud Costs Massive compute bills from scanning unindexed tables Optimized partitioning, indexing, and data retention
    Decision Speed Days spent cleaning messy ad-hoc queries Instant, trustworthy answers from validated tables


    How to Shift from Hoarding to Insights
    Audit Your Schemas: Identify unused columns and stale tables in your warehouse. If a metric doesn't drive a business decision, stop running expensive queries on it daily.
    Standardize Your Definitions: Ensure metrics like "Monthly Active Users" or "Churn" have a single, non-negotiable SQL definition across all departments.
    Model Before You Measure: Transform raw transactional data into clean star/snowflake schemas before handing it off to visualization tools.


    Key Takeaways
    Volume \ Value: Raw data is a liability until it is cleaned, structured, and validated.
    Optimize Early: Aggregating data downstream saves thousands in cloud compute and keeps dashboards fast.
    Single Source of Truth: Clear, business-aligned metric definitions prevent conflicting reports across teams.


    CTA
    Ready to move beyond basic data collecting and master real-world data engineering and modeling?
    Join the Techawks Data Science & Analytics Program today to build production-grade pipelines, optimize database performance, and accelerate your analytics career! 🚀
    Myth Busted: More Data Does NOT Mean Better Insights 📉 ❌ MYTH: "The more data we collect and store, the better our analytics will be." Many organizations believe that capturing every single micro-event and storing massive, unorganized datasets automatically leads to deeper intelligence and better forecasting. ✅ FACT: Signal beats volume every time—data quality and modeling drive real value. Excess, uncurated data introduces noise, increases query latency, inflates warehouse storage costs, and leads to conflicting "single sources of truth." High-performing data teams focus on data hygiene, precise metric definitions, and efficient modeling over sheer volume. Quality vs. Quantity in Data Engineering Focus Area The "More Data" Trap 🛑 The "Quality First" Approach 🎯 Pipeline Health Slow, brittle ETL pipelines querying raw event logs Pre-aggregated, clean data models (dbt/star schema) Dashboard Usability Overcrowded reports with conflicting numbers Focused metrics tied directly to key business KPIs Cloud Costs Massive compute bills from scanning unindexed tables Optimized partitioning, indexing, and data retention Decision Speed Days spent cleaning messy ad-hoc queries Instant, trustworthy answers from validated tables How to Shift from Hoarding to Insights Audit Your Schemas: Identify unused columns and stale tables in your warehouse. If a metric doesn't drive a business decision, stop running expensive queries on it daily. Standardize Your Definitions: Ensure metrics like "Monthly Active Users" or "Churn" have a single, non-negotiable SQL definition across all departments. Model Before You Measure: Transform raw transactional data into clean star/snowflake schemas before handing it off to visualization tools. Key Takeaways Volume \ Value: Raw data is a liability until it is cleaned, structured, and validated. Optimize Early: Aggregating data downstream saves thousands in cloud compute and keeps dashboards fast. Single Source of Truth: Clear, business-aligned metric definitions prevent conflicting reports across teams. CTA Ready to move beyond basic data collecting and master real-world data engineering and modeling? Join the Techawks Data Science & Analytics Program today to build production-grade pipelines, optimize database performance, and accelerate your analytics career! 🚀
    0 Kommentare 0 Geteilt 842 Ansichten 0 Bewertungen
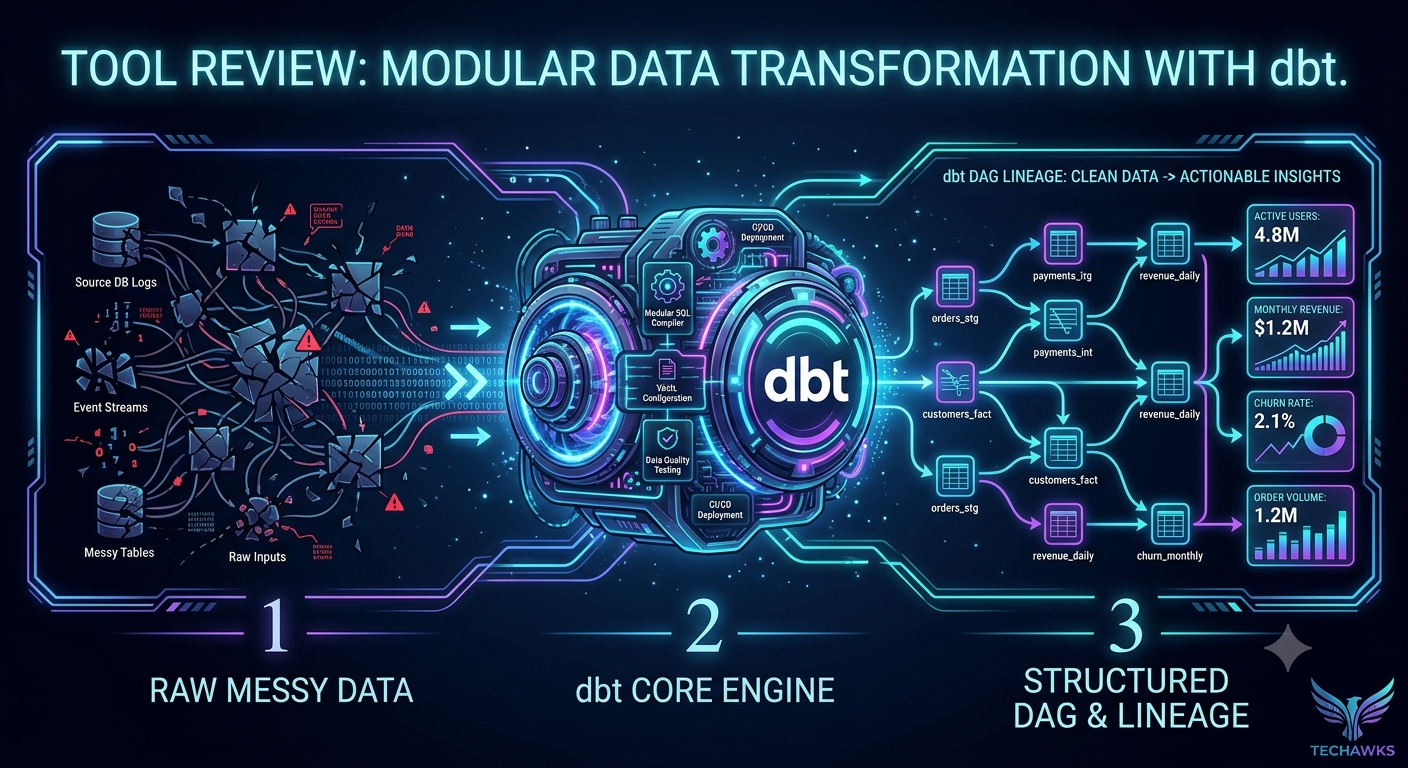
  • Tool Review: dbt (Data Build Tool) – The Secret Weapon for Modern Data Transformation ⚙️
    What is dbt?
    dbt (data build tool) is a transformation framework that lets data analysts and engineers write modular SQL models, test them automatically, and deploy them using software engineering best practices like version control (Git) and CI/CD.
    Unlike traditional ETL tools that handle extraction and loading, dbt operates strictly on the "T" in ELT—transforming raw data that already lives inside modern cloud data warehouses like Snowflake, BigQuery, or Databricks.


    Core Features That Make dbt Indispensable
    🧱 Modular SQL (ref function): Instead of writing 1,000-line monolithic SQL queries, dbt allows you to reference other models modularly using {{ ref('stg_orders') }}. If an upstream logic changes, update it once and it propagates everywhere.
    🧪 Native Testing & Data Quality: Write simple YAML configurations to automatically test for unique, not_null, foreign key integrity, or custom accepted values before production builds.
    📚 Automated Documentation & Lineage Graphs: dbt automatically compiles line-by-line lineage graphs (DAGs) so you can visually trace raw source tables all the way to final BI dashboards.
    ⚙️ Version Control & Collaboration: Because dbt models are plain text SQL and YAML files, teams can use Git workflows, code reviews, and branch deployments seamlessly.


    3 Steps to Implement dbt in Your Workflow
    Structure Your Layers: Organize your project into Staging (cleaning raw fields), Intermediate (business logic joins), and Marts (final business-ready analytics tables).
    Add Data Quality Tests: Start by applying not_null and unique assertions to primary keys in your staging layer.
    Automate Documentation: Run dbt docs generate to auto-build an interactive data dictionary for your entire organization.


    Key Takeaways
    Shift to ELT: Perform transformations inside the data warehouse where compute power is optimized.
    Treat Analytics as Software: Leverage modularity, Git version control, and automated testing for pipeline reliability.
    Document Automatically: Eliminate ambiguity around metric definitions with auto-generated lineage DAGs.


    CTA
    Ready to master analytics engineering, build scalable data models, and deploy production-grade pipelines?
    Join the Techawks Data Science & Analytics Program today to gain hands-on expertise with dbt, SQL, Python, and cloud data architecture! 🚀
    Tool Review: dbt (Data Build Tool) – The Secret Weapon for Modern Data Transformation ⚙️ What is dbt? dbt (data build tool) is a transformation framework that lets data analysts and engineers write modular SQL models, test them automatically, and deploy them using software engineering best practices like version control (Git) and CI/CD. Unlike traditional ETL tools that handle extraction and loading, dbt operates strictly on the "T" in ELT—transforming raw data that already lives inside modern cloud data warehouses like Snowflake, BigQuery, or Databricks. Core Features That Make dbt Indispensable 🧱 Modular SQL (ref function): Instead of writing 1,000-line monolithic SQL queries, dbt allows you to reference other models modularly using {{ ref('stg_orders') }}. If an upstream logic changes, update it once and it propagates everywhere. 🧪 Native Testing & Data Quality: Write simple YAML configurations to automatically test for unique, not_null, foreign key integrity, or custom accepted values before production builds. 📚 Automated Documentation & Lineage Graphs: dbt automatically compiles line-by-line lineage graphs (DAGs) so you can visually trace raw source tables all the way to final BI dashboards. ⚙️ Version Control & Collaboration: Because dbt models are plain text SQL and YAML files, teams can use Git workflows, code reviews, and branch deployments seamlessly. 3 Steps to Implement dbt in Your Workflow Structure Your Layers: Organize your project into Staging (cleaning raw fields), Intermediate (business logic joins), and Marts (final business-ready analytics tables). Add Data Quality Tests: Start by applying not_null and unique assertions to primary keys in your staging layer. Automate Documentation: Run dbt docs generate to auto-build an interactive data dictionary for your entire organization. Key Takeaways Shift to ELT: Perform transformations inside the data warehouse where compute power is optimized. Treat Analytics as Software: Leverage modularity, Git version control, and automated testing for pipeline reliability. Document Automatically: Eliminate ambiguity around metric definitions with auto-generated lineage DAGs. CTA Ready to master analytics engineering, build scalable data models, and deploy production-grade pipelines? Join the Techawks Data Science & Analytics Program today to gain hands-on expertise with dbt, SQL, Python, and cloud data architecture! 🚀
    0 Kommentare 0 Geteilt 831 Ansichten 0 Bewertungen
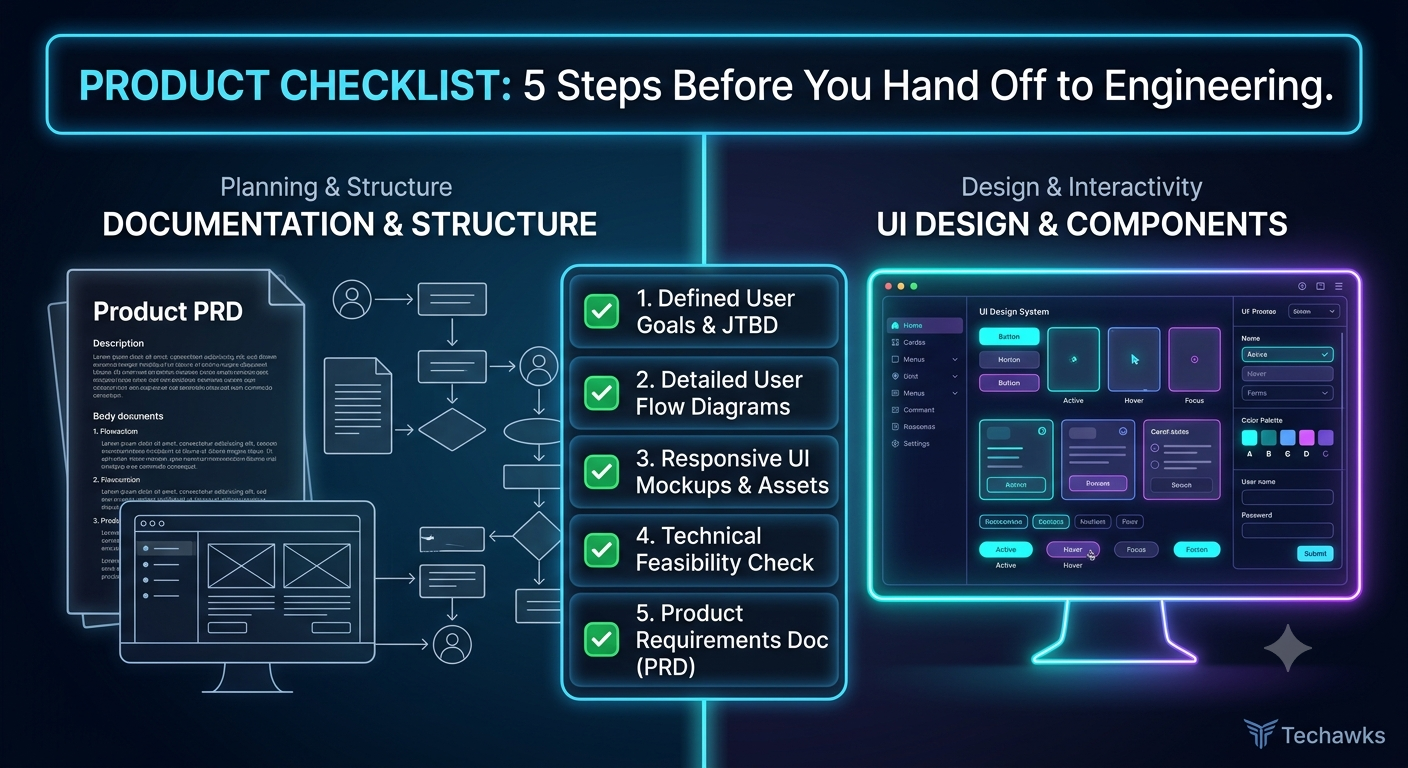
  • The Pre-Handoff Checklist: 5 Steps Every Product Manager & Designer Needs 🚀
    📋 The Ultimate UX & Product Spec Checklist
    1. User Intent & Problem Alignment
    The "So What?": Does the spec clearly articulate the target user problem and core job-to-be-done (JTBD)?
    Success Metrics Defined: Have you established clear, trackable KPIs (e.g., adoption rate, task completion time) before writing a single line of code?
    Out-of-Scope Explicitly Stated: Is it crystal clear what this iteration will not include to prevent scope creep?


    2. State Mapping & Edge Cases
    The 5 Core UI States Covered: Have you designed for Ideal, Empty, Loading/Skeleton, Partial, and Error states?
    Edge Cases Documented: What happens with max character limits, slow network connections, or expired user sessions?
    Permission & Role Scenarios: How does this UI adapt for admins vs. read-only users?


    3. System Consistency & Accessibility
    Design System Compliance: Are you using existing design system tokens, components, and typography?
    Accessibility (WCAG): Do color contrast ratios pass WCAG AA standards, and are screen reader labels/focus states mapped out?
    Responsive Behaviors: Are layout shifts specified across desktop, tablet, and mobile viewports?


    4. Technical Feasibility & Analytics
    Engineering Sanity Check: Has a tech lead reviewed the proposed UI interactions for heavy API calls or performance bottlenecks?
    Event Tracking Spec: Are analytics events (click streams, funnel conversions, modal opens) mapped with exact naming conventions?


    5. Developer Experience (DX) Handoff
    Figma Organization: Are designs cleaned up, frame dependencies detached, and autolayout applied?
    Interactive Prototypes / Flowcharts: Is the user flow linked so developers don't have to guess transitions?


    Key Takeaways
    Design for Errors First: A great user experience is defined by how gracefully it handles edge cases and empty states.
    Involve Engineering Early: Early feasibility alignment prevents costly design redos midway through sprint execution.
    Track by Design: Define analytics tracking events in the spec stage so you aren't guessing user adoption later.


    CTA
    Ready to bridge the gap between product strategy, intuitive UX design, and seamless engineering delivery?
    Join the Techawks Product, UX & Design Program today to build portfolio-worthy products, master design systems, and launch your career in tech leadership! 🎯
    The Pre-Handoff Checklist: 5 Steps Every Product Manager & Designer Needs 🚀 📋 The Ultimate UX & Product Spec Checklist 1. User Intent & Problem Alignment The "So What?": Does the spec clearly articulate the target user problem and core job-to-be-done (JTBD)? Success Metrics Defined: Have you established clear, trackable KPIs (e.g., adoption rate, task completion time) before writing a single line of code? Out-of-Scope Explicitly Stated: Is it crystal clear what this iteration will not include to prevent scope creep? 2. State Mapping & Edge Cases The 5 Core UI States Covered: Have you designed for Ideal, Empty, Loading/Skeleton, Partial, and Error states? Edge Cases Documented: What happens with max character limits, slow network connections, or expired user sessions? Permission & Role Scenarios: How does this UI adapt for admins vs. read-only users? 3. System Consistency & Accessibility Design System Compliance: Are you using existing design system tokens, components, and typography? Accessibility (WCAG): Do color contrast ratios pass WCAG AA standards, and are screen reader labels/focus states mapped out? Responsive Behaviors: Are layout shifts specified across desktop, tablet, and mobile viewports? 4. Technical Feasibility & Analytics Engineering Sanity Check: Has a tech lead reviewed the proposed UI interactions for heavy API calls or performance bottlenecks? Event Tracking Spec: Are analytics events (click streams, funnel conversions, modal opens) mapped with exact naming conventions? 5. Developer Experience (DX) Handoff Figma Organization: Are designs cleaned up, frame dependencies detached, and autolayout applied? Interactive Prototypes / Flowcharts: Is the user flow linked so developers don't have to guess transitions? Key Takeaways Design for Errors First: A great user experience is defined by how gracefully it handles edge cases and empty states. Involve Engineering Early: Early feasibility alignment prevents costly design redos midway through sprint execution. Track by Design: Define analytics tracking events in the spec stage so you aren't guessing user adoption later. CTA Ready to bridge the gap between product strategy, intuitive UX design, and seamless engineering delivery? Join the Techawks Product, UX & Design Program today to build portfolio-worthy products, master design systems, and launch your career in tech leadership! 🎯
    0 Kommentare 0 Geteilt 2KB Ansichten 0 Bewertungen
  • UX Challenge: Spot the 3 Conversion-Killing Design Flaws!
    Below is a scenario depicting a standard SaaS checkout page. Review the design choices and count how many friction points you can spot before reading the answers!


    📱 The Checkout Scenario
    A user clicks "Upgrade to Pro" and is presented with:
    A single-page form asking for First Name, Last Name, Email, Phone Number, Billing Address, Company Name, Job Title, and Credit Card Details.
    A bright red, full-width button at the bottom labeled "SUBMIT".
    A small gray link below the form that reads "Have a coupon code?" which opens a new full-page window when clicked.


    🛠️ The Breakdown: What’s Breaking This UX?
    🔴 Flaw 1: Excess Form Fields (High Cognitive Load)
    The Problem: Asking for non-essential info (Job Title, Phone Number, Company Name) during a simple B2C or self-serve checkout creates unnecessary drop-off.
    The Fix: Every additional field reduces conversions. Collect only what is strictly necessary (Email + Payment info) and defer optional profile data to onboarding.


    🔴 Flaw 2: Vague Action Hierarchy & Aggressive Microcopy
    The Problem: The button text "SUBMIT" is cold, technical, and creates transactional anxiety (what am I submitting? Am I being charged now?).
    The Fix: Use outcome-oriented, value-driven microcopy like "Start My 14-Day Free Trial" or "Complete Order ($29/mo)".


    🔴 Flaw 3: Flow Interruption (Leaving the Funnel)
    The Problem: Opening a new tab/page for a promo code disrupts the checkout mental model and encourages users to leave the page to search Google for coupon codes.
    The Fix: Keep discount inputs as inline collapsible text fields directly on the checkout summary panel.
    How Did You Score?
    3/3 Caught: Senior Product Strategist mindset! 🧠
    1-2 Caught: Good instincts—time to refine your microcopy and interaction flows.
    0 Caught: Don't worry! Product thinking is a muscle you can train.


    Key Takeaways
    Minimize Friction: Trim every non-essential input field from primary conversion funnels.
    Value-Driven Microcopy: CTA buttons should state clear user benefits, not technical actions like "Submit."
    Protect the Funnel: Never give users an excuse or external link to navigate away during payment/signup steps.


    CTA
    Ready to transform from a feature-builder into a high-impact Product Leader?
    Join the Techawks Product, UX & Design Program today to master user research, wireframing, product strategy, and conversion rate optimization! 🚀
    UX Challenge: Spot the 3 Conversion-Killing Design Flaws! Below is a scenario depicting a standard SaaS checkout page. Review the design choices and count how many friction points you can spot before reading the answers! 📱 The Checkout Scenario A user clicks "Upgrade to Pro" and is presented with: A single-page form asking for First Name, Last Name, Email, Phone Number, Billing Address, Company Name, Job Title, and Credit Card Details. A bright red, full-width button at the bottom labeled "SUBMIT". A small gray link below the form that reads "Have a coupon code?" which opens a new full-page window when clicked. 🛠️ The Breakdown: What’s Breaking This UX? 🔴 Flaw 1: Excess Form Fields (High Cognitive Load) The Problem: Asking for non-essential info (Job Title, Phone Number, Company Name) during a simple B2C or self-serve checkout creates unnecessary drop-off. The Fix: Every additional field reduces conversions. Collect only what is strictly necessary (Email + Payment info) and defer optional profile data to onboarding. 🔴 Flaw 2: Vague Action Hierarchy & Aggressive Microcopy The Problem: The button text "SUBMIT" is cold, technical, and creates transactional anxiety (what am I submitting? Am I being charged now?). The Fix: Use outcome-oriented, value-driven microcopy like "Start My 14-Day Free Trial" or "Complete Order ($29/mo)". 🔴 Flaw 3: Flow Interruption (Leaving the Funnel) The Problem: Opening a new tab/page for a promo code disrupts the checkout mental model and encourages users to leave the page to search Google for coupon codes. The Fix: Keep discount inputs as inline collapsible text fields directly on the checkout summary panel. How Did You Score? 3/3 Caught: Senior Product Strategist mindset! 🧠 1-2 Caught: Good instincts—time to refine your microcopy and interaction flows. 0 Caught: Don't worry! Product thinking is a muscle you can train. Key Takeaways Minimize Friction: Trim every non-essential input field from primary conversion funnels. Value-Driven Microcopy: CTA buttons should state clear user benefits, not technical actions like "Submit." Protect the Funnel: Never give users an excuse or external link to navigate away during payment/signup steps. CTA Ready to transform from a feature-builder into a high-impact Product Leader? Join the Techawks Product, UX & Design Program today to master user research, wireframing, product strategy, and conversion rate optimization! 🚀
    0 Kommentare 0 Geteilt 1KB Ansichten 0 Bewertungen
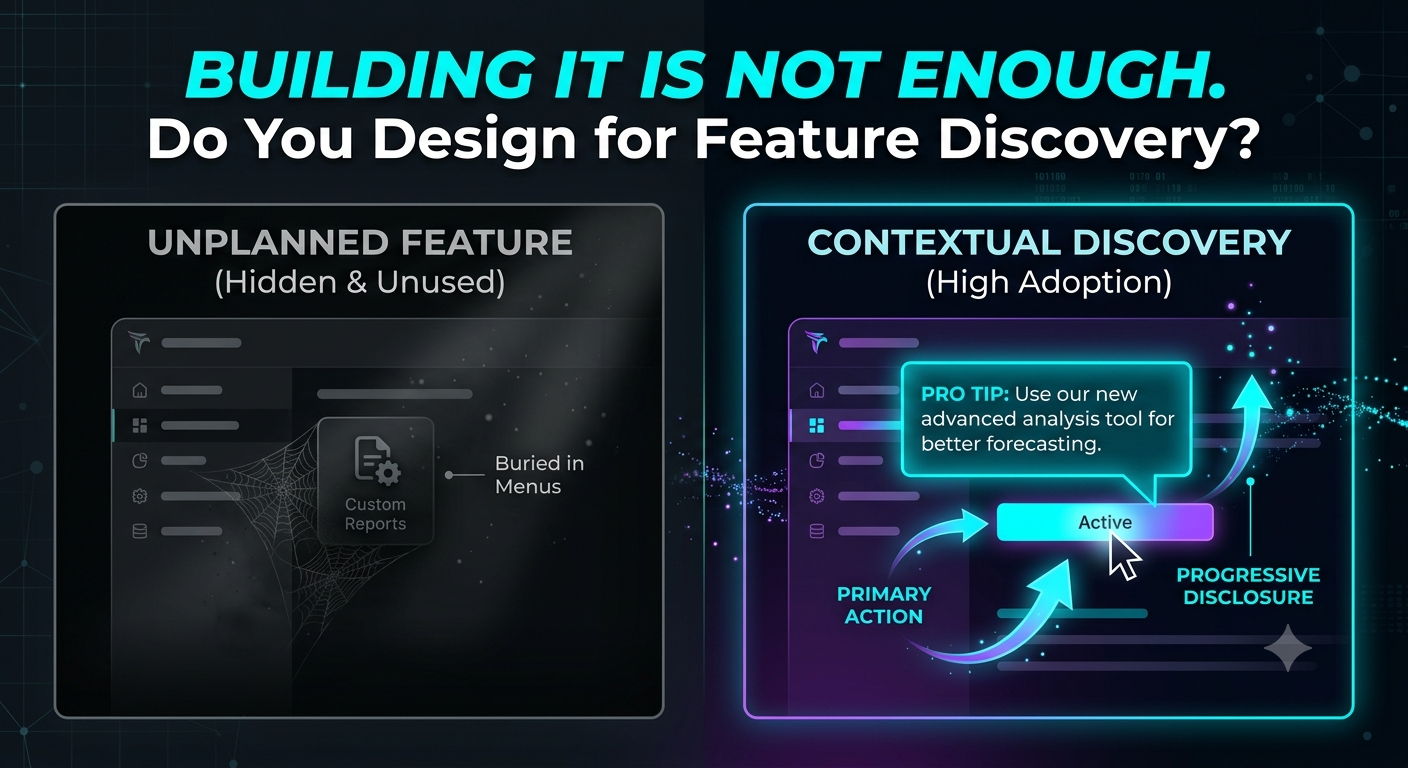
  • Myth Busted: "If You Build Great Features, Users Will Automatically Find Them" 💡
    ❌ MYTH: "Intuitive product features don't need onboarding or feature discovery strategies."
    Many product teams fall into the trap of assuming that if a UI is clean and logical, users will naturally discover new capabilities and adopt them organically.


    ✅ FACT: Feature discovery requires intentional product design and progressive disclosure.
    Users visit your product with high-intent "jobs-to-be-done." They rarely explore interfaces just for fun. Without contextual prompts, empty state guidance, or clear value cues, even your most powerful features will gather digital dust.


    Feature Launch vs. Feature Adoption
    Focus Area The "Build & Pray" Trap ❌ The Product Thinking Approach 🎯
    Launch Plan Ship code, add a release note, and hope users click Contextual empty states + progressive onboarding
    UI Placement Tucked inside nested settings or secondary menus Inline triggers placed directly in key user workflows
    Value Messaging "New Feature: Custom Webhooks Enabled! ""Save 3 Hours: Automate Your Workflow in 1 Click"
    Success Metric Feature completion (Shipped on time) Feature retention & recurring adoption rates


    How to Drive Real Feature Discovery
    Leverage Contextual Prompts: Don't blast users with generic pop-up tours. Show feature tooltips only when the user reaches a relevant step in their workflow.
    Design High-Value Empty States: Replace blank screens with actionable templates, quick-start guides, or preview graphics showing what the feature looks like filled out.
    Trigger Value First, Setup Second: Minimize upfront configuration requirements. Let users see immediate output or preview value before forcing complex settings configuration.


    Key Takeaways
    Discovery # Usability: A feature can be incredibly easy to use, but if it's hidden from the primary user flow, adoption will fail.
    Context Over Noise: Deliver onboarding cues at the exact moment of user intent, not via intrusive welcome modals.
    Measure Outcome Over Output: Shipping a feature is the start of the adoption lifecycle, not the finish line.


    CTA
    Ready to stop shipping ignored features and start designing high-impact product experiences?
    Join the Techawks Product, UX & Design Program today to master user psychology, feature adoption strategies, and product-led growth! 🚀
    Myth Busted: "If You Build Great Features, Users Will Automatically Find Them" 💡 ❌ MYTH: "Intuitive product features don't need onboarding or feature discovery strategies." Many product teams fall into the trap of assuming that if a UI is clean and logical, users will naturally discover new capabilities and adopt them organically. ✅ FACT: Feature discovery requires intentional product design and progressive disclosure. Users visit your product with high-intent "jobs-to-be-done." They rarely explore interfaces just for fun. Without contextual prompts, empty state guidance, or clear value cues, even your most powerful features will gather digital dust. Feature Launch vs. Feature Adoption Focus Area The "Build & Pray" Trap ❌ The Product Thinking Approach 🎯 Launch Plan Ship code, add a release note, and hope users click Contextual empty states + progressive onboarding UI Placement Tucked inside nested settings or secondary menus Inline triggers placed directly in key user workflows Value Messaging "New Feature: Custom Webhooks Enabled! ""Save 3 Hours: Automate Your Workflow in 1 Click" Success Metric Feature completion (Shipped on time) Feature retention & recurring adoption rates How to Drive Real Feature Discovery Leverage Contextual Prompts: Don't blast users with generic pop-up tours. Show feature tooltips only when the user reaches a relevant step in their workflow. Design High-Value Empty States: Replace blank screens with actionable templates, quick-start guides, or preview graphics showing what the feature looks like filled out. Trigger Value First, Setup Second: Minimize upfront configuration requirements. Let users see immediate output or preview value before forcing complex settings configuration. Key Takeaways Discovery # Usability: A feature can be incredibly easy to use, but if it's hidden from the primary user flow, adoption will fail. Context Over Noise: Deliver onboarding cues at the exact moment of user intent, not via intrusive welcome modals. Measure Outcome Over Output: Shipping a feature is the start of the adoption lifecycle, not the finish line. CTA Ready to stop shipping ignored features and start designing high-impact product experiences? Join the Techawks Product, UX & Design Program today to master user psychology, feature adoption strategies, and product-led growth! 🚀
    0 Kommentare 0 Geteilt 1KB Ansichten 0 Bewertungen
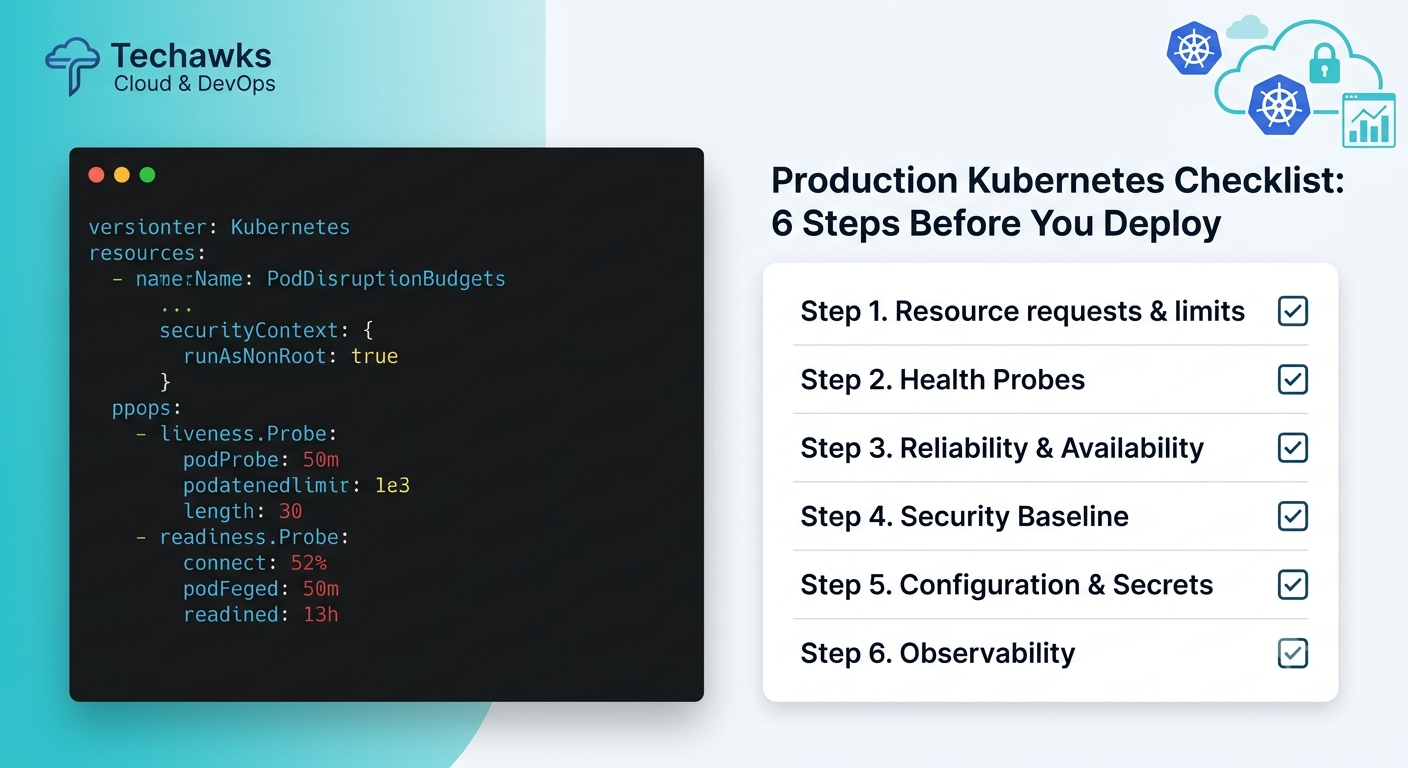
  • The Ultimate Pre-Deployment Checklist for Production Kubernetes Workloads
    Deploying to production without a baseline standard is a recipe for silent failures, resource starvation, and unexpected cloud bills. Bookmark this checklist and run through it for every new workload you deploy.


    1. Resource Requests & Limits
    Define CPU/Memory Requests: Ensure the scheduler knows where to place your pods.
    Set Memory Limits: Protect nodes from Out-Of-Memory (OOM) kills caused by runaway processes.
    Avoid Strict CPU Limits (if throttling occurs): Benchmark your workload under load before hard-capping CPU.


    2. Health Probes
    Startup Probe: Configured for slow-booting applications to prevent premature restarts.
    Liveness Probe: Configured to restart pods if they deadlock or hit an unrecoverable state.
    Readiness Probe: Configured so traffic only routes to pods ready to handle requests.


    3. Reliability & Availability
    Replicas > 1: Run at least 2–3 instances across multiple Availability Zones (AZs).
    PodDisruptionBudget (PDB): Set up PDBs so cluster maintenance or node drains don't drop your available pods to zero.
    Anti-Affinity Rules: Distribute pods across separate nodes or zones.


    4. Security Baseline
    Non-Root Execution: Set runAsNonRoot: true in your securityContext.
    Read-Only Root Filesystem: Enforce readOnlyRootFilesystem: true where possible.
    Network Policies: Restrict ingress and egress traffic to only required dependencies.


    5. Configuration & Secrets
    Externalized Configs: Store environment variables in ConfigMaps, not hardcoded image tags.
    Encrypted Secrets: Manage sensitive credentials via External Secrets Operator or HashiCorp Vault.


    6. Observability
    Structured Logging: Output JSON logs to standard output/error (stdout/stderr).
    Metrics Endpoint: Expose a /metrics path for Prometheus scrapers.


    Key Takeaways
    Predictability over intuition: Reliability isn't luck; it's enforcing guardrails at deployment time.
    Fail gracefully: Probes and PodDisruptionBudgets ensure your system self-heals during node failures or cluster upgrades.
    Security is shift-left: Setting security contexts early prevents container breakout risks down the road.


    CTA
    🚀 Level up your cloud skills! Join the Techawks Cloud, DevOps & Open Source community to get expert architecture guides, hands-on tutorials, and real-world infrastructure strategies.
    The Ultimate Pre-Deployment Checklist for Production Kubernetes Workloads Deploying to production without a baseline standard is a recipe for silent failures, resource starvation, and unexpected cloud bills. Bookmark this checklist and run through it for every new workload you deploy. 1. Resource Requests & Limits Define CPU/Memory Requests: Ensure the scheduler knows where to place your pods. Set Memory Limits: Protect nodes from Out-Of-Memory (OOM) kills caused by runaway processes. Avoid Strict CPU Limits (if throttling occurs): Benchmark your workload under load before hard-capping CPU. 2. Health Probes Startup Probe: Configured for slow-booting applications to prevent premature restarts. Liveness Probe: Configured to restart pods if they deadlock or hit an unrecoverable state. Readiness Probe: Configured so traffic only routes to pods ready to handle requests. 3. Reliability & Availability Replicas > 1: Run at least 2–3 instances across multiple Availability Zones (AZs). PodDisruptionBudget (PDB): Set up PDBs so cluster maintenance or node drains don't drop your available pods to zero. Anti-Affinity Rules: Distribute pods across separate nodes or zones. 4. Security Baseline Non-Root Execution: Set runAsNonRoot: true in your securityContext. Read-Only Root Filesystem: Enforce readOnlyRootFilesystem: true where possible. Network Policies: Restrict ingress and egress traffic to only required dependencies. 5. Configuration & Secrets Externalized Configs: Store environment variables in ConfigMaps, not hardcoded image tags. Encrypted Secrets: Manage sensitive credentials via External Secrets Operator or HashiCorp Vault. 6. Observability Structured Logging: Output JSON logs to standard output/error (stdout/stderr). Metrics Endpoint: Expose a /metrics path for Prometheus scrapers. Key Takeaways Predictability over intuition: Reliability isn't luck; it's enforcing guardrails at deployment time. Fail gracefully: Probes and PodDisruptionBudgets ensure your system self-heals during node failures or cluster upgrades. Security is shift-left: Setting security contexts early prevents container breakout risks down the road. CTA 🚀 Level up your cloud skills! Join the Techawks Cloud, DevOps & Open Source community to get expert architecture guides, hands-on tutorials, and real-world infrastructure strategies.
    0 Kommentare 0 Geteilt 1KB Ansichten 0 Bewertungen
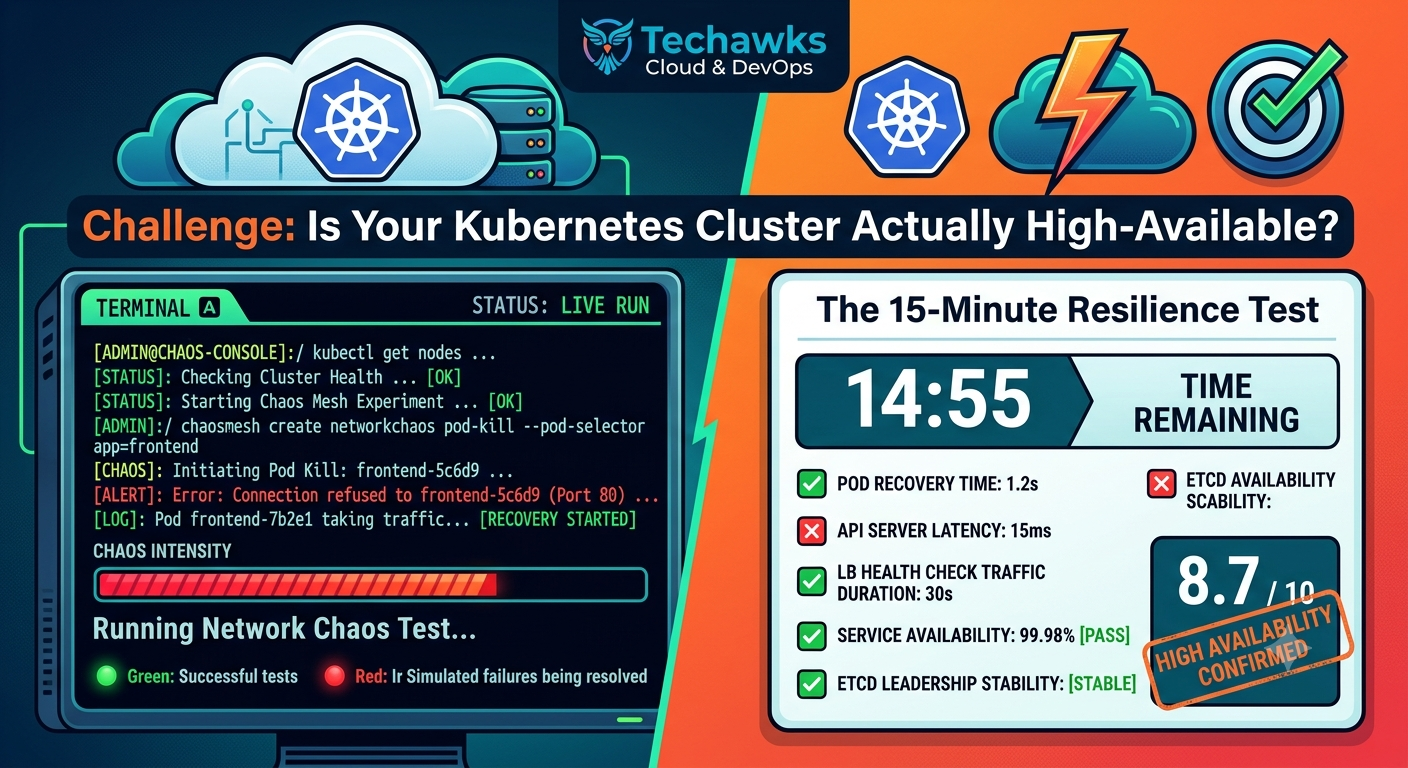
  • Can Your Kubernetes Cluster Survive a Master Node Failure? (The 15-Minute Resilience Challenge)
    Theory is great, but real reliability is proven through chaos engineering. Here is your challenge: execute this non-destructive failover test to find out if your workload strategy actually holds up under pressure.


    The Challenge: The Control Plane Pull-the-Plug Test
    ⚠️ Rules of Engagement: Perform this test in a lower environment (Dev/Staging) that mirrors your production configuration!


    Step 1: Set the Baseline
    Run a basic load test against your cluster to establish continuous traffic to your services.
    # Keep a continuous curl or load tool running against your ingress endpoint
    while true; do curl -I http://your-staging-app.example.com; sleep 1; done


    Step 2: Isolate a Worker Node
    Drain a worker node running one of your core app replicas to force pod reschedule:
    kubectl drain <node-name> --ignore-daemonsets --delete-emptydir-data


    Step 3: Simulate Control Plane Interruption
    If you run a multi-master control plane, terminate or isolate one control plane instance (or simulate API server latency/outage using network policies or iptables).


    How Did Your Infrastructure Score?
    🛑 Fail (0 Points): Your load test shows 5xx errors for more than a few seconds.
    Fix: You need PodDisruptionBudgets (PDBs) and properly configured readinessProbes so traffic isn't routed to unready pods.
    ⚠️ Pass (5 Points): Traffic kept flowing, but pods took over 60 seconds to reschedule on healthy nodes.
    Fix: Tune your kube-controller-manager node eviction timeouts and check your Pod topologySpreadConstraints.
    🏆 Mastery (10 Points): Zero dropped requests, traffic rerouted in under 2 seconds, and new pods spun up seamlessly.


    Key Takeaways
    High Availability is a active configuration, not a passive status: Just having multiple nodes doesn't guarantee uptime without PDBs and anti-affinity rules.
    Probes protect traffic: Proper readiness probes ensure load balancers immediately stop sending traffic to dying nodes.
    Test chaos early: Finding scheduling bottlenecks during a controlled test is infinitely better than finding them during a real outage.


    CTA
    🔥 Did your cluster pass the challenge? Share your results and setup in the comments! For more hands-on DevOps challenges, architecture breakdowns, and chaos engineering guides, join Techawks Cloud, DevOps & Open Source
    Can Your Kubernetes Cluster Survive a Master Node Failure? (The 15-Minute Resilience Challenge) Theory is great, but real reliability is proven through chaos engineering. Here is your challenge: execute this non-destructive failover test to find out if your workload strategy actually holds up under pressure. The Challenge: The Control Plane Pull-the-Plug Test ⚠️ Rules of Engagement: Perform this test in a lower environment (Dev/Staging) that mirrors your production configuration! Step 1: Set the Baseline Run a basic load test against your cluster to establish continuous traffic to your services. # Keep a continuous curl or load tool running against your ingress endpoint while true; do curl -I http://your-staging-app.example.com; sleep 1; done Step 2: Isolate a Worker Node Drain a worker node running one of your core app replicas to force pod reschedule: kubectl drain <node-name> --ignore-daemonsets --delete-emptydir-data Step 3: Simulate Control Plane Interruption If you run a multi-master control plane, terminate or isolate one control plane instance (or simulate API server latency/outage using network policies or iptables). How Did Your Infrastructure Score? 🛑 Fail (0 Points): Your load test shows 5xx errors for more than a few seconds. Fix: You need PodDisruptionBudgets (PDBs) and properly configured readinessProbes so traffic isn't routed to unready pods. ⚠️ Pass (5 Points): Traffic kept flowing, but pods took over 60 seconds to reschedule on healthy nodes. Fix: Tune your kube-controller-manager node eviction timeouts and check your Pod topologySpreadConstraints. 🏆 Mastery (10 Points): Zero dropped requests, traffic rerouted in under 2 seconds, and new pods spun up seamlessly. Key Takeaways High Availability is a active configuration, not a passive status: Just having multiple nodes doesn't guarantee uptime without PDBs and anti-affinity rules. Probes protect traffic: Proper readiness probes ensure load balancers immediately stop sending traffic to dying nodes. Test chaos early: Finding scheduling bottlenecks during a controlled test is infinitely better than finding them during a real outage. CTA 🔥 Did your cluster pass the challenge? Share your results and setup in the comments! For more hands-on DevOps challenges, architecture breakdowns, and chaos engineering guides, join Techawks Cloud, DevOps & Open Source
    0 Kommentare 0 Geteilt 1KB Ansichten 0 Bewertungen
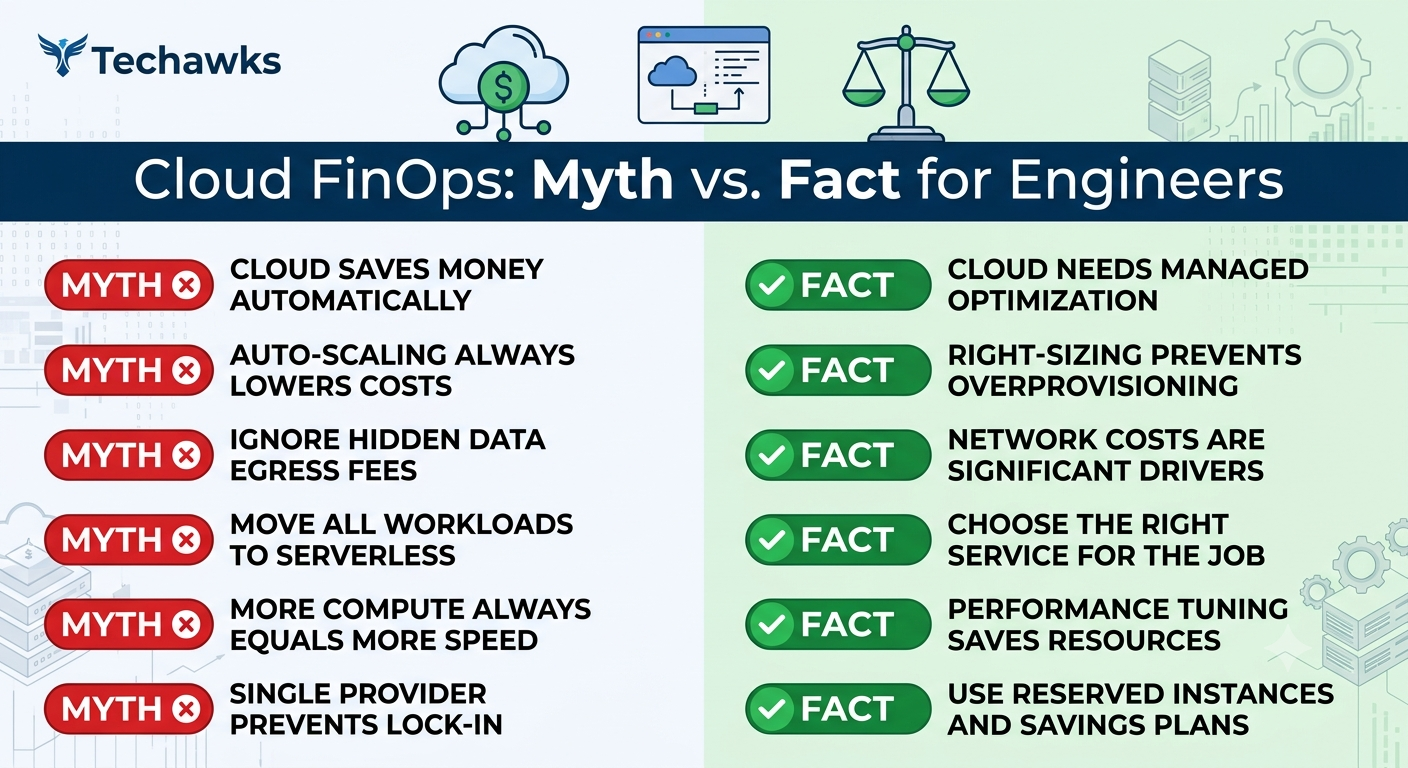
  • Myth vs. Fact: 4 Dangerous Misconceptions About Cloud Cost Optimization
    Optimizing cloud infrastructure isn't just about deleting idle EC2 instances or setting up budget alerts; it requires understanding how cloud architectures actually spend money.
    Here are four common myths that trap cloud engineers and DevOps teams:


    Myth 1: Auto-Scaling Always Reduces Costs
    ❌ Myth: Automatically spinning up and down instances guarantees you only pay for what you need.
    ✅ Fact: Frequent scaling churn can actually increase costs if your scaling policies are misconfigured.
    Actionable Advice: Tune your scaling thresholds with cooldown periods and use predictive scaling based on historical trends rather than reactive spike triggers.


    Myth 2: Multi-Cloud Strategies Save Money Through Competition
    ❌ Myth: Spreading workloads across AWS, Azure, and GCP allows you to play providers against each other for cheaper compute rates.
    ✅ Fact: Data egress fees and cross-cloud networking complexity almost always eat up any marginal compute savings.
    Actionable Advice: Stick to a single primary cloud provider for core workloads unless regulatory compliance or ultra-high availability across providers strictly demands multi-cloud.


    Myth 3: Rightsizing Means Shrinking Instance Sizes
    ❌ Myth: Cost optimization is simply downgrading your instance sizes from xlarge to large.
    ✅ Fact: Changing instance families (e.g., switching from memory-optimized to compute-optimized or moving to ARM-based Graviton/Ampere processors) often yields far higher performance-per-dollar.
    Actionable Advice: Profile your workloads for resource bottlenecks (CPU vs. RAM vs. I/O). Switch to modern CPU architectures (like AWS Graviton or GCP Tau T2A) before simply downgrading hardware specs.


    Myth 4: Reserved Instances / Savings Plans Are a One-and-Done Fix
    ❌ Myth: Lock in a 3-year commitment for maximum discount and forget about it.
    ✅ Fact: Unused reserved capacity is wasted money, and static commitments restrict your ability to modernize your tech stack.
    Actionable Advice: Maintain a blended strategy: coverage of 60–70% baseline capacity with flexible commitment models (like Compute Savings Plans) while leaving room for dynamic spot instances or serverless workloads.


    Key Takeaways
    Architect for efficiency: Cost optimization starts with good system design, not post-deployment cleanup.
    Watch out for hidden fees: Network egress and inter-AZ data transfer are often bigger budget drivers than raw compute.
    Architecture over simple downgrades: Migrating to ARM-based CPUs or modern instance generations yields better performance and cost savings than just shrinking node sizes.


    CTA
    💡 Want to build cost-effective, scalable cloud architectures that actually perform? Join the Techawks Cloud, DevOps & Open Source community for hands-on guides, real-world case studies, and practical DevOps tutorials.
    Myth vs. Fact: 4 Dangerous Misconceptions About Cloud Cost Optimization Optimizing cloud infrastructure isn't just about deleting idle EC2 instances or setting up budget alerts; it requires understanding how cloud architectures actually spend money. Here are four common myths that trap cloud engineers and DevOps teams: Myth 1: Auto-Scaling Always Reduces Costs ❌ Myth: Automatically spinning up and down instances guarantees you only pay for what you need. ✅ Fact: Frequent scaling churn can actually increase costs if your scaling policies are misconfigured. Actionable Advice: Tune your scaling thresholds with cooldown periods and use predictive scaling based on historical trends rather than reactive spike triggers. Myth 2: Multi-Cloud Strategies Save Money Through Competition ❌ Myth: Spreading workloads across AWS, Azure, and GCP allows you to play providers against each other for cheaper compute rates. ✅ Fact: Data egress fees and cross-cloud networking complexity almost always eat up any marginal compute savings. Actionable Advice: Stick to a single primary cloud provider for core workloads unless regulatory compliance or ultra-high availability across providers strictly demands multi-cloud. Myth 3: Rightsizing Means Shrinking Instance Sizes ❌ Myth: Cost optimization is simply downgrading your instance sizes from xlarge to large. ✅ Fact: Changing instance families (e.g., switching from memory-optimized to compute-optimized or moving to ARM-based Graviton/Ampere processors) often yields far higher performance-per-dollar. Actionable Advice: Profile your workloads for resource bottlenecks (CPU vs. RAM vs. I/O). Switch to modern CPU architectures (like AWS Graviton or GCP Tau T2A) before simply downgrading hardware specs. Myth 4: Reserved Instances / Savings Plans Are a One-and-Done Fix ❌ Myth: Lock in a 3-year commitment for maximum discount and forget about it. ✅ Fact: Unused reserved capacity is wasted money, and static commitments restrict your ability to modernize your tech stack. Actionable Advice: Maintain a blended strategy: coverage of 60–70% baseline capacity with flexible commitment models (like Compute Savings Plans) while leaving room for dynamic spot instances or serverless workloads. Key Takeaways Architect for efficiency: Cost optimization starts with good system design, not post-deployment cleanup. Watch out for hidden fees: Network egress and inter-AZ data transfer are often bigger budget drivers than raw compute. Architecture over simple downgrades: Migrating to ARM-based CPUs or modern instance generations yields better performance and cost savings than just shrinking node sizes. CTA 💡 Want to build cost-effective, scalable cloud architectures that actually perform? Join the Techawks Cloud, DevOps & Open Source community for hands-on guides, real-world case studies, and practical DevOps tutorials.
    0 Kommentare 0 Geteilt 1KB Ansichten 0 Bewertungen
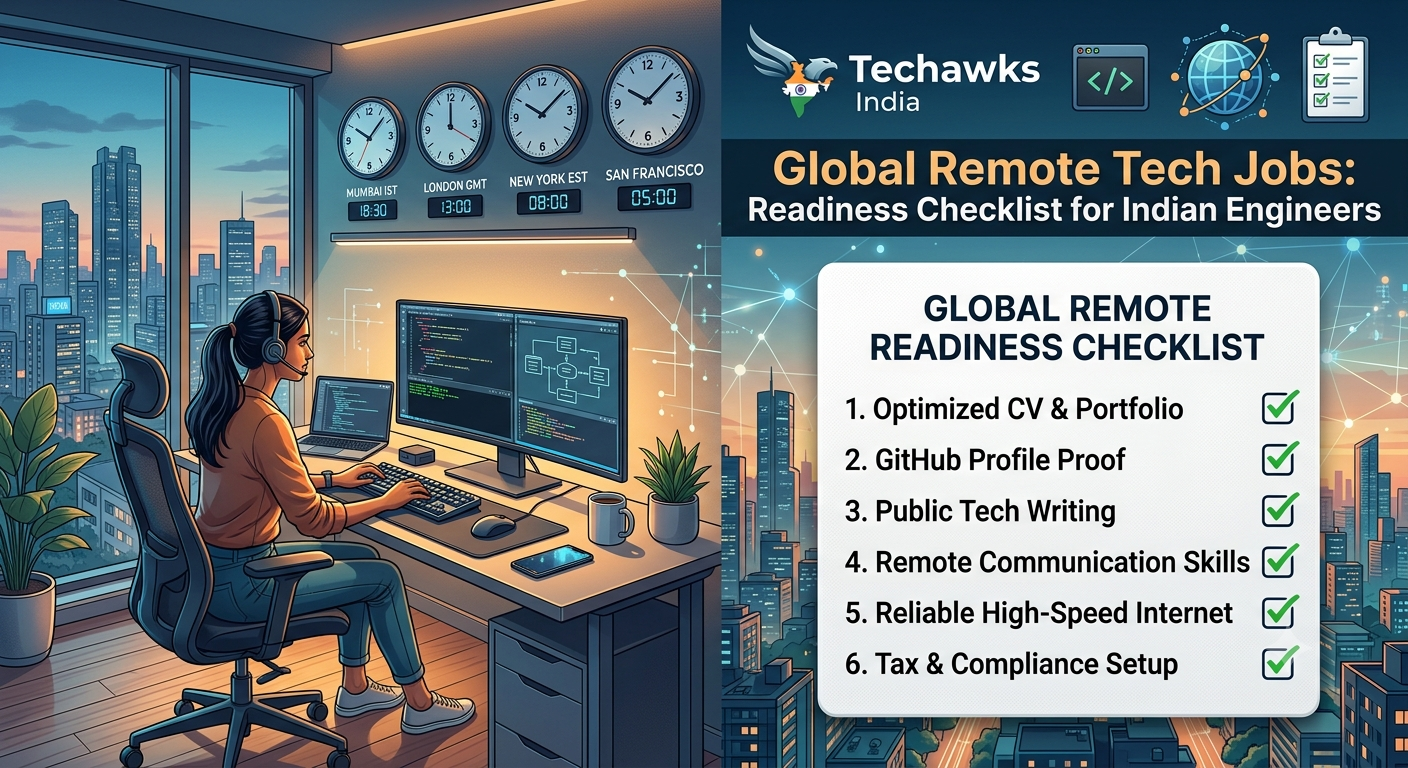
  • The Ultimate Checklist for Landing Remote Tech Jobs from India (USD/EUR Pay)
    Breaking into global remote tech roles requires shifting your approach from traditional local hiring norms to global developer expectations. Use this checklist to audit your profiles, tools, and setup before applying.


    1. Resume & Global Compliance
    Single-Page PDF: Trim multi-page CVs into a clean, concise single-page resume (no photos or personal details like age/marital status).
    Impact-First Bullet Points: Frame accomplishments using metrics (e.g., "Reduced latency by 35% using Redis caching" instead of "Worked on Redis").
    ATS Optimization: Keep layout simple and readable by Applicant Tracking Systems without complex tables or graphics.


    2. Digital Presence & Open Proof
    Optimized GitHub Profile: Pin 2–3 fully documented projects with detailed README.md files, architectural diagrams, and live demo links.
    Public Writing / Tech Blogs: Document your learning or technical challenges on platforms like Hashnode, Dev.to, or Medium.
    LinkedIn Alignment: Align headline to specific roles (e.g., "Backend Engineer | Go & Distributed Systems") rather than generic designations.


    3. Remote Readiness & Communication
    Async-First Communication Skills: Practice writing clear, complete pull request descriptions, documentation, and technical specs.
    English Proficiency in Tech Contexts: Ensure clear spoken and written technical communication for cross-time-zone team setups.


    4. Financial & Compliance Setup
    Cross-Border Payment Accounts: Set up and verify accounts on platforms like Wise, Payoneer, or Deel.
    GST & Taxation Awareness: Understand basic tax implications for foreign inward remittances (LUT filing, Form 15CA/15CB, GST exemption for exports).


    5. Workstation Infrastructure
    High-Speed Internet + Backup: Maintain a reliable primary fiber connection and a reliable mobile/UPS backup for zero downtime during interviews.
    Ergonomic & Quiet Space: Ensure a clean background and clear audio setup (noise-canceling mic) for video calls across time zones.


    Key Takeaways
    Proof over promises: Global remote recruiters value open-source contributions and live projects over college degrees or company brand names.
    Asynchronous clarity is king: Clear written documentation and self-management are mandatory skills for remote developers.
    Prep the backend early: Setting up payment pathways and understanding tax rules upfront prevents headaches once you land an offer.


    CTA
    🇮🇳 Looking to grow your tech career, build high-impact projects, and connect with top Indian developers? Join the Techawks India community today for developer meetups, career guides, and technical discussions!


    👉 [Join Techawks India]
    The Ultimate Checklist for Landing Remote Tech Jobs from India (USD/EUR Pay) Breaking into global remote tech roles requires shifting your approach from traditional local hiring norms to global developer expectations. Use this checklist to audit your profiles, tools, and setup before applying. 1. Resume & Global Compliance Single-Page PDF: Trim multi-page CVs into a clean, concise single-page resume (no photos or personal details like age/marital status). Impact-First Bullet Points: Frame accomplishments using metrics (e.g., "Reduced latency by 35% using Redis caching" instead of "Worked on Redis"). ATS Optimization: Keep layout simple and readable by Applicant Tracking Systems without complex tables or graphics. 2. Digital Presence & Open Proof Optimized GitHub Profile: Pin 2–3 fully documented projects with detailed README.md files, architectural diagrams, and live demo links. Public Writing / Tech Blogs: Document your learning or technical challenges on platforms like Hashnode, Dev.to, or Medium. LinkedIn Alignment: Align headline to specific roles (e.g., "Backend Engineer | Go & Distributed Systems") rather than generic designations. 3. Remote Readiness & Communication Async-First Communication Skills: Practice writing clear, complete pull request descriptions, documentation, and technical specs. English Proficiency in Tech Contexts: Ensure clear spoken and written technical communication for cross-time-zone team setups. 4. Financial & Compliance Setup Cross-Border Payment Accounts: Set up and verify accounts on platforms like Wise, Payoneer, or Deel. GST & Taxation Awareness: Understand basic tax implications for foreign inward remittances (LUT filing, Form 15CA/15CB, GST exemption for exports). 5. Workstation Infrastructure High-Speed Internet + Backup: Maintain a reliable primary fiber connection and a reliable mobile/UPS backup for zero downtime during interviews. Ergonomic & Quiet Space: Ensure a clean background and clear audio setup (noise-canceling mic) for video calls across time zones. Key Takeaways Proof over promises: Global remote recruiters value open-source contributions and live projects over college degrees or company brand names. Asynchronous clarity is king: Clear written documentation and self-management are mandatory skills for remote developers. Prep the backend early: Setting up payment pathways and understanding tax rules upfront prevents headaches once you land an offer. CTA 🇮🇳 Looking to grow your tech career, build high-impact projects, and connect with top Indian developers? Join the Techawks India community today for developer meetups, career guides, and technical discussions! 👉 [Join Techawks India]
    0 Kommentare 0 Geteilt 1KB Ansichten 0 Bewertungen